Tutorial #4: Kanda Header {Redemption}
Tutorial #4: Kanda Header {Redemption}
...long, LONG overdue tutorial specifically requested by sun_soraya. Please, check out her icon LJ, soleil_icons if you want some great icon tutorials. I fail at those~
FEEDBACK PLEASE!
I need to know if the tutorial is usable. Not released yet & kind of still being edited. ;]
I have a batch coming out but its going really, really slow. I've lost my summer inspiration x_X so please be patient a little longer.
Tools Used: Photoshop CS4
Translatable: No, Selective Coloring Required.
PSD: YES
Difficultly Level: Very
1. Start out with a solid color background. Any color will do. I have a tendency to lean more to gray colors so I started with #333333
2.Take this cloud texture by Unknown. Place it on top on your solid layer.
3. Start erasing portions until you come up with a shape you like. I divided my cloud texture into 2 parts like this so I ended up with this:
4. Duplicated the cloud-texture-layer & set it so screen 100%.
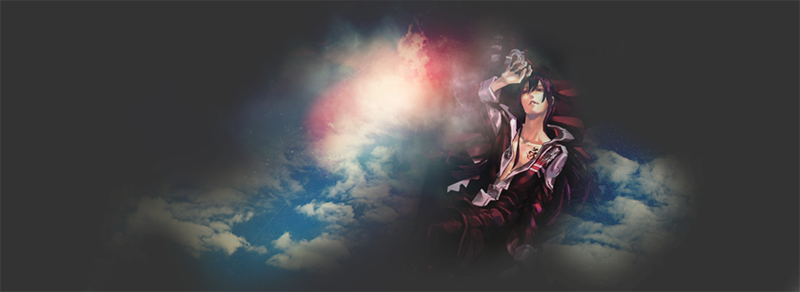
5. Take an image to use in the picture. I choose a D.Grayman Fanart by houseki-hime from Riot of Flowers. Eraser part of the image until you have the portion of the image you want like my Kanda example
6. If you feel like you have erased too much, just duplicate the previous layer & set it to normal @ 40% (or any other %). It makes your image seem more solid.
7. Take this texture by bambinainnero & set to Screen @ 100%.
8. Take this texture also by bambinainnero & set it screen @ 40%
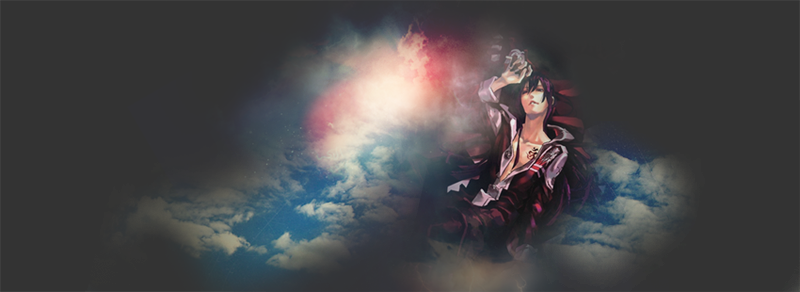
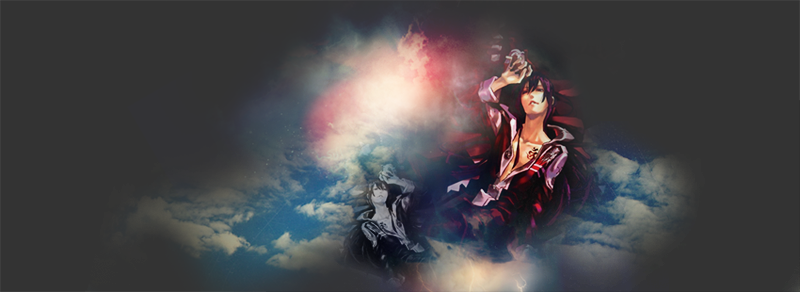
9. Duplicate your image, drag it to the top & set it Soft Light @ 100%
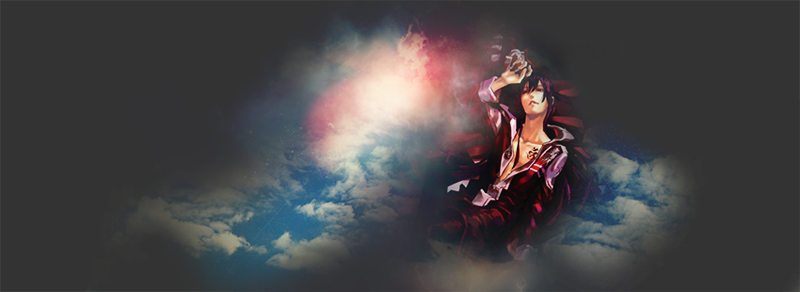
10. Duplicate your image again, resize it to make it smaller (Crt+T to transform) & desaturate the image (Crl + Shift + U). I choose to set my smaller, desaturated next to my larger image like this:

Set it to Soft Light @ 100%
11. Duplicate your black & white image. Set it to Soft Light 100% like this. Duplicate image again & set it to Multiply @ 73%.
12. Duplicate texture used in Step 8. Drag it to the top & set it to Screen 100%.
13. Take this bird image by Unknown & set it to Screen @ 100%.
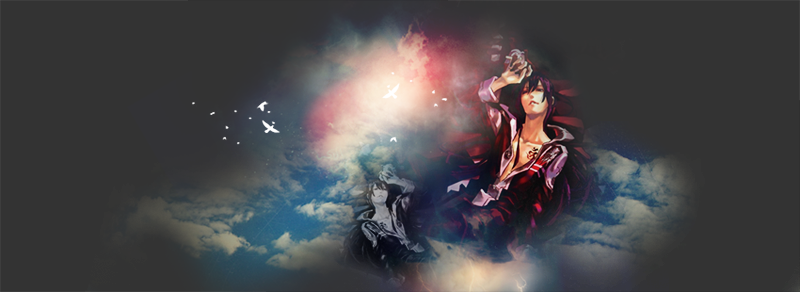
14. Duplicate Bird Image layer again & set to Screen 100%. This makes the birds pop out more.
15. Duplicate your image (the colored one in Step 5) & set it Screen @ 20%
16. Duplicate your image (the colored one) & Set to Soft Light @ 80%
17. Take a brush with the same color as your background & on a new layer, eliminate all the lines, extra things you see sticking out, etc. Basically, refine your image.
If you want my selective Coloring, continue to Step 18. If not, skip to Step 21.
-----------------------------------------------------------------------
This is the Start of the Selective Coloring portion of the tutorial. If you are using a different image or want to get a different coloring, feel free to use a different coloring tutorial or create your own. My Selective Coloring is best recommended for images w/ lots of red!
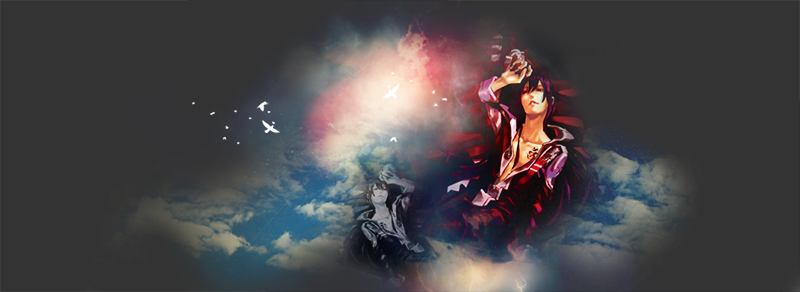
18. Go to Layer > New Adjustment Layer > Selective Coloring & apply these settings:
Reds: -53 28 0 0
Blues: 100 6 0 0
19. Duplicate the selective Color Layer (Normal 100%). On the Selective Layer, take a small, black brush (roughly size 20) & brush over Kanda's Skin. This creates a layer mask & prevents Kanda's skin from getting too red. (If you don't know what a layer mask is, I would advise you to look it up! Very useful in making graphics).
Layer Mask should look like this:
20. Go to Layer > New Adjustment Layer > Selective Coloring & apply these settings:
Yellows: 0 -21 0 0
Magentas: -100 34 -25 15
-----------------------------------------------------------------------
21. Add your text! I used a text texture that I created from "All It Takes For Your Dreams To Come True" by Skylit Drive.
"The fire rages in me
Daylight fights through the night with the cries of redemption
The sun ignites the light in our eyes"
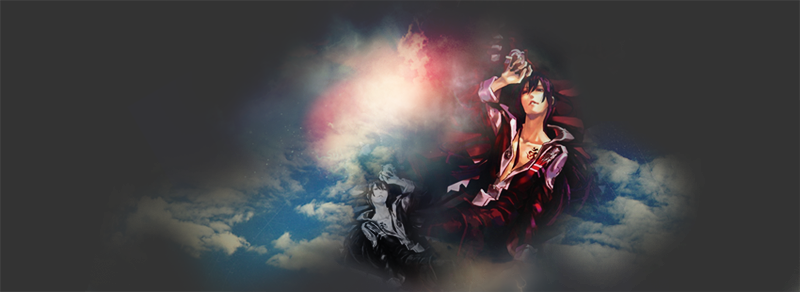
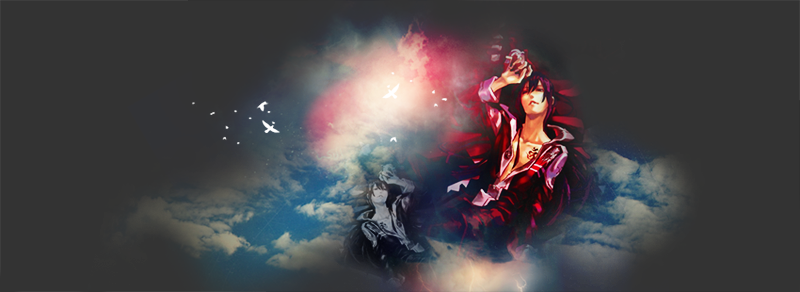
END RESULT:
Another Example using the tutorial:
[Photoshop Files]
PSD with DGM: http://www.box.net/shared/sh11ea0zm0
PSD with Phantasmagoria (the example): Only Available via Request. will be PM to you.
If you have any other graphic tutorial requests, let me know! I'll try to get some done this summer!
Comment/Questions?
Join//Watch// Affiliate
...long, LONG overdue tutorial specifically requested by sun_soraya. Please, check out her icon LJ, soleil_icons if you want some great icon tutorials. I fail at those~
FEEDBACK PLEASE!
I need to know if the tutorial is usable. Not released yet & kind of still being edited. ;]
I have a batch coming out but its going really, really slow. I've lost my summer inspiration x_X so please be patient a little longer.
Tools Used: Photoshop CS4
Translatable: No, Selective Coloring Required.
PSD: YES
Difficultly Level: Very
1. Start out with a solid color background. Any color will do. I have a tendency to lean more to gray colors so I started with #333333
2.Take this cloud texture by Unknown. Place it on top on your solid layer.
3. Start erasing portions until you come up with a shape you like. I divided my cloud texture into 2 parts like this so I ended up with this:
4. Duplicated the cloud-texture-layer & set it so screen 100%.
5. Take an image to use in the picture. I choose a D.Grayman Fanart by houseki-hime from Riot of Flowers. Eraser part of the image until you have the portion of the image you want like my Kanda example
6. If you feel like you have erased too much, just duplicate the previous layer & set it to normal @ 40% (or any other %). It makes your image seem more solid.
7. Take this texture by bambinainnero & set to Screen @ 100%.
8. Take this texture also by bambinainnero & set it screen @ 40%
9. Duplicate your image, drag it to the top & set it Soft Light @ 100%
10. Duplicate your image again, resize it to make it smaller (Crt+T to transform) & desaturate the image (Crl + Shift + U). I choose to set my smaller, desaturated next to my larger image like this:
Set it to Soft Light @ 100%
11. Duplicate your black & white image. Set it to Soft Light 100% like this. Duplicate image again & set it to Multiply @ 73%.
12. Duplicate texture used in Step 8. Drag it to the top & set it to Screen 100%.
13. Take this bird image by Unknown & set it to Screen @ 100%.
14. Duplicate Bird Image layer again & set to Screen 100%. This makes the birds pop out more.
15. Duplicate your image (the colored one in Step 5) & set it Screen @ 20%
16. Duplicate your image (the colored one) & Set to Soft Light @ 80%
17. Take a brush with the same color as your background & on a new layer, eliminate all the lines, extra things you see sticking out, etc. Basically, refine your image.
If you want my selective Coloring, continue to Step 18. If not, skip to Step 21.
-----------------------------------------------------------------------
This is the Start of the Selective Coloring portion of the tutorial. If you are using a different image or want to get a different coloring, feel free to use a different coloring tutorial or create your own. My Selective Coloring is best recommended for images w/ lots of red!
18. Go to Layer > New Adjustment Layer > Selective Coloring & apply these settings:
Reds: -53 28 0 0
Blues: 100 6 0 0
19. Duplicate the selective Color Layer (Normal 100%). On the Selective Layer, take a small, black brush (roughly size 20) & brush over Kanda's Skin. This creates a layer mask & prevents Kanda's skin from getting too red. (If you don't know what a layer mask is, I would advise you to look it up! Very useful in making graphics).
Layer Mask should look like this:
20. Go to Layer > New Adjustment Layer > Selective Coloring & apply these settings:
Yellows: 0 -21 0 0
Magentas: -100 34 -25 15
-----------------------------------------------------------------------
21. Add your text! I used a text texture that I created from "All It Takes For Your Dreams To Come True" by Skylit Drive.
"The fire rages in me
Daylight fights through the night with the cries of redemption
The sun ignites the light in our eyes"
END RESULT:
Another Example using the tutorial:
[Photoshop Files]
PSD with DGM: http://www.box.net/shared/sh11ea0zm0
PSD with Phantasmagoria (the example): Only Available via Request. will be PM to you.
If you have any other graphic tutorial requests, let me know! I'll try to get some done this summer!
Comment/Questions?
Join//Watch// Affiliate