Tutorial #4: Header with Gossip Girls & D. Grayman
Tutorial #4: Header with Gossip Girls & D. Grayman
Well, its been quite a while since I have updated...the last time I posted was in November. Sorry to make you wait so long (I was suffering from a long, LONG creative block) but I am now back! I have part of a batch waiting to be posted but it will be a while before its done. Until than, I have a tutorial! ♥
FEEDBACK PLEASE!
I need to know if the tutorial is usable~
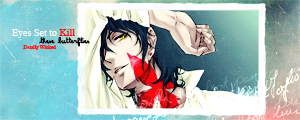
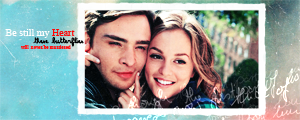
Tools Used: Photoshop CS4
Translatable: No (yes if you exclude all the Selective Coloring)
PSD: YES
Difficultly Level: Moderate
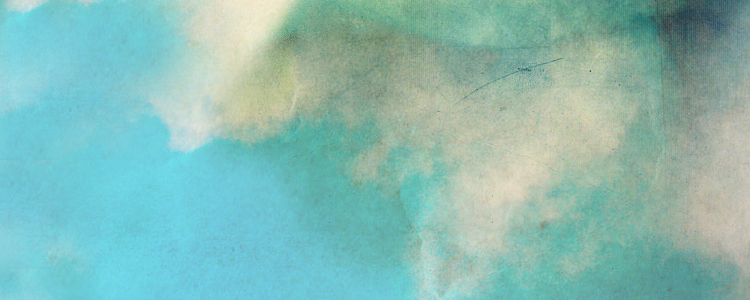
1. Start with this texture created by me with a fusion of a cloud image & a texture by bambinainnero
2. Take this TEXTURE by Unknown & set it to Screen 100%
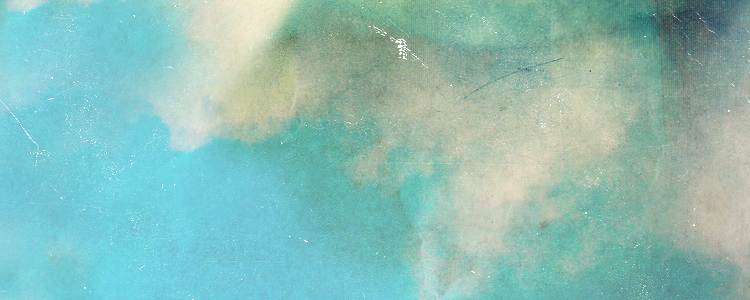
3. Take this FRAME TEXTURE by Unknown & Set it to Screen 100%
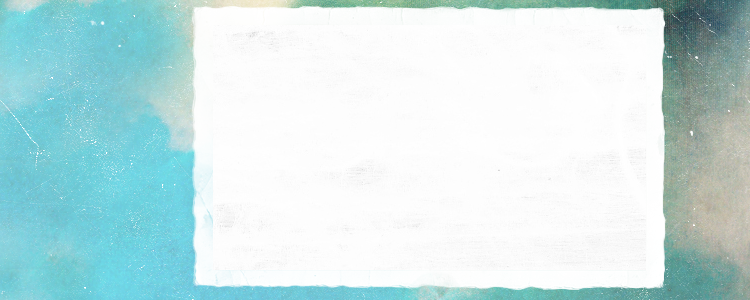
The Off-white color Box in the middle of Frame is where you are going to insert your image.
4. I choose THIS IMAGE of Tyki from D. Grayman. (I think it's Fanart but I forgot who the artist was). Crop it until it fits onto your frame.
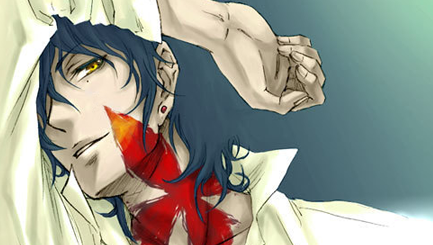
There are two ways to modify the image using Selective Colorings. You can modify the image before you paste it onto the frame or you can create a layer mask (which allows you to modify only certain parts the header). I am going to explain how to modify the image before you paste it but my PSD uses a layer mask.
Steps #5- #7 describe how to get the coloring I used so if you using a different coloring, SKIP THESE STEPS!
5. Duplicate & Set the layer to Soft Light 100%. You will end up with THIS.
6. Go to Layer > New Adjustment Layer > Selective Coloring & apply these settings:
Reds: -100 100 0 0
Yellow: 0 0 -100 0
Black: 0 0 0 22
You will end up with THIS.
7. Go to Layer > New Adjustment Layer > Level & apply these settings:
Level: 0 1.08 249
This will brighten your image & you will end up with THIS.
8. & you are done with your coloring! Apply it to your image.
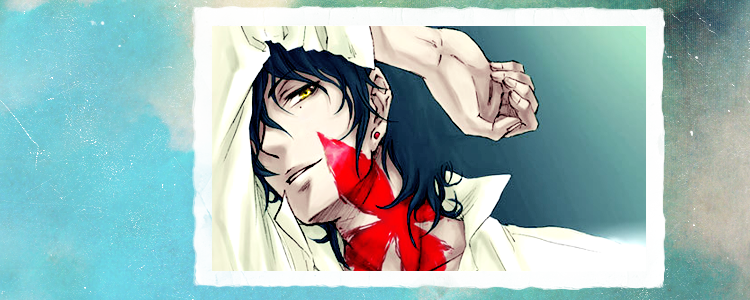
9. Take the UPPER PART of this TEXTURE by sanami276. Set to Screen 100%

10. The words didn't show up enough for me so Duplicate the texture & set that layer to Screen 100%
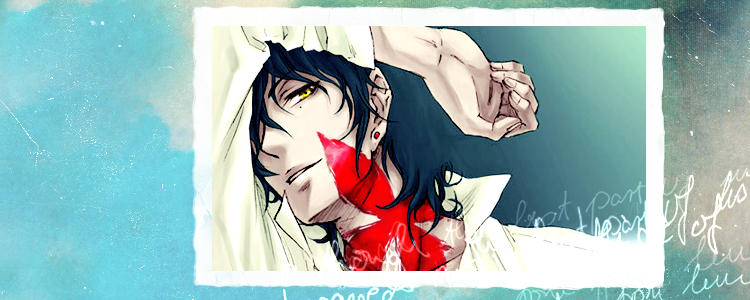
11. Duplicate the texture used in Step 2 & use it again so you get this:
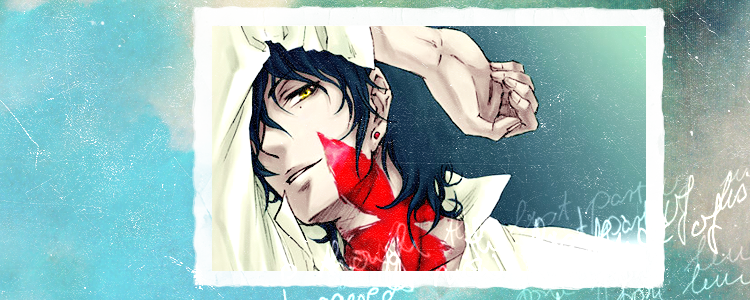
12. Add Text & you are done!
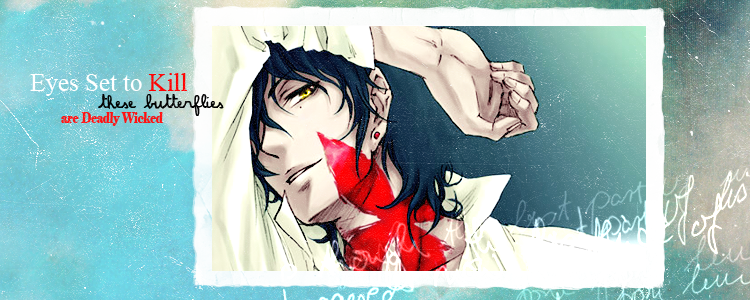
I used Fonts: Times New Roman, Amandine, & Elephant.
BONUS:
I also chose to do a Version with THIS IMAGE of Ed & Leighton from Gossip Girl.

The same Steps except Steps #5-#7 above are used. To get the Coloring I used, use these steps instead of #5-#7.
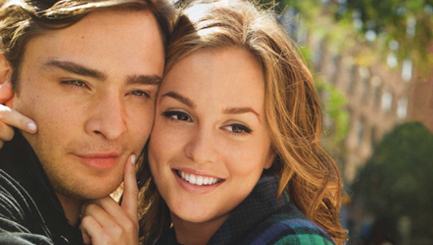
1. Duplicate & Set the layer to Soft Light 100%. You will end up with THIS.
2. Go to Layer > New Adjustment Layer > Color Balance & apply these settings @ 50%:
Midtones: -100 0 100
You will end up with THIS.
3. Create a New Layer and fill it in with a bright, blue color (#03ffeb). Set it to Soft Light at 20%. You should end up with THIS.
4. Go to Layer > New Adjustment Layer > Selective Coloring & apply these settings @ 80%:
Reds: -20 11 0 0
Yellows: 0 0 -87 0
You will end up with THIS.
5. Go to Layer > New Adjustment Layer > Color Balance & apply these settings @ 60%:
Midtones: 10 0 100
You will end up with THIS.
6. Go to Layer > New Adjustment Layer > Color Balance & apply these settings @ 50%:
Midtones: -24 0 16
7. To Brighten it up a bit, go to Layer > New Adjustment Layer > Level & apply these settings @ 100%:
Level: 0 0 247
8. The End Result is THIS:

Go back to Step 8 to complete the Header ♥
[Photoshop Files]
PSD with Both Gossip Girl & DGM version: http://www.box.net/shared/m1lx2272st
PSD with DGM version: http://www.box.net/shared/lt53v053kp
PSD with Gossip Girl Version: http://www.box.net/shared/7py0sx48ds
& I already have people making some headers:
saori1f made this.
Comment/Questions?
Join//Watch// Affiliate
Well, its been quite a while since I have updated...the last time I posted was in November. Sorry to make you wait so long (I was suffering from a long, LONG creative block) but I am now back! I have part of a batch waiting to be posted but it will be a while before its done. Until than, I have a tutorial! ♥
FEEDBACK PLEASE!
I need to know if the tutorial is usable~


Tools Used: Photoshop CS4
Translatable: No (yes if you exclude all the Selective Coloring)
PSD: YES
Difficultly Level: Moderate
1. Start with this texture created by me with a fusion of a cloud image & a texture by bambinainnero

2. Take this TEXTURE by Unknown & set it to Screen 100%

3. Take this FRAME TEXTURE by Unknown & Set it to Screen 100%

The Off-white color Box in the middle of Frame is where you are going to insert your image.
4. I choose THIS IMAGE of Tyki from D. Grayman. (I think it's Fanart but I forgot who the artist was). Crop it until it fits onto your frame.

There are two ways to modify the image using Selective Colorings. You can modify the image before you paste it onto the frame or you can create a layer mask (which allows you to modify only certain parts the header). I am going to explain how to modify the image before you paste it but my PSD uses a layer mask.
Steps #5- #7 describe how to get the coloring I used so if you using a different coloring, SKIP THESE STEPS!
5. Duplicate & Set the layer to Soft Light 100%. You will end up with THIS.
6. Go to Layer > New Adjustment Layer > Selective Coloring & apply these settings:
Reds: -100 100 0 0
Yellow: 0 0 -100 0
Black: 0 0 0 22
You will end up with THIS.
7. Go to Layer > New Adjustment Layer > Level & apply these settings:
Level: 0 1.08 249
This will brighten your image & you will end up with THIS.
8. & you are done with your coloring! Apply it to your image.

9. Take the UPPER PART of this TEXTURE by sanami276. Set to Screen 100%

10. The words didn't show up enough for me so Duplicate the texture & set that layer to Screen 100%

11. Duplicate the texture used in Step 2 & use it again so you get this:

12. Add Text & you are done!

I used Fonts: Times New Roman, Amandine, & Elephant.
BONUS:
I also chose to do a Version with THIS IMAGE of Ed & Leighton from Gossip Girl.

The same Steps except Steps #5-#7 above are used. To get the Coloring I used, use these steps instead of #5-#7.

1. Duplicate & Set the layer to Soft Light 100%. You will end up with THIS.
2. Go to Layer > New Adjustment Layer > Color Balance & apply these settings @ 50%:
Midtones: -100 0 100
You will end up with THIS.
3. Create a New Layer and fill it in with a bright, blue color (#03ffeb). Set it to Soft Light at 20%. You should end up with THIS.
4. Go to Layer > New Adjustment Layer > Selective Coloring & apply these settings @ 80%:
Reds: -20 11 0 0
Yellows: 0 0 -87 0
You will end up with THIS.
5. Go to Layer > New Adjustment Layer > Color Balance & apply these settings @ 60%:
Midtones: 10 0 100
You will end up with THIS.
6. Go to Layer > New Adjustment Layer > Color Balance & apply these settings @ 50%:
Midtones: -24 0 16
7. To Brighten it up a bit, go to Layer > New Adjustment Layer > Level & apply these settings @ 100%:
Level: 0 0 247
8. The End Result is THIS:

Go back to Step 8 to complete the Header ♥
[Photoshop Files]
PSD with Both Gossip Girl & DGM version: http://www.box.net/shared/m1lx2272st
PSD with DGM version: http://www.box.net/shared/lt53v053kp
PSD with Gossip Girl Version: http://www.box.net/shared/7py0sx48ds
& I already have people making some headers:
saori1f made this.
Comment/Questions?
Join//Watch// Affiliate