First Tutorial: Loveless Header
&this is going to be a my first tutorial. WHEE. Click on the cut to learn how to make this:
Tools Used: Photoshop CS3
Translatable: Yes (minus one selective color layer)
PSD: Soon be Added YES
*Basically this is an unfinished tutorial (need to go edit my words). Until this officially gets released Done!...Enjoy ;]
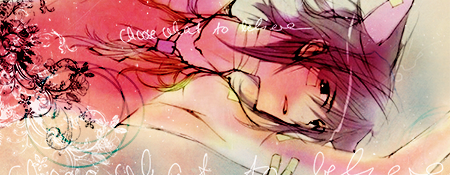
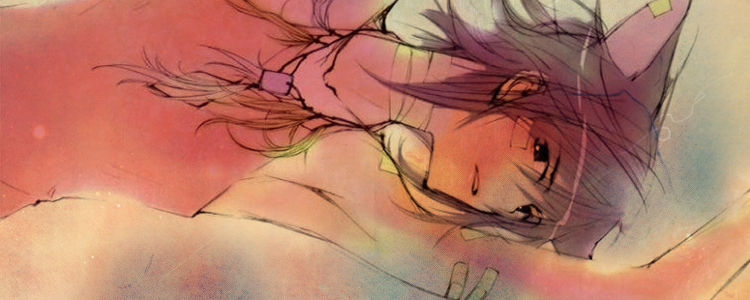
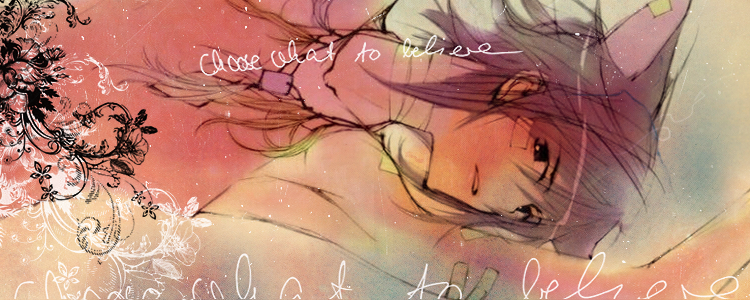
This what we want.
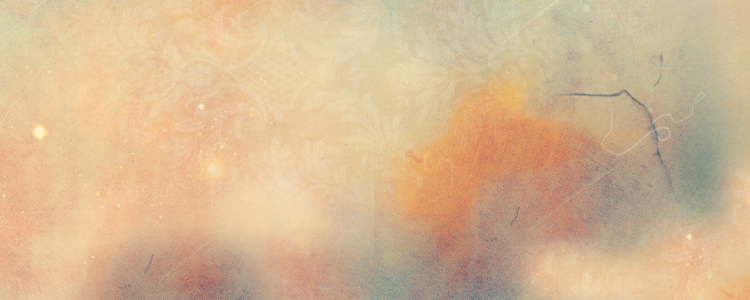
1. Start with this texture by bambinainnero. Texture comes in 1024x768 so adjust until you find a portion you like.
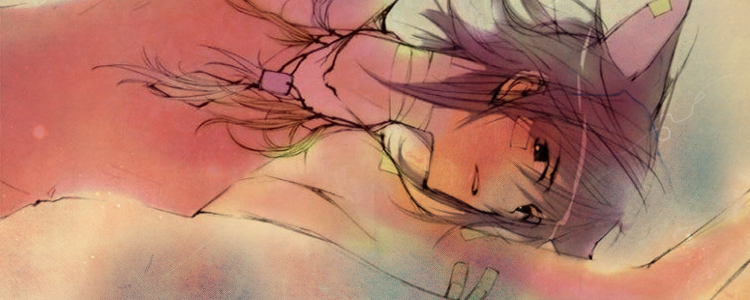
2. Pick an image to work with. I choose this Image from the Loveless Artbook-For your eyes Only & I cropped it to the appropriate size.

2. Set image layer to multiply & it should come out like this.
3. Go to Layer > New Adjustment Layer > Hue/Saturation. Saturation = +8.
4. Go to Layer > New Adjustment Later > Curves. In RGB, make one point @
Output: 155
Input: 136
(This will brighten up the image)
5. Apply this texture by sanami276 over your layers & set the texture to Screen @ 90%.
* I erased part of the image to make Ritsuka's face more visible.
6. Borrowing from nebel_graphics's tutorials, I used this texture by tralala_icons. Set the texture to Screen @ 100%.
7. Duplicate the same texture (the flower one) & push "Crt+I" to Invert the image. Set this layer to Multiply @ 100%.
*If the texture layer don't show up dark enough. Duplicate the multiply layer until it does.
* To contrast with the white version, I resize the black one & set it above the white one to like like this.
8. Duplicate the Image Base. Bring it to the top & set it to Soft Light @ 100%
9. Duplicate the Image Base (again) & set it to Soft Light at 50% (if needed).
10. Place this texture over the layers & set it to Color Burn @ 50%.

11. Go to Layer > New Adjustment Layer > Brightness/Contrast
Brightness +5
Contrast +5
12. FOR PHOTOSHOP USERS ONLY. Go to Layer > New Adjustment Layer > Selective Color and input:
Reds -13, 7, 0,0
Whites 0,0,0,-24
Blacks 0,0,0,15

Extra: To go the rings
13. Get the Elliptical Marque Tool & create a circle.

14. *ON A NEW LAYER* Go. Edit > Stroke. Set the Width to 3px & location to center.
* I choose #245d64 to match the background color.
15. Repeat until you have a series of rings like this.

16. Set the Ring layer to Vivid Light @ 100%.
17. Modify with whatever you want.
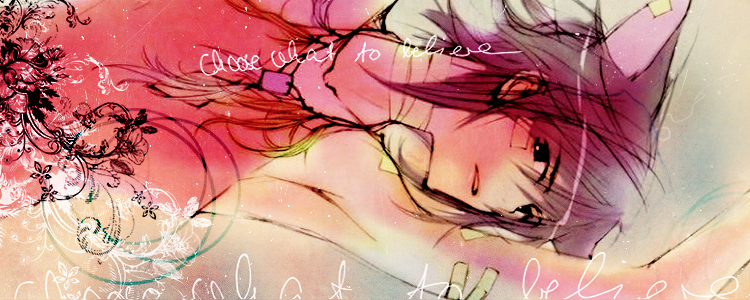
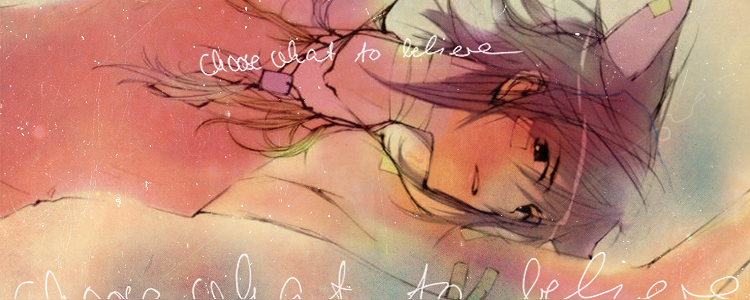
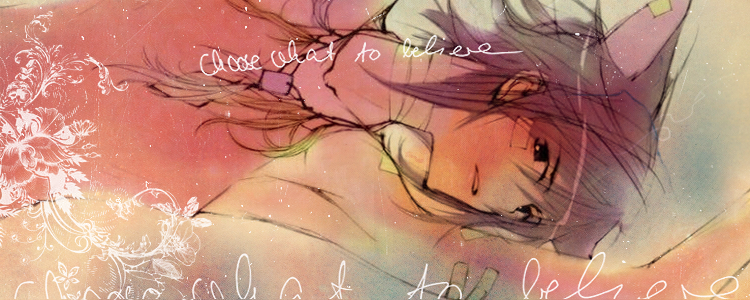
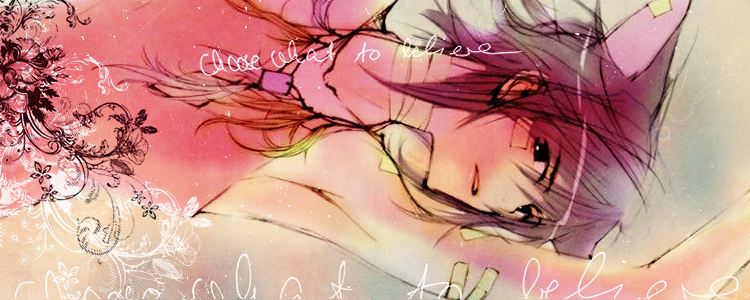
END RESULTS:
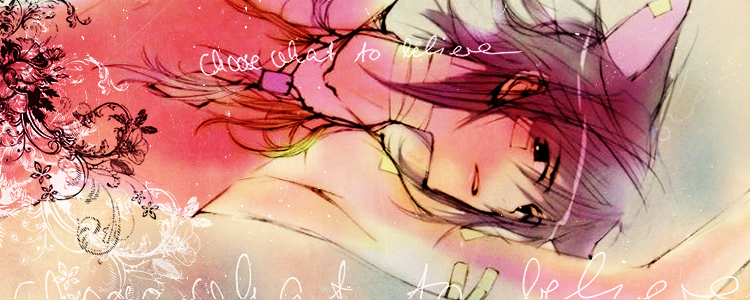
or

& Finished. I hope you liked it & found it helpful. I would love to see any of your results.
PSD Download Here: Box.net// Megaupload
Comment?
Join?
Watch?
Tools Used: Photoshop CS3
Translatable: Yes (minus one selective color layer)
PSD: Soon be Added YES
*Basically this is an unfinished tutorial (need to go edit my words). Until this officially gets released Done!...Enjoy ;]
This what we want.
1. Start with this texture by bambinainnero. Texture comes in 1024x768 so adjust until you find a portion you like.
2. Pick an image to work with. I choose this Image from the Loveless Artbook-For your eyes Only & I cropped it to the appropriate size.
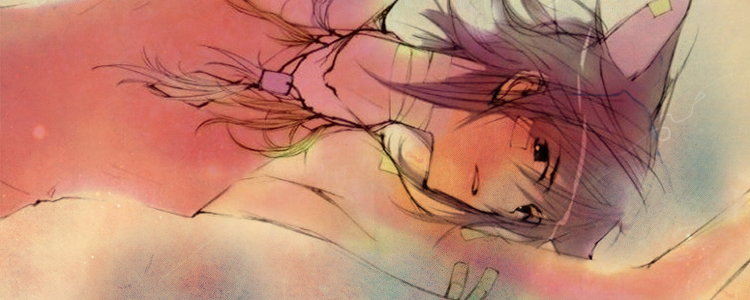
2. Set image layer to multiply & it should come out like this.
3. Go to Layer > New Adjustment Layer > Hue/Saturation. Saturation = +8.
4. Go to Layer > New Adjustment Later > Curves. In RGB, make one point @
Output: 155
Input: 136
(This will brighten up the image)
5. Apply this texture by sanami276 over your layers & set the texture to Screen @ 90%.
* I erased part of the image to make Ritsuka's face more visible.
6. Borrowing from nebel_graphics's tutorials, I used this texture by tralala_icons. Set the texture to Screen @ 100%.
7. Duplicate the same texture (the flower one) & push "Crt+I" to Invert the image. Set this layer to Multiply @ 100%.
*If the texture layer don't show up dark enough. Duplicate the multiply layer until it does.
* To contrast with the white version, I resize the black one & set it above the white one to like like this.
8. Duplicate the Image Base. Bring it to the top & set it to Soft Light @ 100%
9. Duplicate the Image Base (again) & set it to Soft Light at 50% (if needed).
10. Place this texture over the layers & set it to Color Burn @ 50%.
11. Go to Layer > New Adjustment Layer > Brightness/Contrast
Brightness +5
Contrast +5
12. FOR PHOTOSHOP USERS ONLY. Go to Layer > New Adjustment Layer > Selective Color and input:
Reds -13, 7, 0,0
Whites 0,0,0,-24
Blacks 0,0,0,15
Extra: To go the rings
13. Get the Elliptical Marque Tool & create a circle.
14. *ON A NEW LAYER* Go. Edit > Stroke. Set the Width to 3px & location to center.
* I choose #245d64 to match the background color.
15. Repeat until you have a series of rings like this.
16. Set the Ring layer to Vivid Light @ 100%.
17. Modify with whatever you want.
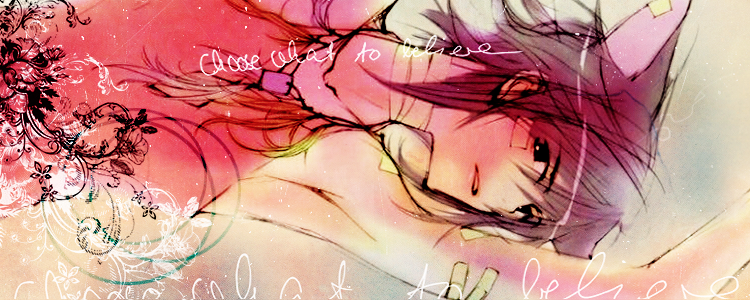
END RESULTS:
or
& Finished. I hope you liked it & found it helpful. I would love to see any of your results.
PSD Download Here: Box.net// Megaupload
Comment?
Join?
Watch?