soft shading manga coloring tut~
so, um, a lot of people wanted this from me for some reason, since they're all better than me anyway so here's my first ever manga coloring tutorial! I have icons done, but I'm waiting to finish all the ouran ones (yes, I'm not done yet, BUT ALMOST, I SWEAR) before posting. hopefully this will tide you over. :)
this was made using photoshop cs3, but I imagine it's mostly translatable? (sorry, I've never used programs like GIMP, so I'm not sure.)
first step, of course, is to pick an image. here, we're using Mei from sukitte ii na yo. the scan is nice and clean, so I didn't have to do anything to it, but occasionally you'll have to white out bits to make it look better.

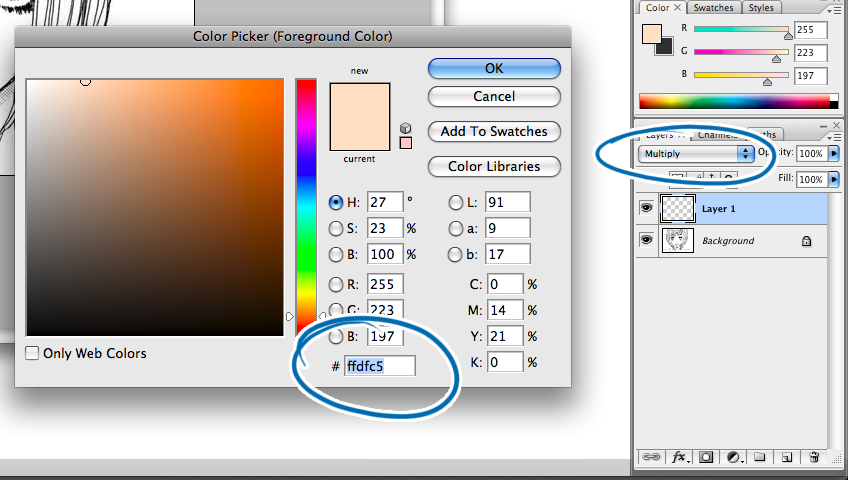
I don't necessarily have an order, but for this, we'll start with the skin. I use #ffdfc5 as my base skin color. make a new layer and set it to multiply.
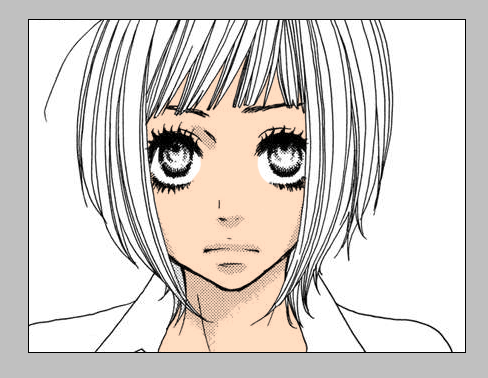
some people do this a different/easier/faster way, but I use a simple, hard brush tool of varying sizes to hand color the area I want colored. I use a tablet, so it's easier and faster this way for me (takes anywhere between 5 to 10 minutes depending on how big the area is), but it can be done with a mouse. color inside the lines, but if you bleed into other areas, just use the eraser tool to clean it up.
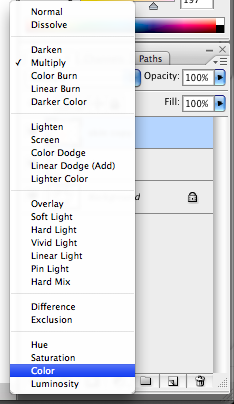
now, copy the skin layer, set it to "color", and drag it beneath the multiply layer.
you don't have to do anything else with that layer, so go back to the multiply layer and check the box to lock transparency.
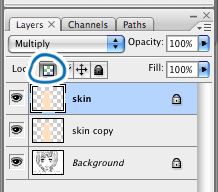
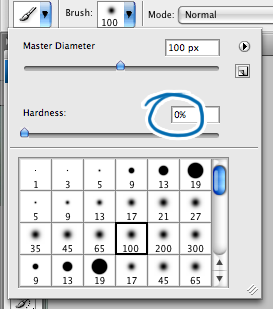
now it's time to do the shading. here, I use #eabc97 for skin shadow. I pick a soft brush (set hardness to 0%), usually sized at 100 pixels. depending on the size of the scan you're coloring, you may have to shrink to 65 pixels or expand to a 200 or even 300 pixel brush for this step.
to keep the shading consistent, pick a side from which the light will be coming, which will determine where the most shading is. in this scan, there's already some shading done for us, so I know which direction the light is coming from. I always drag the brush across the top of the forehead/beneath the bangs and beneath the eyebrows, and then go from there. I use broad/light strokes so that you can't tell where I started or stopped dragging the brush, and hopefully to keep the skin looking smooth.

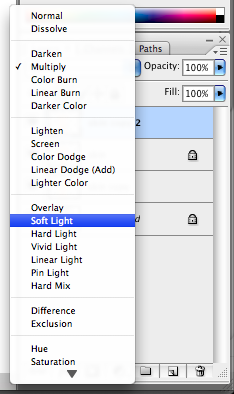
once you're done shading, copy the multiply skin layer one more time, change it to "soft light", and leave it on top of the multiply layer.
and now you're done with the skin!

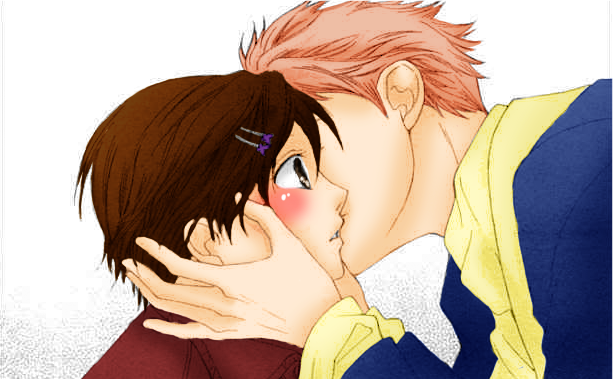
after that, it's basically rinse and repeat the exact same steps with the exact same tools for all parts (hair, eyes, clothes). in the end, this is what I got:

this is what I do with everything I color, so here are some other examples:

this is my first tutorial ever, so sorry if it doesn't end up helping much. ^_^;;