ho a tutorial!
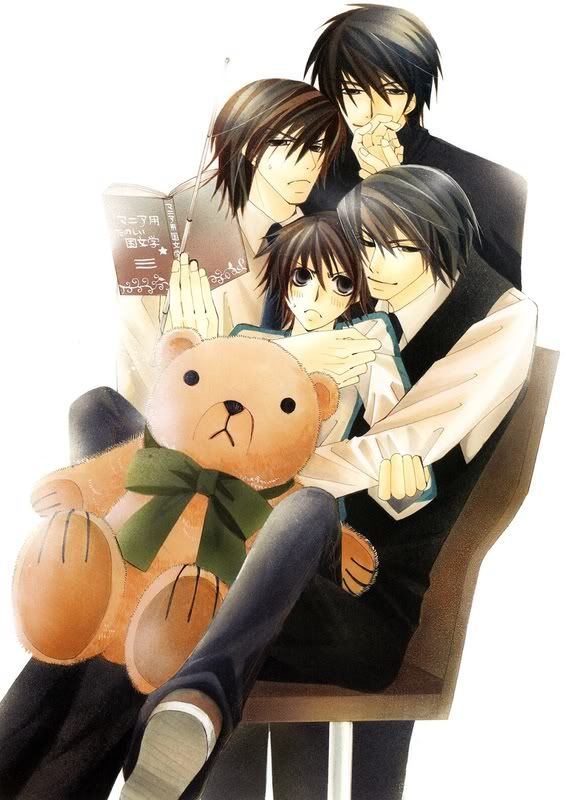
From 
to
Fullsize of wall can be found here.
Since people at the Junjou comm and DA liked this wallpaper I decided to do a tutorial for it no, I'm not doing it because I feel like procrastinating.
- Made in Photoshop CS3 but translatable except for the selective colour layer.
- Difficulty: Easy - or what I consider easy anyway 8D;
First tutorial orz sorry if this sucks.
1. Open up your canvas to desired size.
Since I was making a wallpaper, I opened it up to my resolution of 1440x900
2. Take this texture by anliah and rotate it 90 degrees.
3. Drop your image in and set it to 'multiply'. Duplicate it again if you wish.
I used a soft edge brush on a low opacity and erased some scratches on the texture where it is overlapping the image.

4. Take this texture by yunhe and grabbing a large soft brush on a low opacity, I erased the right side so it gives a faded look.
Erase any extra bits of the texture that covers the image.
I left this layer on 'normal' but you may want to set yours to 'multiply' or 'linear burn' so the scratches come through.

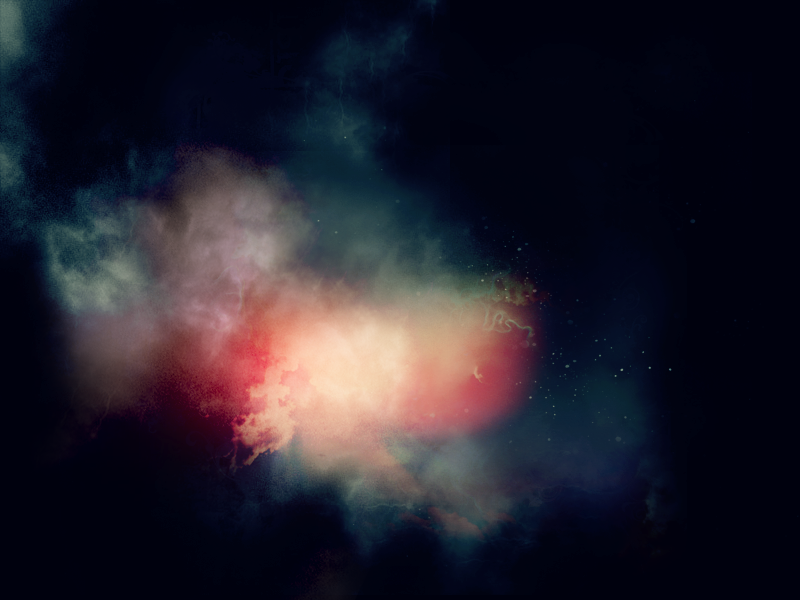
5. Take this texture by bambinainnero and set it to 'screen'.

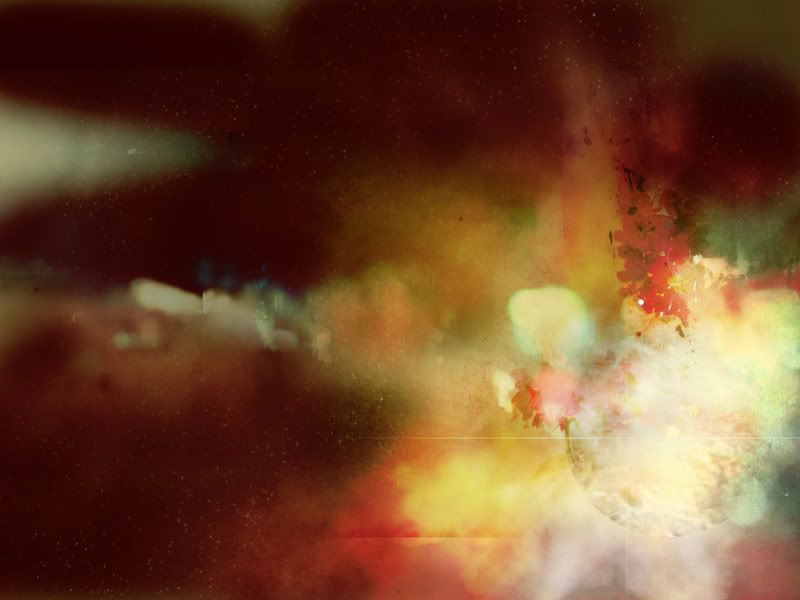
6. Take this texture by erniemay and set to 'soft light'
I move it up to the top left corner and grabbed a soft edged brush and erased part of it where overlaps the face for it made it too yellow.

7. Selective colouring time~
It all depends on your image but here are my settings:
Reds -100 0 0 0
Yellows -68 93 61 -6
Cyans 100 -100 -100 100
Magentas 100 100 100 100
Whites 100 100 100 -44

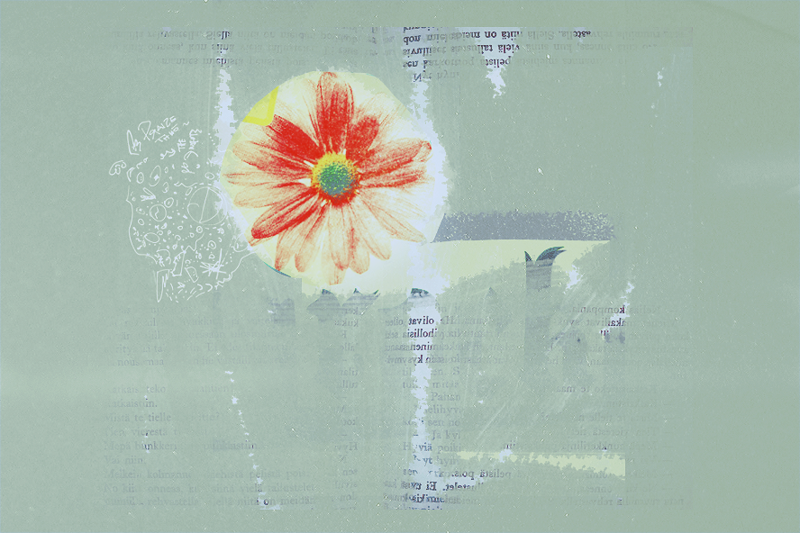
8. The bottom left was a bit empty so I took this texture by tralala_icons and set it to screen. Rotate it however you want.

9. Lastly I grabbed a soft brush w/ white and in a new layer I added blots of white where I want it to be lighter. Lower the opacity.

and there's where I'm done~
You can continue by adding a fill layer, text, more textures, duplicating the base image and desaturate and resize it down etcetc.
Adjust the opacity of the layers and move the order of them around.
Here I added an 'exclusion' layer of #220b0b for softer colours and dragged the floral texture to the top,
duplicating the image used and lowering the opacity to 8%

I'd love to see any results you make :D
to

Fullsize of wall can be found here.
Since people at the Junjou comm and DA liked this wallpaper I decided to do a tutorial for it no, I'm not doing it because I feel like procrastinating.
- Made in Photoshop CS3 but translatable except for the selective colour layer.
- Difficulty: Easy - or what I consider easy anyway 8D;
First tutorial orz sorry if this sucks.
1. Open up your canvas to desired size.
Since I was making a wallpaper, I opened it up to my resolution of 1440x900
2. Take this texture by anliah and rotate it 90 degrees.
3. Drop your image in and set it to 'multiply'. Duplicate it again if you wish.
I used a soft edge brush on a low opacity and erased some scratches on the texture where it is overlapping the image.
4. Take this texture by yunhe and grabbing a large soft brush on a low opacity, I erased the right side so it gives a faded look.
Erase any extra bits of the texture that covers the image.
I left this layer on 'normal' but you may want to set yours to 'multiply' or 'linear burn' so the scratches come through.
5. Take this texture by bambinainnero and set it to 'screen'.
6. Take this texture by erniemay and set to 'soft light'
I move it up to the top left corner and grabbed a soft edged brush and erased part of it where overlaps the face for it made it too yellow.
7. Selective colouring time~
It all depends on your image but here are my settings:
Reds -100 0 0 0
Yellows -68 93 61 -6
Cyans 100 -100 -100 100
Magentas 100 100 100 100
Whites 100 100 100 -44
8. The bottom left was a bit empty so I took this texture by tralala_icons and set it to screen. Rotate it however you want.
9. Lastly I grabbed a soft brush w/ white and in a new layer I added blots of white where I want it to be lighter. Lower the opacity.
and there's where I'm done~
You can continue by adding a fill layer, text, more textures, duplicating the base image and desaturate and resize it down etcetc.
Adjust the opacity of the layers and move the order of them around.
Here I added an 'exclusion' layer of #220b0b for softer colours and dragged the floral texture to the top,
duplicating the image used and lowering the opacity to 8%
I'd love to see any results you make :D