(no subject)
I have a tutorial here for everyone! 8D
From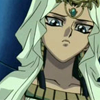
to
Uses Selective Coloring, so it's only translatable to other Photoshop programs.
Well, this was from a batch not that long ago. But long enough for me to forget what I was thinking while making this icon. 8DDb So my base was this:
I'm pretty sure I used Auto Contrast ( Alt + Shift + Ctrl + L ) on it.
For the next step I duplicated the base and set it to Softlight 100% And I got this! But, it was a little dark so I duplicated the base again and dragged it to the top and set it to Screen 50% and got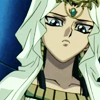
But there's something lacking in this icon...and that is the Exclusion layer! :D So I made a Color Fill layer, used #031738 and set it to Exclusion 100%.
Icon so far: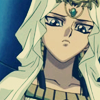
It looks a little blah, so I duplicated the base, dragged it to the top, and set it to Softlight 100% Looks a little dark. D8 But I'll solve that issue soon.
Next I made a Hue/Saturation layer, and set it to Master- Hue: 0, Saturation: 20, Lightness: 0 and I got this: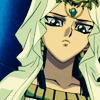
But it's still a little dark, but I'll fix it~♥
I duplicated the base once again, dragged it to the top, and set it to Screen 25% And got this.
Next I went to this tutorial by almateria and I used the Selective Color in step three and had the layer set it Normal 75% And with that, I get the end result of this:
I hope this wasn't confusing for anybody. 8DD;; And show me your results, I'd love to see what you got from this! And expect another tutorial soon~♥
From

to

Uses Selective Coloring, so it's only translatable to other Photoshop programs.
Well, this was from a batch not that long ago. But long enough for me to forget what I was thinking while making this icon. 8DDb So my base was this:

I'm pretty sure I used Auto Contrast ( Alt + Shift + Ctrl + L ) on it.
For the next step I duplicated the base and set it to Softlight 100% And I got this! But, it was a little dark so I duplicated the base again and dragged it to the top and set it to Screen 50% and got

But there's something lacking in this icon...and that is the Exclusion layer! :D So I made a Color Fill layer, used #031738 and set it to Exclusion 100%.
Icon so far:

It looks a little blah, so I duplicated the base, dragged it to the top, and set it to Softlight 100% Looks a little dark. D8 But I'll solve that issue soon.
Next I made a Hue/Saturation layer, and set it to Master- Hue: 0, Saturation: 20, Lightness: 0 and I got this:

But it's still a little dark, but I'll fix it~♥
I duplicated the base once again, dragged it to the top, and set it to Screen 25% And got this.
Next I went to this tutorial by almateria and I used the Selective Color in step three and had the layer set it Normal 75% And with that, I get the end result of this:

I hope this wasn't confusing for anybody. 8DD;; And show me your results, I'd love to see what you got from this! And expect another tutorial soon~♥