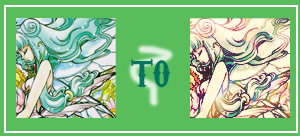
Primera Tutorial!
As requested by dragonsquee! Sorry it took so long~ :DD

** made using Adobe Photoshop CS2
** uses Selective Coloring
** not translatable
I forgot how many tuts I've got, so I'll get back to you later. XDD Anyway, here's tutorial requested by dragonsquee ages ago. Sorry about the wait~ :D I forgot I erased the PSD. of this icon, so I'll recreate how I made it as close as I can remember. ^^ Also, please do not follow this step-by-step, this was made to inspire and all. Experimentation is greatly appriciated! :3
(I owe you so much dragonsquee! I couldn't get the right coloring, I swear I was going nuts XDD~ Hope what I typed here won't kill all yar work. XD)
I swear, this is the messiest and most inaccurate tut I have EVAH done XD Sorry XD
So let's start! The icon I'm using is Primera from the CLAMP series Magic Knight Rayearth. Let's begin.
-----
1.) Crop your image to 100 x 100 LJ standard size.
2.) Use some Auto Levels/Auto Contrast/Auto Color (if necessary.)
3.) Duplicate your base and Desaturate. Use the old Brightness/Contrast method to get it clearer. Set this layer on Soft Light, 100%.
4.) Play with the Hue/Saturation bar. (Saturation only) Crank it up as you see fit. (Sounds wrong XDD)
5.) New layer, fill with #050834. Set this to Exclusion at 75%.
6.) New layer, fill with #ECCCA3. Set this to Multiply at 40% or lower.
7.) New layer, fill with #F59BFB. Set this to Overlay at 33% or lower.
8.) New layer, fill with #96FBFF. Set this to Soft Light at 35% or lower.
9.) New layer, fill with #B2B2B2. Set this to Color Burn at 80% or lower.
10.) New Adjustment layer, Brightness/Contrast at 10 and 12 respectively.
11.) New Adjustment Layer, Selective Coloring:
REDS:
-100, 0, 100, 0
NEUTRALS:
35, 16, 14, 12
BEWARE. I am a texture whore, so please don't be surprised why I put so many darn textures in this icon. XD
12.) Place this texture on Lighten, 35% or lower.
13.) Place this texture on Lighten, 60% or lower.
14.) Place this texture on Lighten, 80% or lower.
15.) Place this texture on Soft Light, 100% or lower.
16.) Duplicate your base and drag to the top, set on Hard Light at 40% or lower.
17.) Place this texture on Lighten, 80% or lower.
18.) Place this texture on Lighten at 65% or lower.
Flatten, add text and brushes and you're done.
Not so proud of this one, I really cannot remember the right patterns and the right textures/settings I used, so don't expect the greatest of results, I swear. XDD [/dies]
^^;; *cries* Comment~?
And also, if anyone gets the right coloring, mind telling me what you guys did? :DD In case I spark up remembering. :DD
FORGIVE MEEE~~