(no subject)
How to Make Miranda Sad.

done in PSP8, but completely translatable


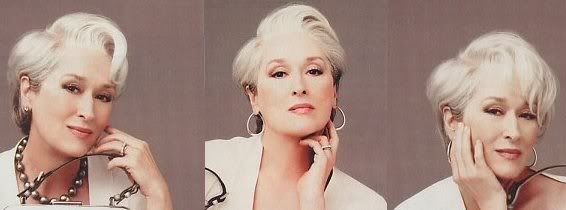
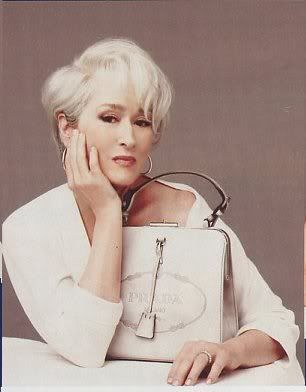
This tutorial is for anyone who has wanted to make a wallpaper or icon or graphic that was angsty but all the damn pictures of Miranda looked happy or coy or smug or angry... here's how to make her sad/pensive!
What happens to a face when you smile...
So! In order to photomanipulate sadness from happiness you have to address all of the above features. (The only one I didn't do was the nostrils one because the smiles weren't very big smiles and it didn't make much change)
Easy enough to say, right? But here's how...
**If anything doesn't make sense or you need more help, comment or pm me or whatever and I'd be happy to help!

done in PSP8, but completely translatable


This tutorial is for anyone who has wanted to make a wallpaper or icon or graphic that was angsty but all the damn pictures of Miranda looked happy or coy or smug or angry... here's how to make her sad/pensive!
What happens to a face when you smile...
- Your eyes squint
- Your nostrils puff out a little and raise, so you can see a little more of the darkness of the nostril when you smile
- Smile lines! Both by the cheeks, making them look very defined, but also up by the eyes
- And of course, the obvious, the corners of your mouth go up
So! In order to photomanipulate sadness from happiness you have to address all of the above features. (The only one I didn't do was the nostrils one because the smiles weren't very big smiles and it didn't make much change)
Easy enough to say, right? But here's how...

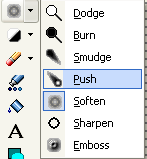
Smile lines. This is probably the easiest one. Select the soften tool and go over the lines on the side of the eye (being careful not to get the actual eye because it can look very strange if you have part of the eye softened). And then find the dark, defining cheek line and soften that.
- Upturned lips.

Select the smudge tool (in PSP8 it's under the same button as the soften -- I'm sorry I don't know where it is in other programs) and very carefully smudge the lips. Do the line that shows smile and also push them to the center a little bit. Make sure that you're using a very small smudge brush, you have to do this a little at a time and can't rush it.
- Eyebrows

More often than not when people make sad faces their eyebrows go towards the center. So what I do is I select the eyebrow, just the end, and make a copy and just move the copy over.
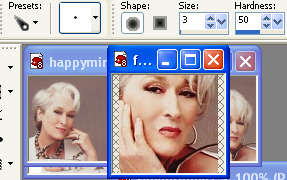
Also, the act of pulling your eyebrows towards the center creates a little crease between them. So what I do is I use the dropper tool and take her skin color between her eyebrows and then make it a little darker, using the brush tool on size one I make two lines and then I use the soften tool to make them fade into her skin, this should just be enough color to imply the crease, if it's too defined it won't look right.
- Squinted Eyes

Use the smudge tool to bring down the eyes, you will probably need to guess and check a bit to make this work perfectly. Once again use a small brush to do this and do it slowly. Eyes are important!! Also, remember that wet eyes reflect more light so if you want to make the light reflection in her eye bigger in a sad manip that's a great addition! - Lastly, I like to deal with the cheek crease again

I wouldn't skip the initial softening step because to extra take care of it I use the dropper tool to select a cheek skin color, make a new raster layer and color over the cheek crease. But because we still have cheek creases, just less defined, when we're not smiling I lowered the opacity until it looked about right. NOTE: For the cheek color bit I like to choose a pink-ish hue so it looks like her cheeks are a little rosy. - And, done!

**If anything doesn't make sense or you need more help, comment or pm me or whatever and I'd be happy to help!