Android USB tethering on Mac OS X
If you’ve got an Android-based phone, and want to do simple USB-based tethering on your Mac, you will find this guide useful. For reference, I performed this with the following equipment:
- Samsung Captivate on at&t running custom Cognition 4.1.1 ROM.
- MacOS X 10.6.6
The standard disclaimers apply here: follow these instructions at your own risk. This may void your warranty. Discontinue use if a rash develops.
Getting started: Preparing Android
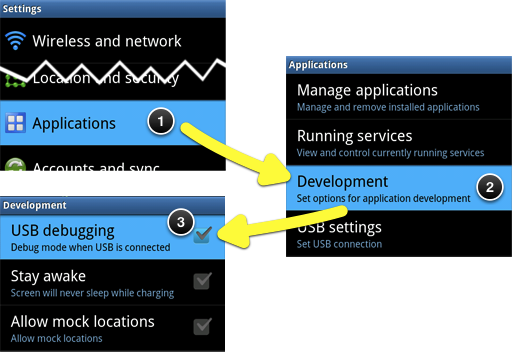
All we need to do on Android is turn on “USB debugging” - do NOT fiddle with any of the “USB tethering” options or anything else. So, go into Settings > Applications > Development, and check the box next to “USB debugging.”
After turning on “USB debugging” connect the device to your Mac using the USB cable.
Next, configure the Mac
After connecting the USB cable, your Mac should pop up a window saying that a device “SAMSUNG_Android” needs to be configured, like this:
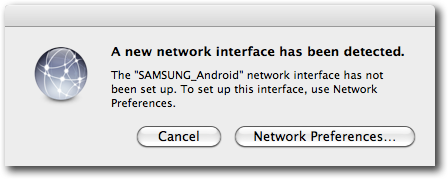
This is a good sign. Click the “Network Preferences…” button, and find that device in your System Preferences’s “Network” section, which should look something like this:
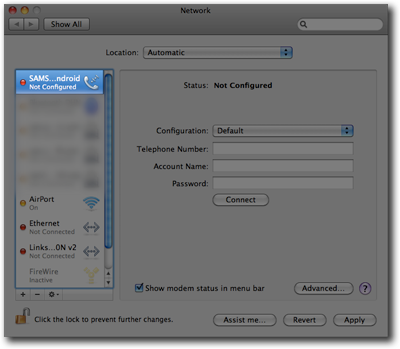
The first thing to do is enter the values for this screen. Use the following settings:
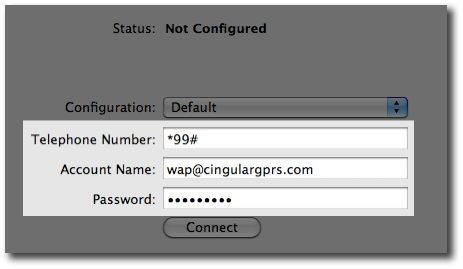
- Telephone Number: *99#
- Account Name: wap@cingulargprs.com
- Password: cingular1
Next, click on the “Advanced…” button towards the bottom right of the window. That should bring you to a screen that looks like this:
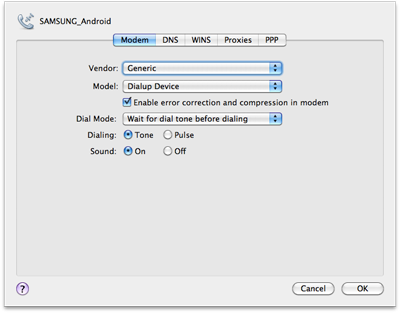
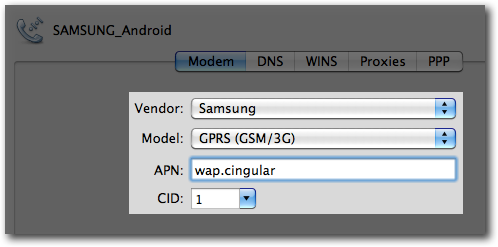
First, click on “Generic” and select “Samsung” for the vendor. Next, click on “Dialup” and select “GPRS (GSM/3G)” for the model. Enter in “wap.cingular” for the APN. Leave the CID as “1″ which is the default. When everything is done, the window should now look like this:
Once that’s done, click “OK” which should bring you back to the previous screen. Next, click the “Apply” button to save all these settings.
Lets try connecting
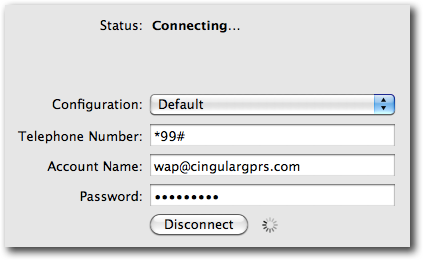
At this point, you’re ready to try tethering! Go ahead and click on that “Connect” button. You should now see something like this:
If everything goes well, after 5-10 seconds, it should change to something that looks like this:
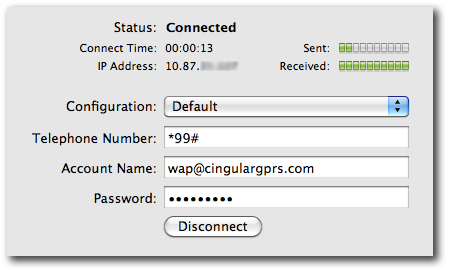
That’s it, now you’re tethered
Not terribly painful, no goofy software installation needed and hoops to jump through. And, here’s a speedtest for folks who are curious:
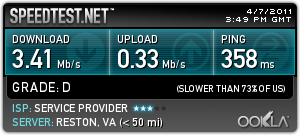
3.4 Mbit/s down, and 330 Kbit/s up on a 400ms ping isn’t fantastic, but it’s more than adequate for getting work done while out and about.
I hope you’ve found this guide useful and are happily tethered now. If you have any questions or comments, feel free to share them in the comments below!
Added on 2012-11-20: A reader named Art emailed me about HoRNDIS: a USB tethering driver for MacOS X. This may be useful for folks who are still interested in USB tethering on OSX.
Originally posted on Dossy's Blog.