Tutorial #04
Hi there! I'm still alive haha! Just that I'm busy...and don't have many time for icons...I can't believe I haven't done any icon since the Desmond post...I'm gonna have to fix that.
Well, now, a tutorial,
belletrix asked me to do it, and someone else also wanted me to do it, so here I am with a tutorial of an icon from my last batch. This is kind of a weird tutorial, becuase that batch was the realut of messing around with PS, at first I didn't even know what I wanted. I picked one icon in which I had used a lot of textures and stuff, so I can give more possibilities to you.

Made with PS CS
I used this picture of Desmond, a picture I adore, I like him when he's with his "thoughtful face". Well, let's go
1. Crop your base, rotate it, or whatever until you have it as you like it. I got this

Don't worry if you see the limit of the image, we're going to erase it later.
2. Coloring, I used the same coloring I explained in this tutorial (steps 1 to 6), because it woks pretty fine with the colors I want to get.
Now I got this

3. Now merge all the layers (except the white background with which you opened the file)
4. I pick the eraser tool. Choose a brush, I used this one but I can't remember who made it, I'm sorry, if you know who was, please tell me to give credit. I also used the Dry Brushes Photoshop has. Well, once you've chosen your eraser, erase the borders, I erased Des' forehead and the bottom part of the icon, I got this

(Note: the white background you see in this step is the background with which you opened the file, you have to keep it at the bottom of the palette)
5. Now, the funny stuff, textures!! I used this one by
rhinestone_life, and set it to multiply
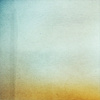
-->
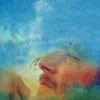
6. I used another texture, this one by
elli, I cropped the part I liked the most, set it to soft light on top, and used the dry brush, or the other one I posted before to erase the part of the texture covering Des' face. I got this

7. Duplicate this last layer (the soft light one) and set it to darken 70%
8. Another texture! by
iconofilth, set it to soft light
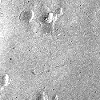
-->
9. Duplicate your base (that is, the layer in which you have your image with the erased borders) and set it to soft light on top.

10. Add a text if you want, I used the font Arena Condensed, size 10 pt
And you're done!!!
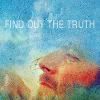
Hope you find it helpful =)
If you try it, then please show me what you got, I'd love to see it!
But try to make it your own, I mean, play with the opacity of the layers, try other settings, colorings, textures...some of the layers may not work with your picture.
Well, now, a tutorial,
belletrix asked me to do it, and someone else also wanted me to do it, so here I am with a tutorial of an icon from my last batch. This is kind of a weird tutorial, becuase that batch was the realut of messing around with PS, at first I didn't even know what I wanted. I picked one icon in which I had used a lot of textures and stuff, so I can give more possibilities to you.

Made with PS CS
I used this picture of Desmond, a picture I adore, I like him when he's with his "thoughtful face". Well, let's go
1. Crop your base, rotate it, or whatever until you have it as you like it. I got this

Don't worry if you see the limit of the image, we're going to erase it later.
2. Coloring, I used the same coloring I explained in this tutorial (steps 1 to 6), because it woks pretty fine with the colors I want to get.
Now I got this

3. Now merge all the layers (except the white background with which you opened the file)
4. I pick the eraser tool. Choose a brush, I used this one but I can't remember who made it, I'm sorry, if you know who was, please tell me to give credit. I also used the Dry Brushes Photoshop has. Well, once you've chosen your eraser, erase the borders, I erased Des' forehead and the bottom part of the icon, I got this

(Note: the white background you see in this step is the background with which you opened the file, you have to keep it at the bottom of the palette)
5. Now, the funny stuff, textures!! I used this one by
rhinestone_life, and set it to multiply

-->

6. I used another texture, this one by
elli, I cropped the part I liked the most, set it to soft light on top, and used the dry brush, or the other one I posted before to erase the part of the texture covering Des' face. I got this

7. Duplicate this last layer (the soft light one) and set it to darken 70%

8. Another texture! by
iconofilth, set it to soft light

-->

9. Duplicate your base (that is, the layer in which you have your image with the erased borders) and set it to soft light on top.

10. Add a text if you want, I used the font Arena Condensed, size 10 pt
And you're done!!!
Hope you find it helpful =)
If you try it, then please show me what you got, I'd love to see it!
But try to make it your own, I mean, play with the opacity of the layers, try other settings, colorings, textures...some of the layers may not work with your picture.