colorization tutorial
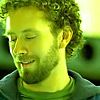
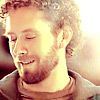
We're going to go from
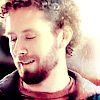
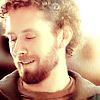
to
in seven steps. This tutorial is for people with at least an intermediate knowledge of PSCS. Its intent it to show how adjustment layers can drastically change an image, and inspire people to experiment with their software instead of just following a tutorial by rote.
INSTRUCTION
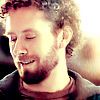
RESULT
Take your weirdly-coloured base and prep it.
In this case, prepping consisted of cropping, unsharp mask 50, resize, auto levels, take snapshot, unsharp mask 50, history brush (soft round 15px 100%) to smooth skin and background, sharpen tool (hard round 5px 25%) on facial features and hair and clothing details.
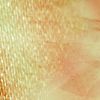
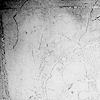
Step 1: Add a light texture, such as

and set it to Screen, 100%.

Step 2: Add a selective colour adjustment layer. Whatever colour you're trying to reduce in the image, find it in the drop-down menu and play around with the sliders, experimenting with the effects they have. It will be different with each base image.
In this case, I did the following:
a. Select "yellows" from the drop-down menu, and input the following settings: Cyan -75, Magenta +50, Yellow -65, Black +5.
b. Select "greens" from the menu, and input the following: Magenta +50, Yellow -75, Black +95.
c. Select "blacks" from the menu, and input the following: Black +100.

Step 3: Add a curves adjustment layer. You can both adjust the contrast and brightness, and continue to improve the colour, here. I did this:
a. Select "RGB" from the drop-down menu, and use the following settings: Input 115, Output 125.
b. Select "Blue" from the menu, and use the following settings: Input 115, Output 130.
Step 4: Add an image like
to add texture, shadowing/highlighting/visual interest in general, and set it to Soft Light, 100%.
Step 5: Duplicate your base image and desaturate it to your preference. Here are three methods for desaturation (use whichever one gives you the best result for your particular base image).
Drag it to the top, blur it with Gaussian Blur (here, set to 2.0px) and set it to Soft Light, 100%.
Step 6: Add a solid colour layer in a light shade to add depth and intensity (here, in #A6C5EE). Set it to Colour Burn, 100%.
Step 7: Create a new, blank layer in order to add a gentle glow to the icon. Use a texture-y brush like
in #FFFFFF (click once) and set the layer to Overlay, 100% (I had to rotate it 180 degrees to get it where I wanted it).
And that's it. Now that you've got the colouring and lighting/shadows right, the icon's ready to be worked with (text, etc.).