(no subject)
By request, a two part tutorial on basic text animation. This technique requires moderate knowledge of Photoshop & various terms. If you are using a mac, the short cut "ctrl" translates into the apple key. (The one with the weird square clover looking thing)
Remember, don't hesitate to ask questions if you're confused!!
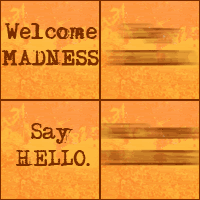
That all aside, now for the fun stuff. How to make the text effect used on this icon:
Section A: Photoshop
To start, I'll try to explain what a frame is. A frame refers to basically a layer of animation. For example, here's a stick figure waving. As you can see, part of the image stays constant the whole time, while only a section actually moves.
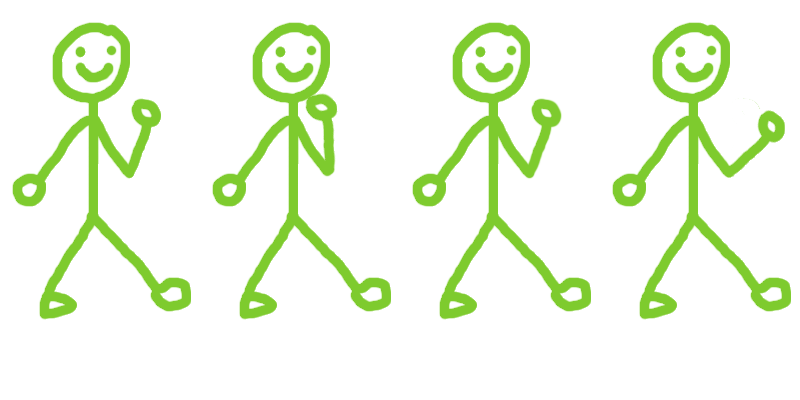
Now here are the frames, broken down and numbered. I also colour-coded them to make it easier to see which part is actually moving.

In the example icon, there are four frames, as well. Two for the readable text, two for the blur.
Firstly, prepare your base. As a quick reference to those who are curious, for this icon I flood-filled the first layer with a pale orange and then overlayed a texture from sxc.hu, a free stock site. I named this layer base
Step 02: type your first frame of text over your base. Your layer palette should look like this.
Step 03: THIS IS IMPORTANT! For this to work, you MUST make sure the base layer and any other layers other than your text ARE NOT VISIBLE. Following that, make sure you are on your text layer/s. Then hit ctrl + a (or apple + a in macs) to select the document. Go to Edit>Copy Merge.
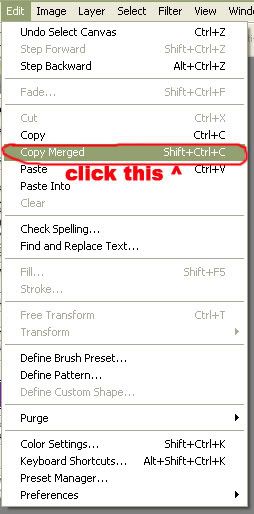
This will copy everything visible, not just your current layer. This is a handy tool because you can copy your text into one merged layer AND preserve your original text.
Step 04: ctrl + v to paste this new layer over everything else. I named this layer WM because of the initials of the words. My layer palette now looks like this:
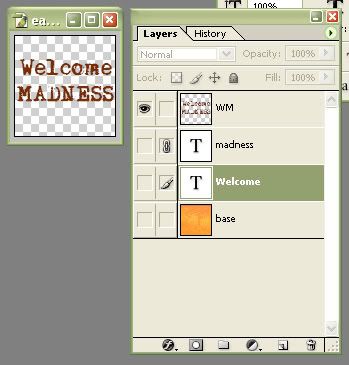
Step 05: Duplicate your base layer. Link your duplicated base with your text (not the recently pasted layer) and merge these linked layers. (To do merge linked, click the arrow on the layer menu and click "link merged")
Step 06: Repeat steps 2-5 for every different block of text you want to have. With this icon, I only had to repeat these steps once. My layer palette at the end of this looks like this:
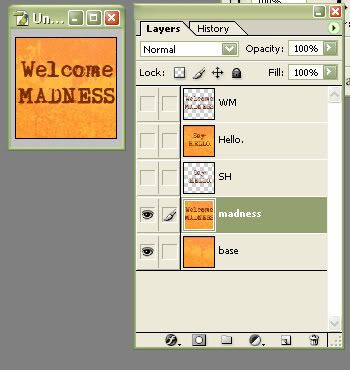
Note that I still have a blank base. THIS IS IMPORTANT. You will need a layer with your blank base to use as a backdrop for your blurred image. ALSO PAY ATTENTION TO THE LAYER ORDER. It should go in this order: First block of text, then the copied text of your SECOND block of text, then second block of text, then copied text of your THIRD block of text, third block of text, and so on.
Step 07: This is the fun part! To get the blur effect I used, make sure you're on your copied block of text. Then, go to Filter>Blur>Motion Blur, like so:

Then play with the settings. Always click "preview" to see what it will look like. I used a distance of 27 and an angle of 0.
This is a demonstration in why it is VERY important to NOT merge your copied text with your base :
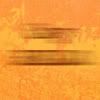
vs.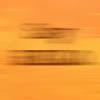
(YES) (NO)
See the difference?
Step 08: Again, repeat this step, for every frame you want to be blurred. At the end of all these steps, I am now ready to move into ImageReady.
Section B: ImageReady
There are less images for this section because while I used my PC to screencap the images, I'm using my Mac which, because of my geekiness, has Windows as well, but no print screen button. If you need me to further explain things, I can try and get caps for you using the labs here.
To enter ImageReady, click the icon at the very bottom of the tool bar. It will look different depending on what version of Photoshop you have, but it should look like an arrow coming out of a document, pointing to a logo. Once in ImageReady, your document should come up. At the bottom there should be a toolbar called "Animation." If it isn't, go to Window>Animation to bring it up.
Step 01: This is where it gets tricky. To start, click the arrow on the animation toolbar and click on "make frames from layers."
Step 02 (a): Woah, right? All those layers you had are now individual frames. But you don't want that. The first thing to do is to make sure your base layer is on all your frames. shift + click all your frames and then in the layers palette, click the little eyeball on your blank base layer. You may have to double-click if it's already visible on your current frame.
b: Now, for your first frame (the one with your first still text) click the first frame. Go to the layers palette and make visible (click the eyeball again) everything you want to be visible.
c: Lather, rinse, repeat for every additional frame you'd like to have. You can delete any extra frames at the end.
So this is what the animation menu looked like when I first clicked "make frames from layers":

And once I fixed all the frames:

Step 03: Timing is key in a good icon. For your transition frames, 0sec is fine. But to have a readable icon, your actual text frames need a longer timing. For this icon, I set the timing for the text frames to 2 seconds.
Now you're finished, right? Not quite! Always make sure your icon is under 40K[ilobytes], because LJ can't support icons higher than that. To check this, click the "2 up" tab on your document viewer. This way, you can see what the original looks like and what the .gif file will look like.
If it is too high, you can try fiddling with the optimizing features. Go to Window>Optimize to bring up the Optimize menu. Playing with the different settings will give you different results.
Remember, don't hesitate to ask questions if you're confused!!
That all aside, now for the fun stuff. How to make the text effect used on this icon:

Section A: Photoshop
To start, I'll try to explain what a frame is. A frame refers to basically a layer of animation. For example, here's a stick figure waving. As you can see, part of the image stays constant the whole time, while only a section actually moves.

Now here are the frames, broken down and numbered. I also colour-coded them to make it easier to see which part is actually moving.

In the example icon, there are four frames, as well. Two for the readable text, two for the blur.
Firstly, prepare your base. As a quick reference to those who are curious, for this icon I flood-filled the first layer with a pale orange and then overlayed a texture from sxc.hu, a free stock site. I named this layer base
Step 02: type your first frame of text over your base. Your layer palette should look like this.
Step 03: THIS IS IMPORTANT! For this to work, you MUST make sure the base layer and any other layers other than your text ARE NOT VISIBLE. Following that, make sure you are on your text layer/s. Then hit ctrl + a (or apple + a in macs) to select the document. Go to Edit>Copy Merge.

This will copy everything visible, not just your current layer. This is a handy tool because you can copy your text into one merged layer AND preserve your original text.
Step 04: ctrl + v to paste this new layer over everything else. I named this layer WM because of the initials of the words. My layer palette now looks like this:

Step 05: Duplicate your base layer. Link your duplicated base with your text (not the recently pasted layer) and merge these linked layers. (To do merge linked, click the arrow on the layer menu and click "link merged")
Step 06: Repeat steps 2-5 for every different block of text you want to have. With this icon, I only had to repeat these steps once. My layer palette at the end of this looks like this:

Note that I still have a blank base. THIS IS IMPORTANT. You will need a layer with your blank base to use as a backdrop for your blurred image. ALSO PAY ATTENTION TO THE LAYER ORDER. It should go in this order: First block of text, then the copied text of your SECOND block of text, then second block of text, then copied text of your THIRD block of text, third block of text, and so on.
Step 07: This is the fun part! To get the blur effect I used, make sure you're on your copied block of text. Then, go to Filter>Blur>Motion Blur, like so:

Then play with the settings. Always click "preview" to see what it will look like. I used a distance of 27 and an angle of 0.
This is a demonstration in why it is VERY important to NOT merge your copied text with your base :

vs.

(YES) (NO)
See the difference?
Step 08: Again, repeat this step, for every frame you want to be blurred. At the end of all these steps, I am now ready to move into ImageReady.
Section B: ImageReady
There are less images for this section because while I used my PC to screencap the images, I'm using my Mac which, because of my geekiness, has Windows as well, but no print screen button. If you need me to further explain things, I can try and get caps for you using the labs here.
To enter ImageReady, click the icon at the very bottom of the tool bar. It will look different depending on what version of Photoshop you have, but it should look like an arrow coming out of a document, pointing to a logo. Once in ImageReady, your document should come up. At the bottom there should be a toolbar called "Animation." If it isn't, go to Window>Animation to bring it up.
Step 01: This is where it gets tricky. To start, click the arrow on the animation toolbar and click on "make frames from layers."
Step 02 (a): Woah, right? All those layers you had are now individual frames. But you don't want that. The first thing to do is to make sure your base layer is on all your frames. shift + click all your frames and then in the layers palette, click the little eyeball on your blank base layer. You may have to double-click if it's already visible on your current frame.
b: Now, for your first frame (the one with your first still text) click the first frame. Go to the layers palette and make visible (click the eyeball again) everything you want to be visible.
c: Lather, rinse, repeat for every additional frame you'd like to have. You can delete any extra frames at the end.
So this is what the animation menu looked like when I first clicked "make frames from layers":

And once I fixed all the frames:

Step 03: Timing is key in a good icon. For your transition frames, 0sec is fine. But to have a readable icon, your actual text frames need a longer timing. For this icon, I set the timing for the text frames to 2 seconds.
Now you're finished, right? Not quite! Always make sure your icon is under 40K[ilobytes], because LJ can't support icons higher than that. To check this, click the "2 up" tab on your document viewer. This way, you can see what the original looks like and what the .gif file will look like.
If it is too high, you can try fiddling with the optimizing features. Go to Window>Optimize to bring up the Optimize menu. Playing with the different settings will give you different results.