Lens Flare Tutorial
How to go from 
to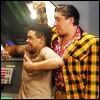
or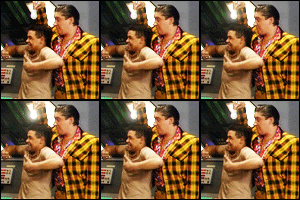
using Adobe Photoshop CS & lower and Image Ready
This tutorial requires moderate to advanced knowledge of both programs. Warning: IT IS RATHER LENGTHY.
PART I: Preparing the base
(Remember, this part you can alter as you like. I'm just giving you the break down of how I made the base for this particular icon. You can skip this part if you'd like.)
01. After cropping your image, duplicate it and set this layer to "screen."
02. Resize to 100 x 100. Duplicate your screen layer and set it to Soft Light.
03. Go to Filter -> Blur -> Gaussian Blur Use any settings you'd like.
04. Going back to your screen layer, duplicate it once again. Hit ctrl + shift + u to desaturate it.
PART II: Now for the shiny!
01. Make a new layer and set it also to "screen." Floodfill it black.
02. Go to Filter -> Render -> Lens Flare. Use these settings:
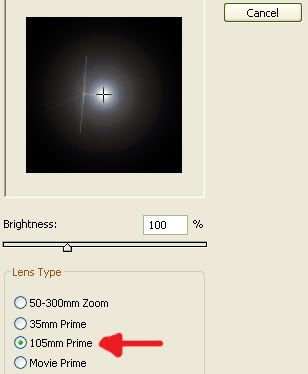
To move the crosshairs to the center, click the center of the dialog box.
04. Move this layer around until the flare is over the bulb. If it is too big, you can scale it down by going to Edit -> Transform -> Scale
That looks good, but it's looking a little boring. Let's play with the colour!
05. Go to Image -> Adjustments -> Hue/Saturation. Use these settings:
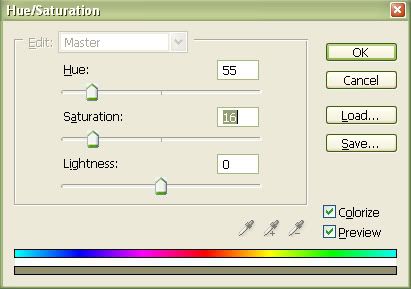
That's better. Now you can leave as is, or play with the opacity. For the final product, I brought the opacity down to 72%.
PART III: The Animation
Still with me? Good! This is where you need to know how to use Image Ready.
Firstly, hide your lens flare layer. Then select the whole icon by hitting ctrl + a
02. Go to Edit -> Copy Merged This will copy everything that is visible. This is why you must hide the lens flare layer.
03. Open a new 100 x 100 document. Paste in your base. DO NOT CLOSE THE ORIGINAL DOCUMENT!!!
04. Holding shift, click & drag your lens flare layer into your new document. Make sure you're selecting the image itself, NOT the layer. (Click here for clarification.)
05. Bring the opacity up to 100%
06. Duplicate your lens flare layer and bring the opacity down to 70%
07. Repeat step 06, but bring the opacity down to 30%.
08. And so on, until you have a good number of different opacities. You don't want any more than 4 or 5 layers.
09. Click on the Jump to Image Ready button. It's at the bottom of your toolbar. (This is what it looks like using Photoshop CS.)
10. Now that you're in Image Ready, make sure your animation tool bar is open. If it isn't, go to Window -> Animation to make sure there's a check next to "Animation."
11. Click the triangle (>) button on the animation toolbar and hit Make Frames From Layers.
12. Select them all by clicking the frames and using the layer window, click the square next to your base to make it visible on all layers. It should now look like this:
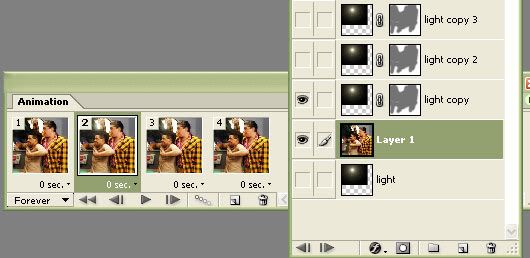
(You may have a different number of frames, depending on how many lens flare layers you have.)
13. Now, hold shift and click every frame except the first and last.
14. Click that triangle button again and hit Copy Frames
15. Move to your last frame.
16. Then choose Paste Frames... When the dialog box comes up, click Paste after Selection
Like so:
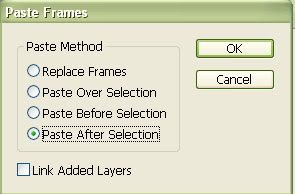
17. After hitting ok, DO NOT DESELECT THE FRAMES! Once again, click that little triangle and hit Reverse Frames
18. Hold shift and select all frames again. Click on the little thing that says 0 seconds Then hit Other For this icon, I used 0.15 seconds but this can change.
19. Hit the little internet explorer button on your main toolbar to preview it in a webpage. If it goes too slowly or too quickly, play with the speed. Also! Make sure that the size is below 40KB if you plan on using it as an LJ icon. To reduce the size, increase the speed. (0 seconds will give you the lowest size.)
20. To save, go to File -> Save Optimized As and make sure .gif is the file extension.
Whew! Done, finally!
Comments? Complaints? Compliments Need something clarified? Leave a comment!
More Examples:
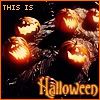
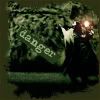


to

or

using Adobe Photoshop CS & lower and Image Ready
This tutorial requires moderate to advanced knowledge of both programs. Warning: IT IS RATHER LENGTHY.
PART I: Preparing the base
(Remember, this part you can alter as you like. I'm just giving you the break down of how I made the base for this particular icon. You can skip this part if you'd like.)
01. After cropping your image, duplicate it and set this layer to "screen."
02. Resize to 100 x 100. Duplicate your screen layer and set it to Soft Light.
03. Go to Filter -> Blur -> Gaussian Blur Use any settings you'd like.
04. Going back to your screen layer, duplicate it once again. Hit ctrl + shift + u to desaturate it.
PART II: Now for the shiny!
01. Make a new layer and set it also to "screen." Floodfill it black.
02. Go to Filter -> Render -> Lens Flare. Use these settings:

To move the crosshairs to the center, click the center of the dialog box.
04. Move this layer around until the flare is over the bulb. If it is too big, you can scale it down by going to Edit -> Transform -> Scale
That looks good, but it's looking a little boring. Let's play with the colour!
05. Go to Image -> Adjustments -> Hue/Saturation. Use these settings:

That's better. Now you can leave as is, or play with the opacity. For the final product, I brought the opacity down to 72%.
PART III: The Animation
Still with me? Good! This is where you need to know how to use Image Ready.
Firstly, hide your lens flare layer. Then select the whole icon by hitting ctrl + a
02. Go to Edit -> Copy Merged This will copy everything that is visible. This is why you must hide the lens flare layer.
03. Open a new 100 x 100 document. Paste in your base. DO NOT CLOSE THE ORIGINAL DOCUMENT!!!
04. Holding shift, click & drag your lens flare layer into your new document. Make sure you're selecting the image itself, NOT the layer. (Click here for clarification.)
05. Bring the opacity up to 100%
06. Duplicate your lens flare layer and bring the opacity down to 70%
07. Repeat step 06, but bring the opacity down to 30%.
08. And so on, until you have a good number of different opacities. You don't want any more than 4 or 5 layers.
09. Click on the Jump to Image Ready button. It's at the bottom of your toolbar. (This is what it looks like using Photoshop CS.)
10. Now that you're in Image Ready, make sure your animation tool bar is open. If it isn't, go to Window -> Animation to make sure there's a check next to "Animation."
11. Click the triangle (>) button on the animation toolbar and hit Make Frames From Layers.
12. Select them all by clicking the frames and using the layer window, click the square next to your base to make it visible on all layers. It should now look like this:

(You may have a different number of frames, depending on how many lens flare layers you have.)
13. Now, hold shift and click every frame except the first and last.
14. Click that triangle button again and hit Copy Frames
15. Move to your last frame.
16. Then choose Paste Frames... When the dialog box comes up, click Paste after Selection
Like so:

17. After hitting ok, DO NOT DESELECT THE FRAMES! Once again, click that little triangle and hit Reverse Frames
18. Hold shift and select all frames again. Click on the little thing that says 0 seconds Then hit Other For this icon, I used 0.15 seconds but this can change.
19. Hit the little internet explorer button on your main toolbar to preview it in a webpage. If it goes too slowly or too quickly, play with the speed. Also! Make sure that the size is below 40KB if you plan on using it as an LJ icon. To reduce the size, increase the speed. (0 seconds will give you the lowest size.)
20. To save, go to File -> Save Optimized As and make sure .gif is the file extension.
Whew! Done, finally!
Comments? Complaints? Compliments Need something clarified? Leave a comment!
More Examples: