Steampunk. Fit the whatever.
I think this is issue 3. I might well be wrong. ( Previously on steampunk)
Anyway, more stuff has been done. As promised last time, frosting has been added to the window, (An A3 sheet of thin, fairly rigid frosted plastic sheet was cut to shape and glued on the inside of the window. I haven't actually taken a decent shot of this yet, but you can see it on the photograph illustrating the feet. The LED fans look pretty good through it- they're visible as glowing shapeless blobs, and components and cables are just visible if they're close enough to the window.
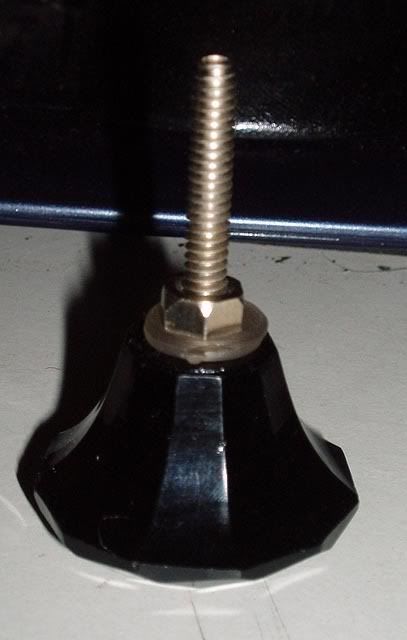
I also said I'd get some feet. So I visited John Lewis, and bought four of these fine drawer knobs. Not quite as nice as the brass and amber glass one I saw in Homebase, but they had enough (I've not seen more than one of the others) and they were about half the price. £9 or so does me nicely I think there.

All screwed on, and you can see the frosted window too.

And in place.

Hmm that front panel needs a polish. I might want to touch up the edges of the usb cover too!.
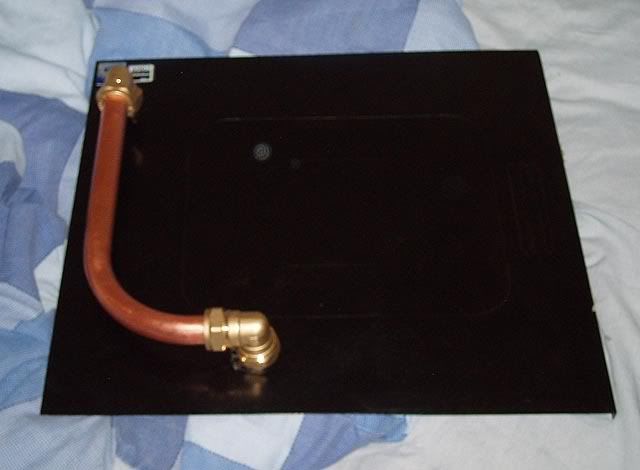
Never mind on with the next part- Copper Tubing! A mate had a section of pipe "too small to be of further use" in his attic, which he gave to me. One straight section, connected to a bent bit. Attack it with some Brasso, wet 'n' dry sandpaper and the polishing bit on the Rotary Tool, and it comes up lovely. A couple of 90 degree angles, a couple of dollops of Evostick and Hey Presto! Copper Pipe!
Sadly while it looks good it isn't functional. Maybe when I build my own watercooled rig. Maybe when I have a job that means I can afford a rig that deserves to be watercooled!


Replacing the power switch. When I took off the front to add the brass, I broke off the cable for the reset switch and couldn't reattach it. So I decide to buy a new switch and replace it. First I tried a simple foot switch, only I bough the wrong one (a Single Throw, Double Pole- for those of you who care) I couldn't make it work no matter which way I wired it- despite the internet indicating that it should work. I return it and am told by TCRs branch that nothing will work, they sell a specific one (nasty black plastic- not at all what I need). This is odd 'cos their website says several switches are usable. (It turns out that as long as its a "momentary switch" everything will be fine.) These fine folks sell Vandal Resistant Switches for casemodding, but they ain't cheap (especially after P&P) and I don't really want the LED version. So, another trip to Maplins (Wood Green this time) and I get the plain silver version they sell. The chap there didn't think I'd have any problem, and indeed I don't! (Plus its only got two contacts, even I can't mess that up.) Swap the reset and power supply jumpers around and I have a big silver "on" button!

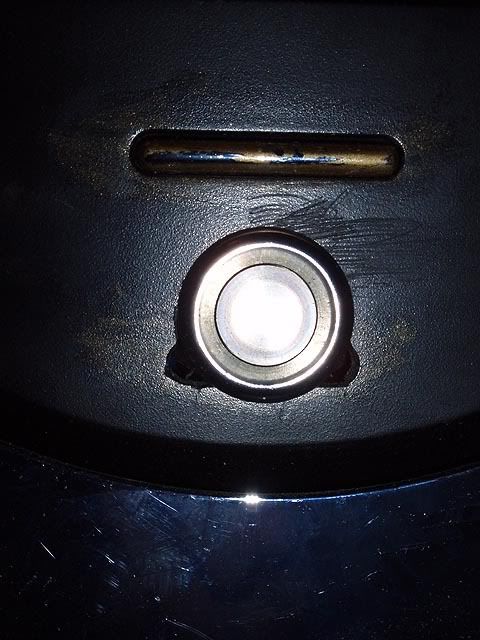
You can see that the paint has worn off the old power button in no time. Now its the reset button I don't think this will be too much of a problem. (I'll either remove the paint completely and leave it silver or repaint it. Not sure which yet). I also need to add the HDD LED back in, so that's another hole to drill.
Drilling the hole to push the Vandal Switch through wasn't easy, and I've scratched the front. Buffing it with the rotary made it worse. I misjudged it and the scratch is now bigger and more prominent. Its no great loss, as because the new switch doesn't quite cover the old hole I need to make a cover anyway. I think a trip to 4D models for some veneer is in order.
Planning is also in progress for the keyboard too.
As an aside, does anyone know how many LEDs can be attached to a single HDD LED header? Either in series or parallel? I like the idea of having twin HDD LEDs either side of the reset/power buttons, rather than everything in a row.
Anyway, more stuff has been done. As promised last time, frosting has been added to the window, (An A3 sheet of thin, fairly rigid frosted plastic sheet was cut to shape and glued on the inside of the window. I haven't actually taken a decent shot of this yet, but you can see it on the photograph illustrating the feet. The LED fans look pretty good through it- they're visible as glowing shapeless blobs, and components and cables are just visible if they're close enough to the window.
I also said I'd get some feet. So I visited John Lewis, and bought four of these fine drawer knobs. Not quite as nice as the brass and amber glass one I saw in Homebase, but they had enough (I've not seen more than one of the others) and they were about half the price. £9 or so does me nicely I think there.

All screwed on, and you can see the frosted window too.

And in place.

Hmm that front panel needs a polish. I might want to touch up the edges of the usb cover too!.
Never mind on with the next part- Copper Tubing! A mate had a section of pipe "too small to be of further use" in his attic, which he gave to me. One straight section, connected to a bent bit. Attack it with some Brasso, wet 'n' dry sandpaper and the polishing bit on the Rotary Tool, and it comes up lovely. A couple of 90 degree angles, a couple of dollops of Evostick and Hey Presto! Copper Pipe!
Sadly while it looks good it isn't functional. Maybe when I build my own watercooled rig. Maybe when I have a job that means I can afford a rig that deserves to be watercooled!


Replacing the power switch. When I took off the front to add the brass, I broke off the cable for the reset switch and couldn't reattach it. So I decide to buy a new switch and replace it. First I tried a simple foot switch, only I bough the wrong one (a Single Throw, Double Pole- for those of you who care) I couldn't make it work no matter which way I wired it- despite the internet indicating that it should work. I return it and am told by TCRs branch that nothing will work, they sell a specific one (nasty black plastic- not at all what I need). This is odd 'cos their website says several switches are usable. (It turns out that as long as its a "momentary switch" everything will be fine.) These fine folks sell Vandal Resistant Switches for casemodding, but they ain't cheap (especially after P&P) and I don't really want the LED version. So, another trip to Maplins (Wood Green this time) and I get the plain silver version they sell. The chap there didn't think I'd have any problem, and indeed I don't! (Plus its only got two contacts, even I can't mess that up.) Swap the reset and power supply jumpers around and I have a big silver "on" button!

You can see that the paint has worn off the old power button in no time. Now its the reset button I don't think this will be too much of a problem. (I'll either remove the paint completely and leave it silver or repaint it. Not sure which yet). I also need to add the HDD LED back in, so that's another hole to drill.
Drilling the hole to push the Vandal Switch through wasn't easy, and I've scratched the front. Buffing it with the rotary made it worse. I misjudged it and the scratch is now bigger and more prominent. Its no great loss, as because the new switch doesn't quite cover the old hole I need to make a cover anyway. I think a trip to 4D models for some veneer is in order.
Planning is also in progress for the keyboard too.
As an aside, does anyone know how many LEDs can be attached to a single HDD LED header? Either in series or parallel? I like the idea of having twin HDD LEDs either side of the reset/power buttons, rather than everything in a row.