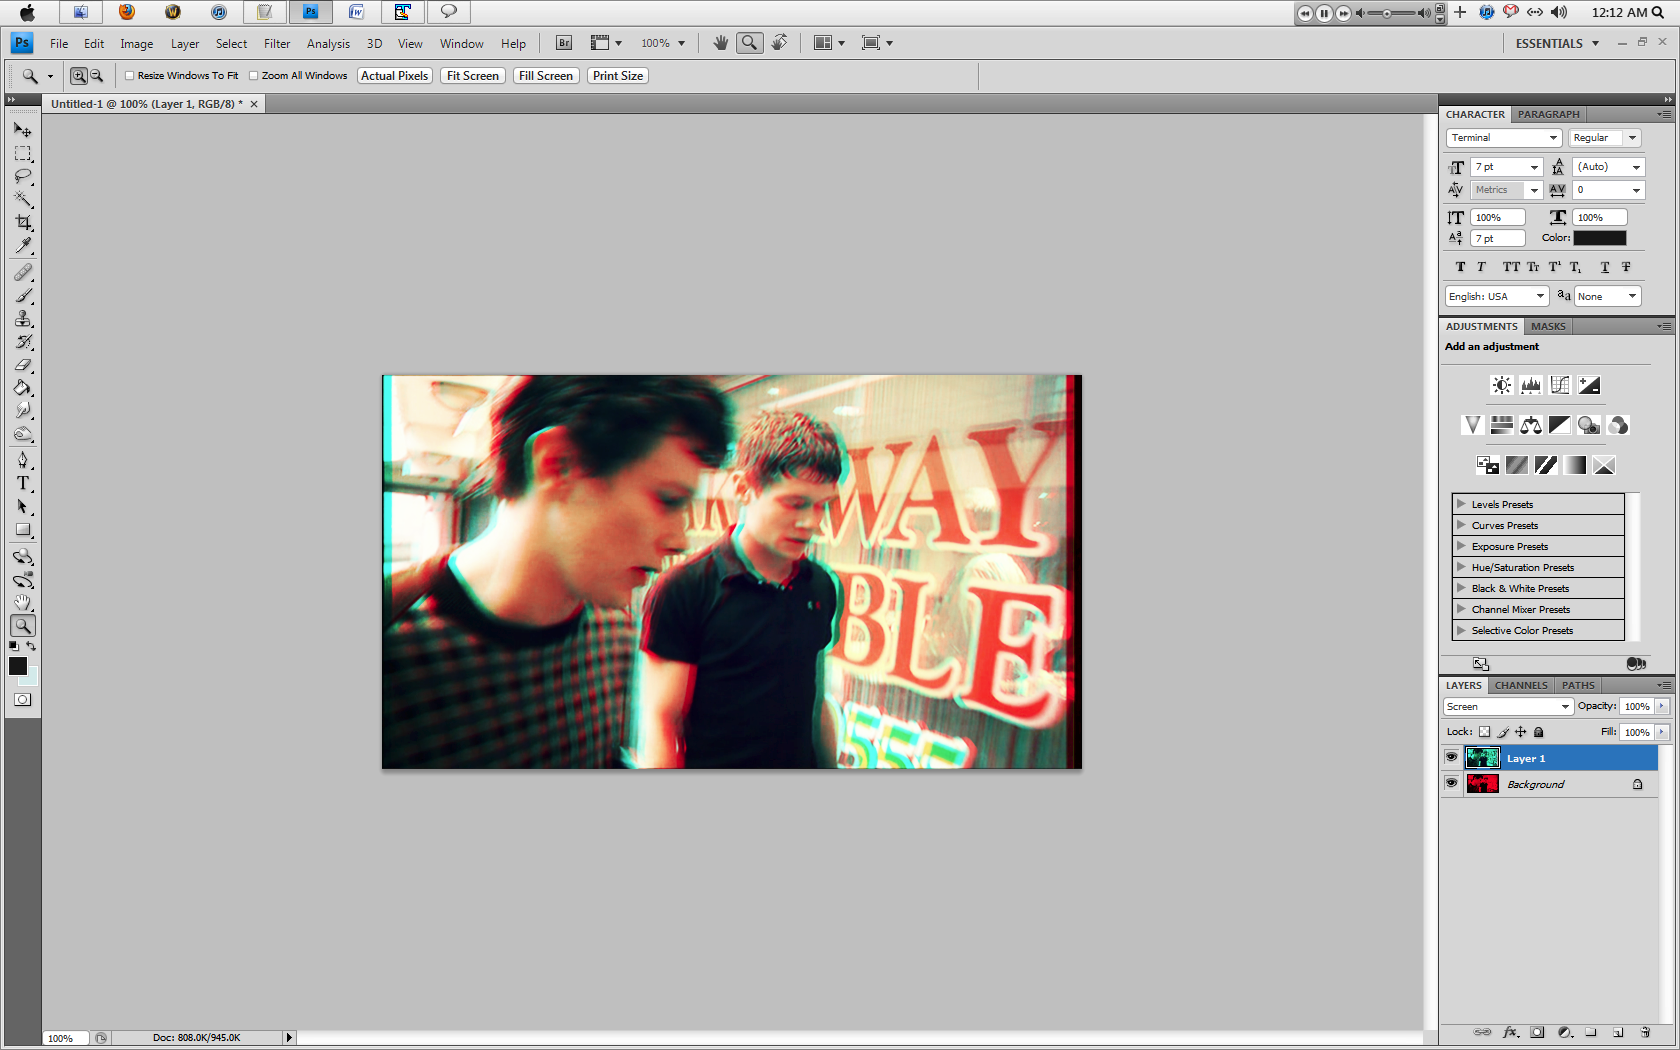
026.

I've noticed this trend where somehow, anaglyph imaging became ~the thing to do in Photoshop. I haven't found another tutorial on it - likely since it's rather easy, and anyone who knows their program should know how to do this already. If you don't know simple actions such as opening files, I suggest you read that first, as this isn't in-depth :p
* No, I won't make a PSD as this is literally a few steps. Such comments will be deleted. *
With Two Images-
001) Do any pre-coloring that you want first, and once that's done open your images in a single document (copy and paste the second image into the document with the first image), and set your second image to screen, 50%.
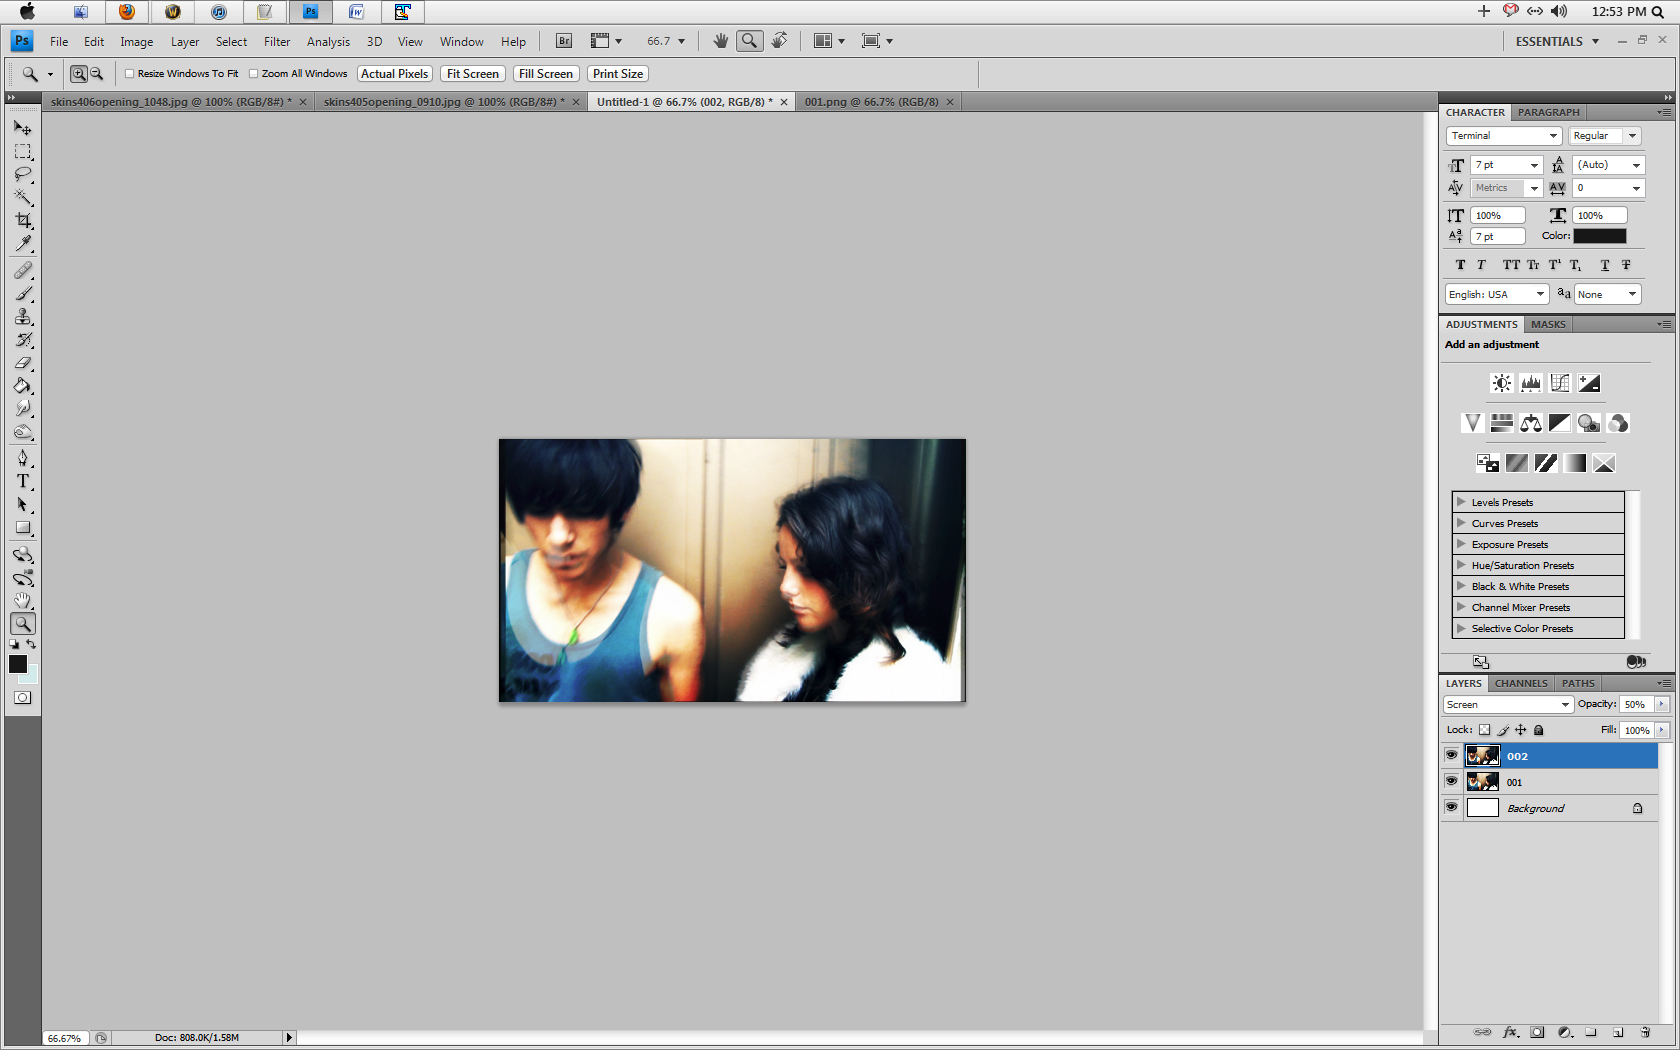
002) With your second image (screen layer), go to Image > Adjustments > Levels and choose the Red channel (in the drop-down menu).

003) Under 'Output', drag the slider under '255' until it's at '0' - this should make your layer green.
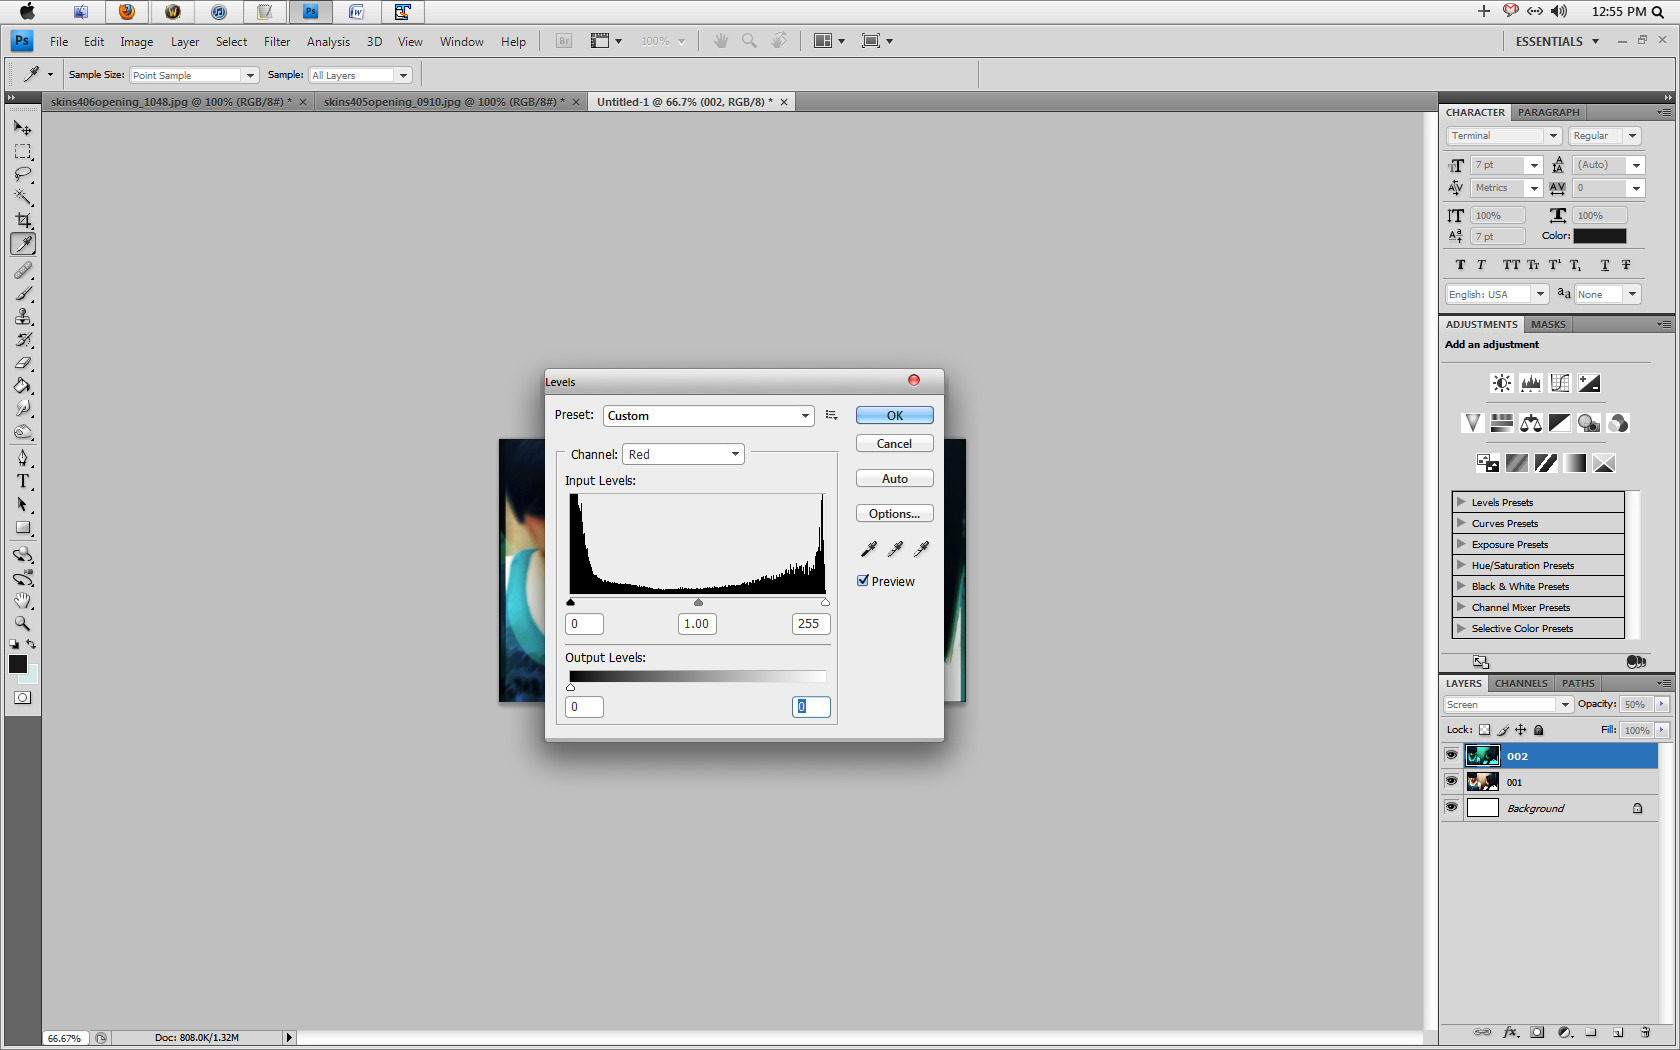
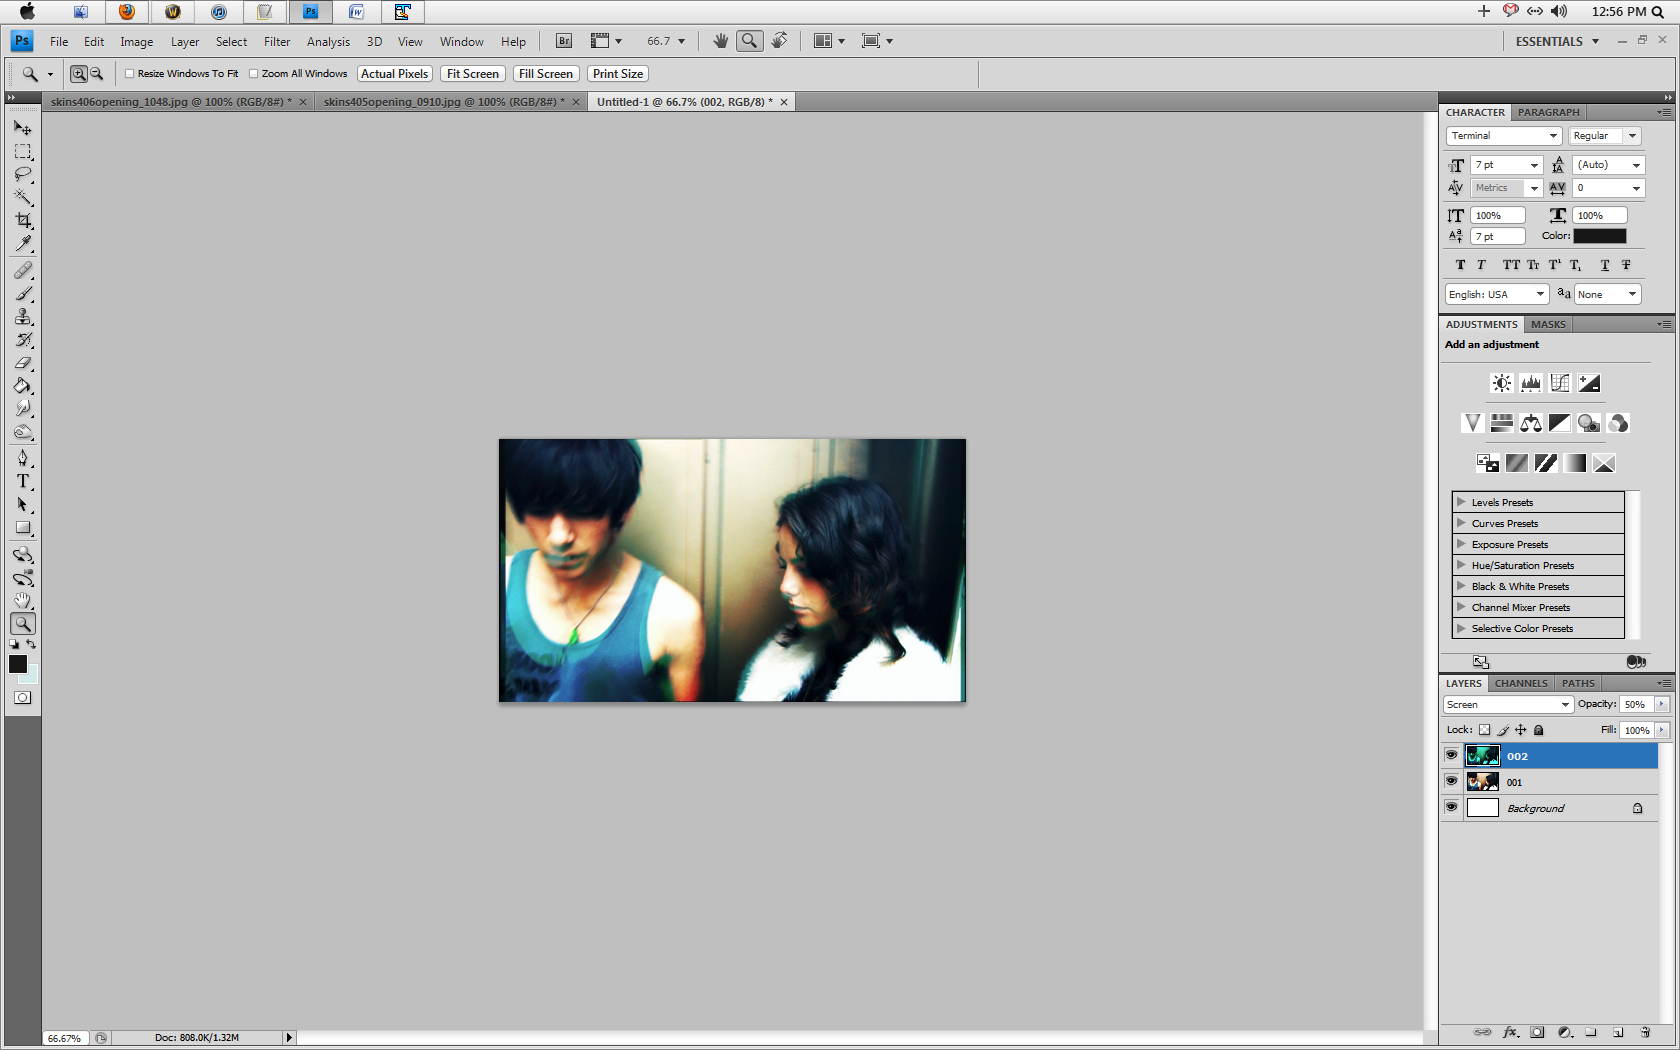
Click the 'eye' next to the layer to make it invisible so we can see what we're doing in the next step.
004) Now, with your first layer (under the screen layer), go to Image > Adjustments > Levels and choose the Green channel (in the drop-down menu). Under 'Output', drag the slider under '255' until it's at '0'. Then, choose the Blue channel and under 'Output', drag the slider from '255' to '0'. This should make your layer red.
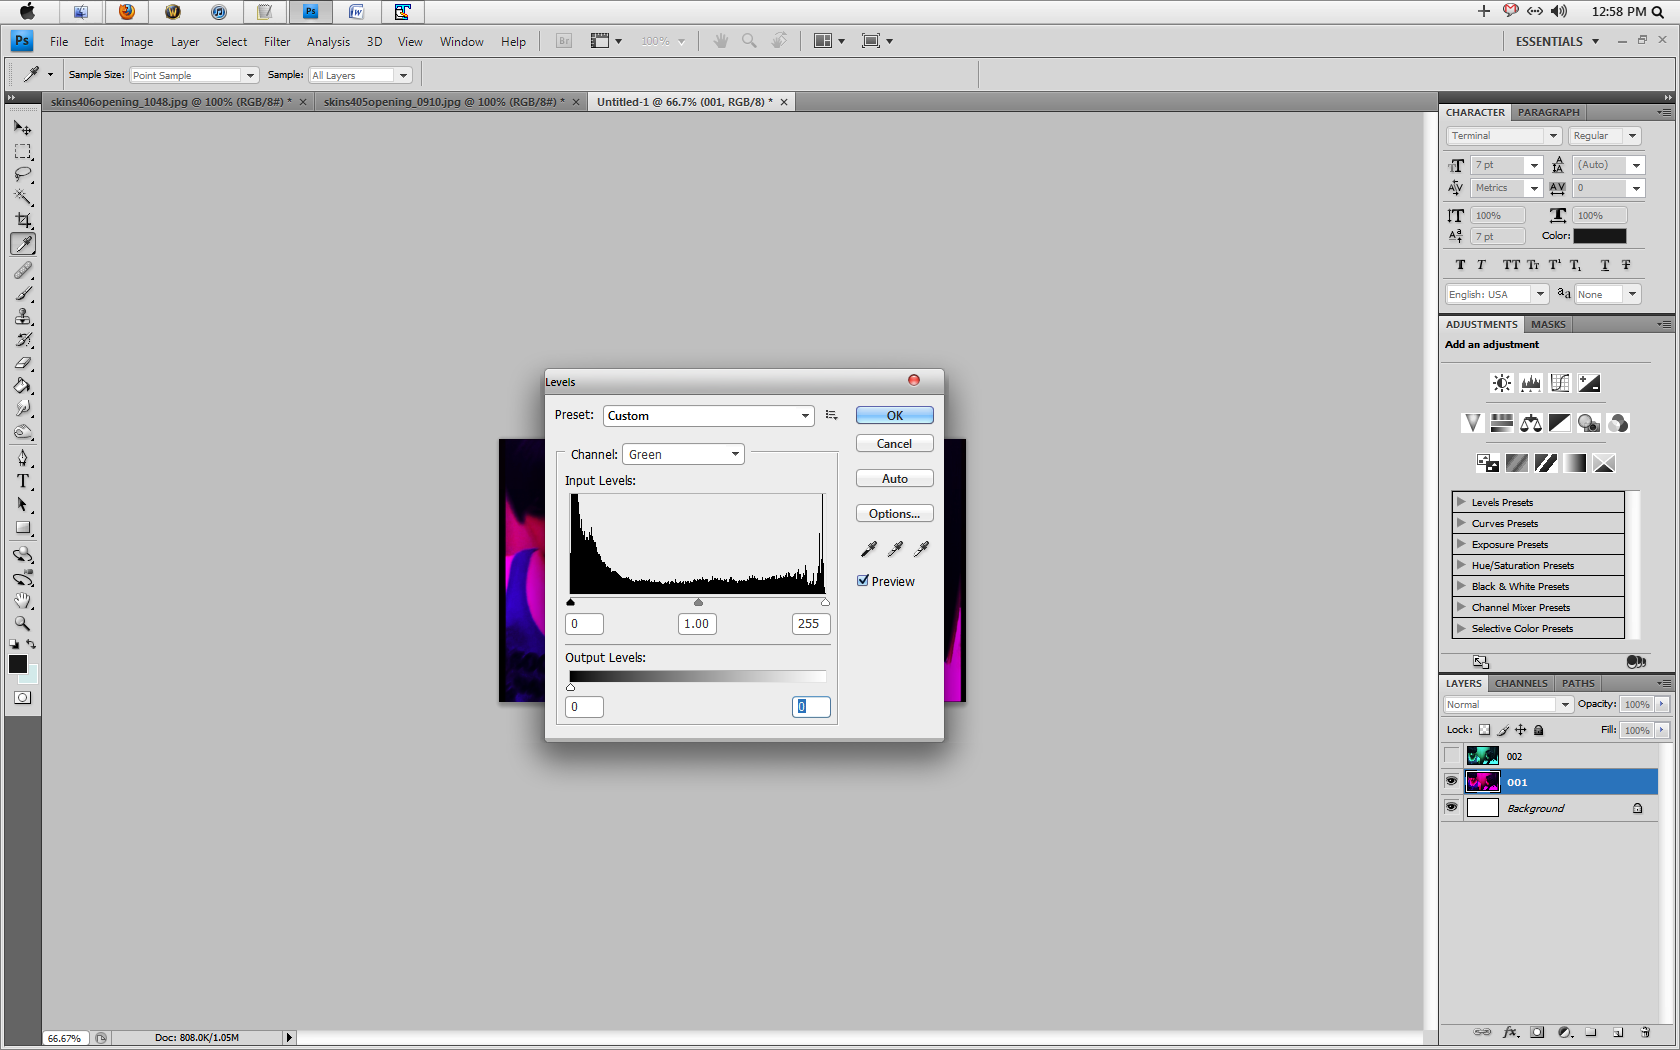
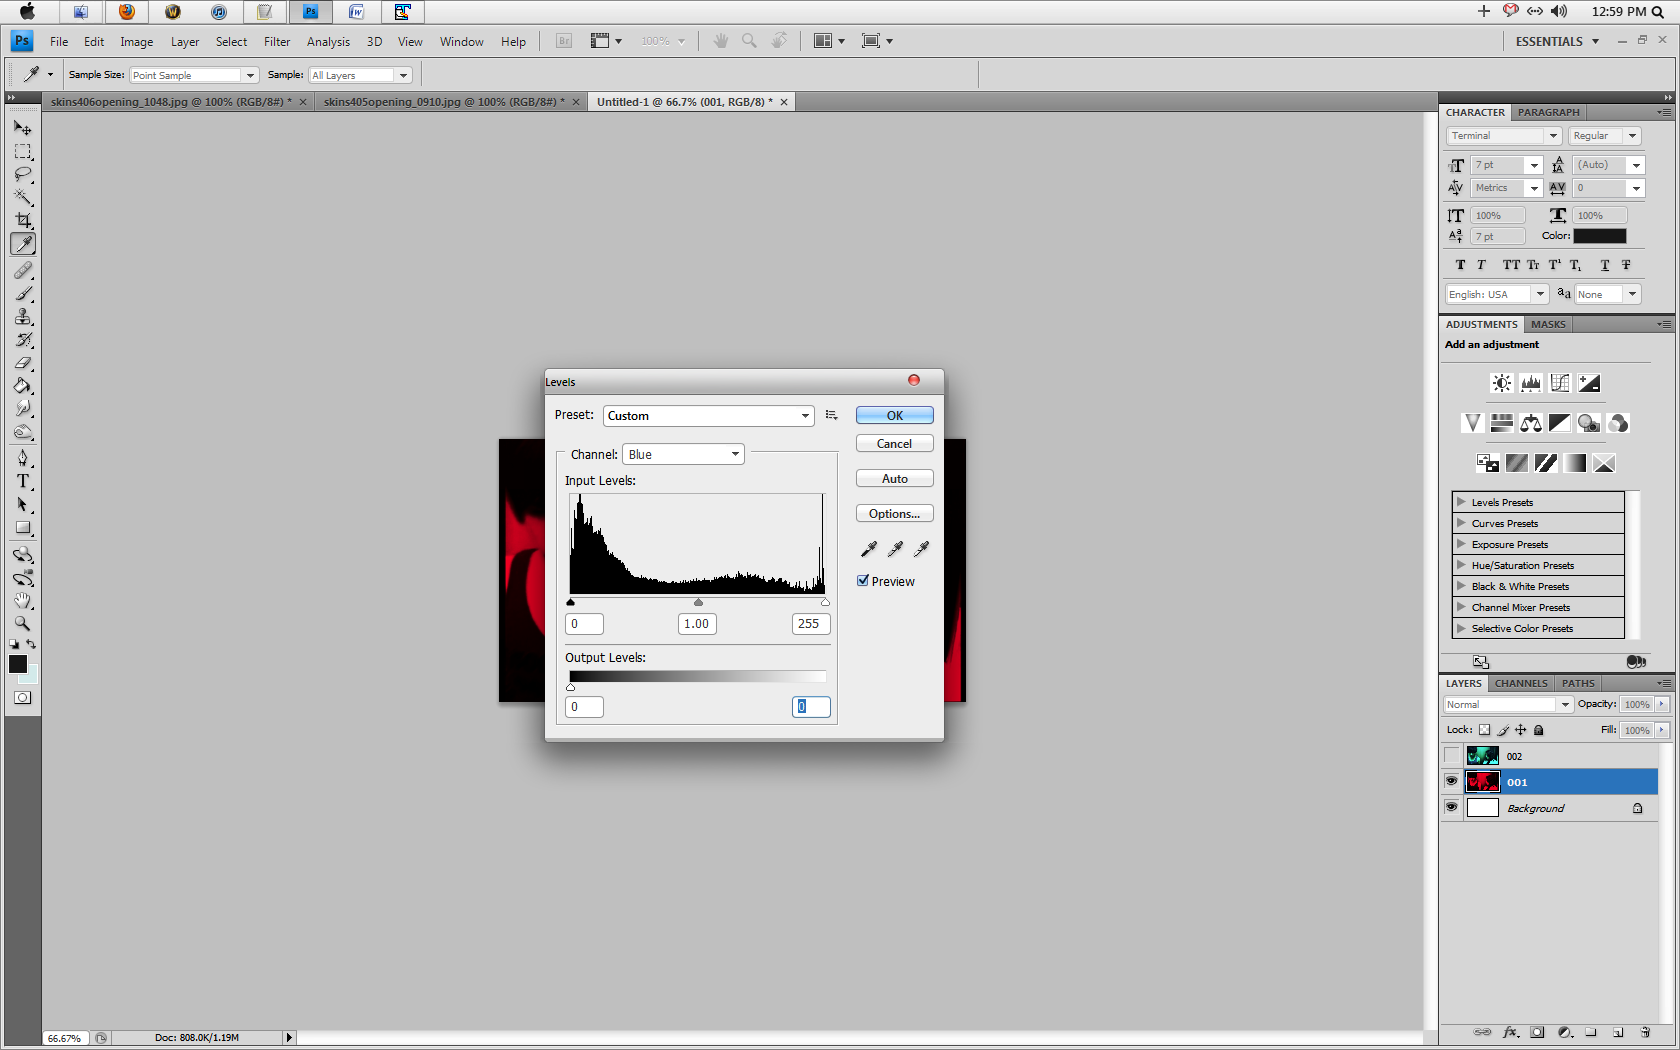
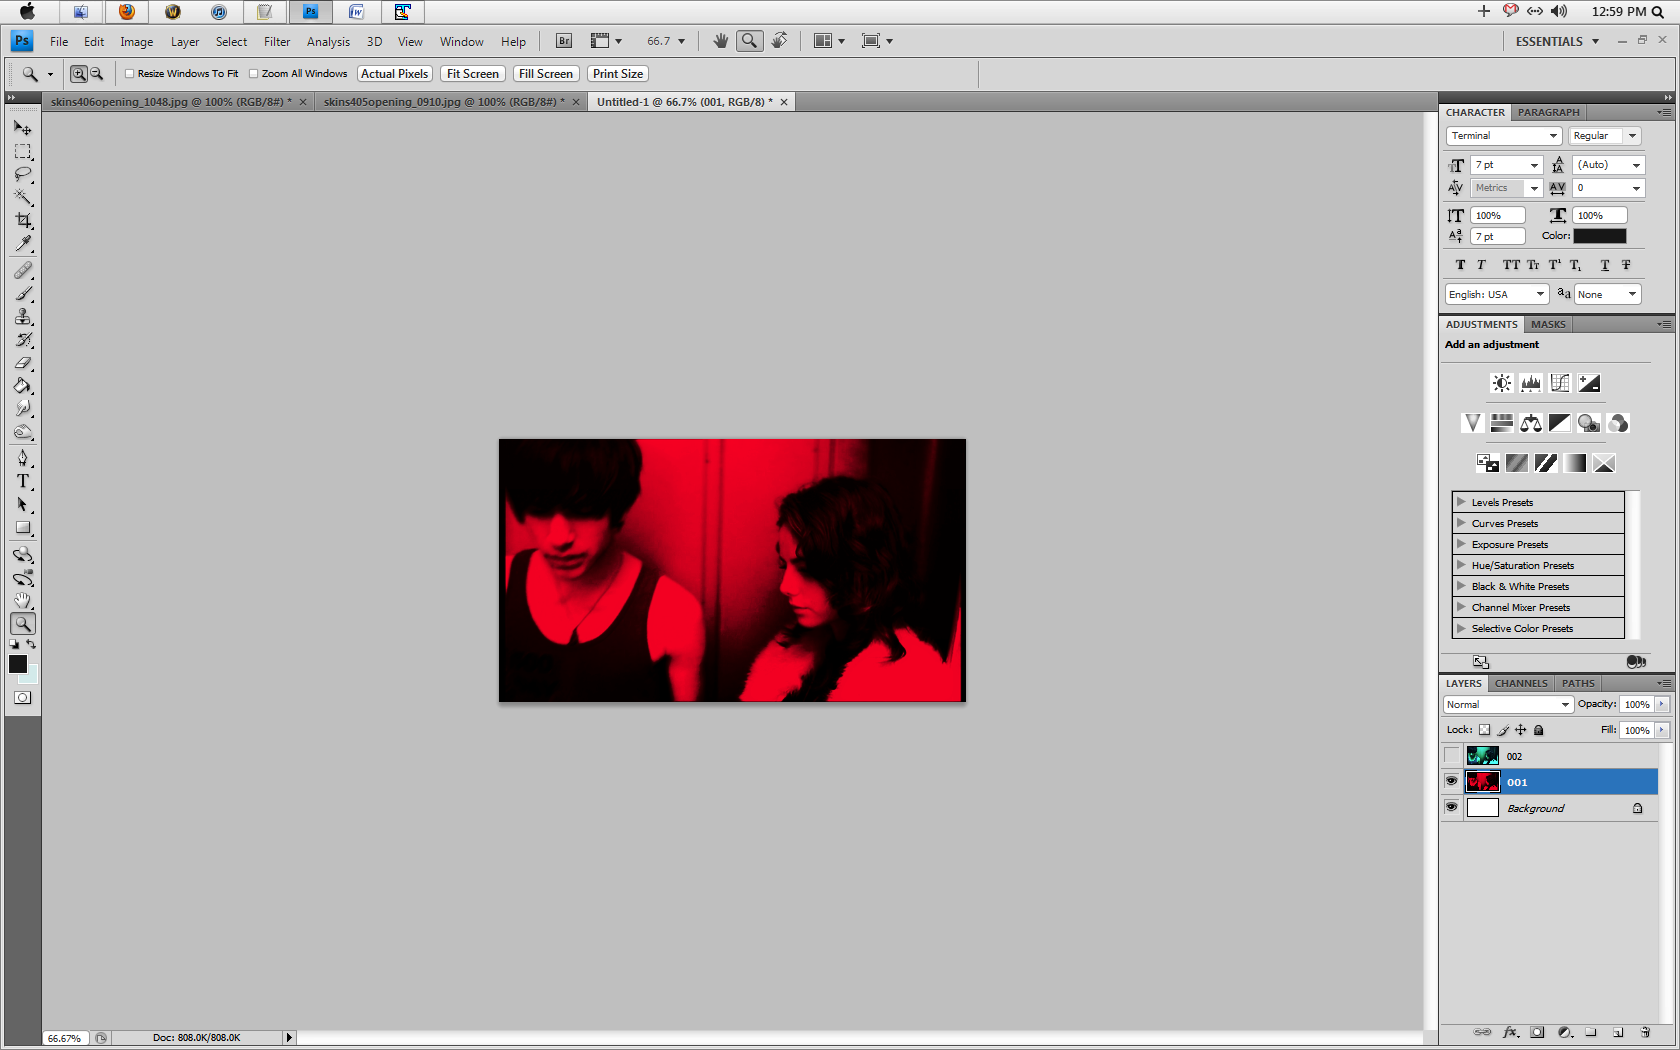
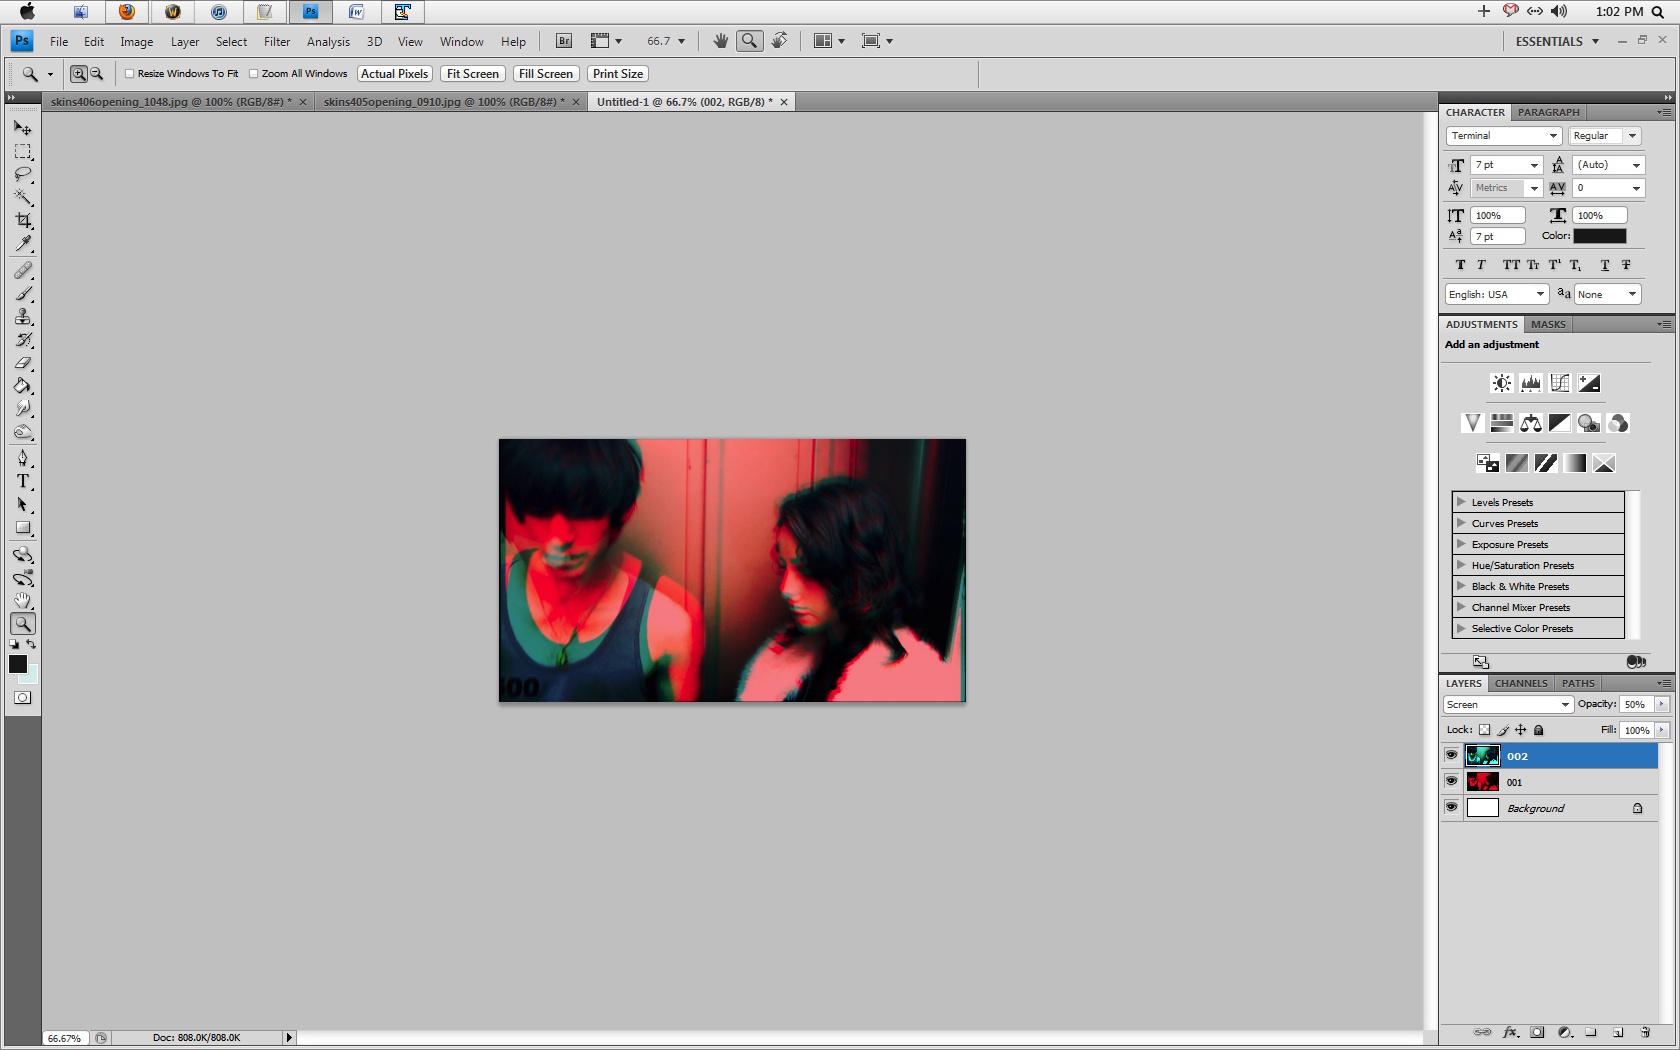
005) Now, make your screen layer visible again (click the eye), and voila! We have our anaglyph image! If you'd like, you can change the opacity on the 'screen' layer to whatever suits your taste. Experiment!
With One Image-
001) Do any pre-coloring that you want first, and once that's done open your images in a single document (copy and paste the second image into the document with the first image), and set your second image to screen, 50%.
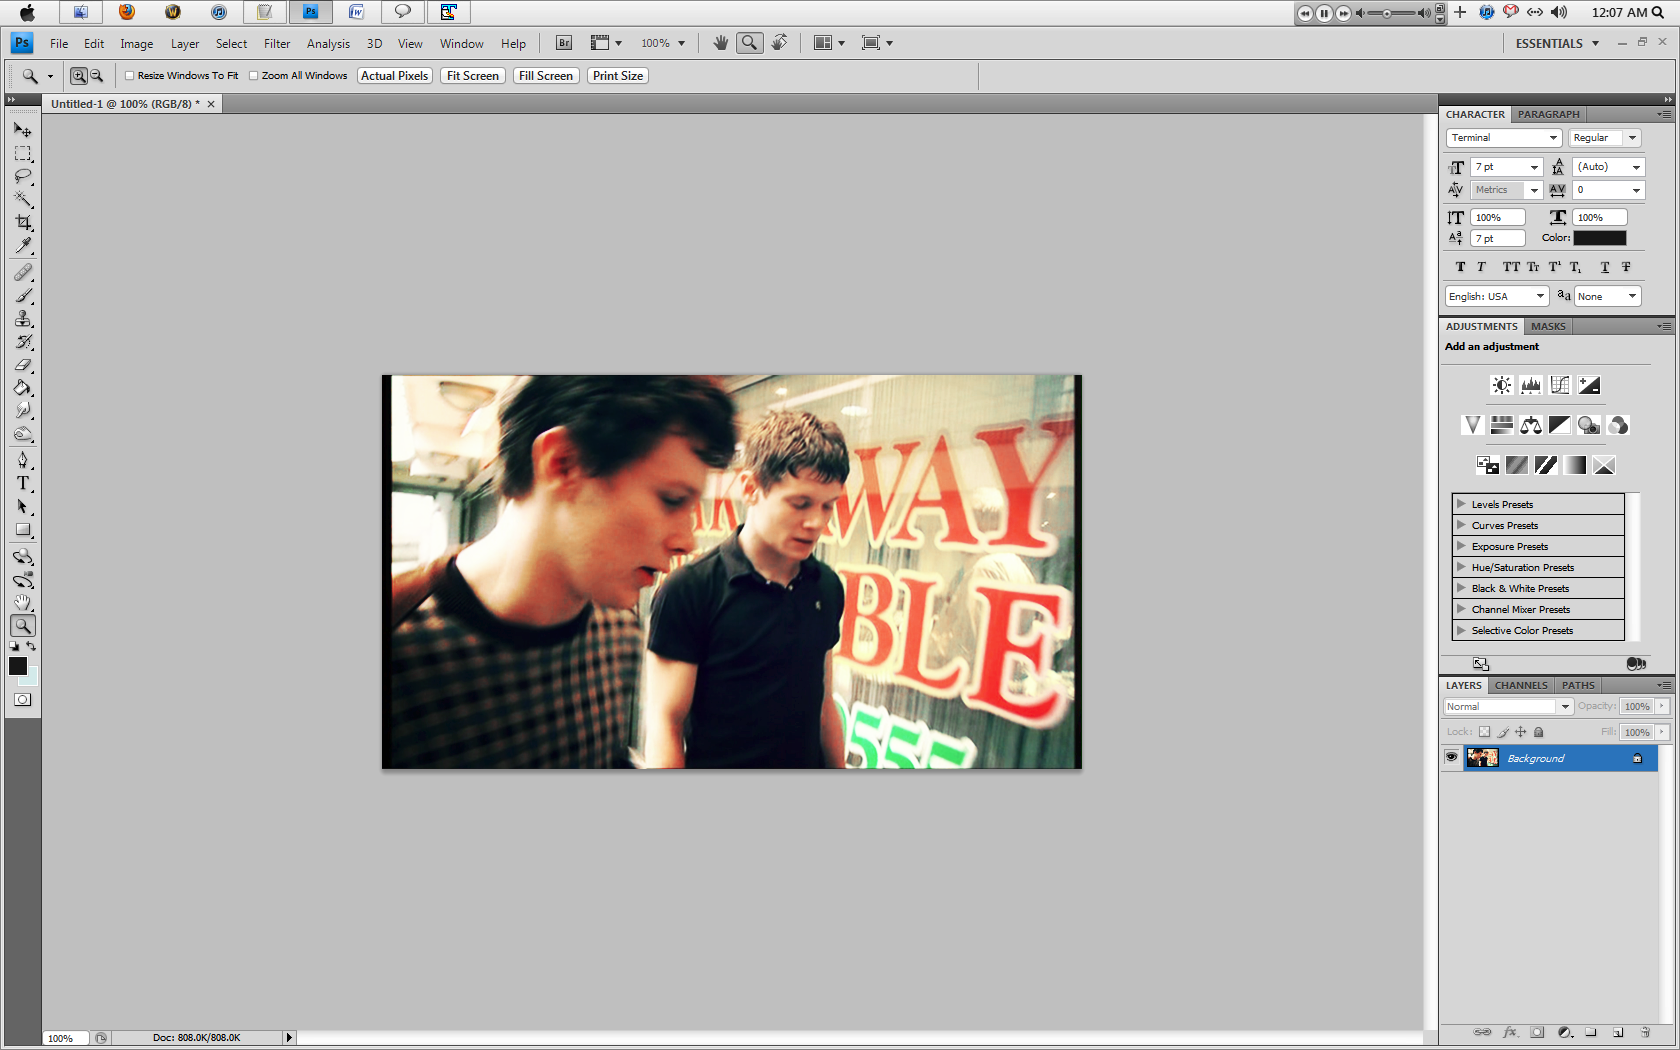
001-a) Here's the trick to using one image: You're going to take your screen layer, and move it just a tad to the left/right/top/bottom to give the effect of 'motion'.
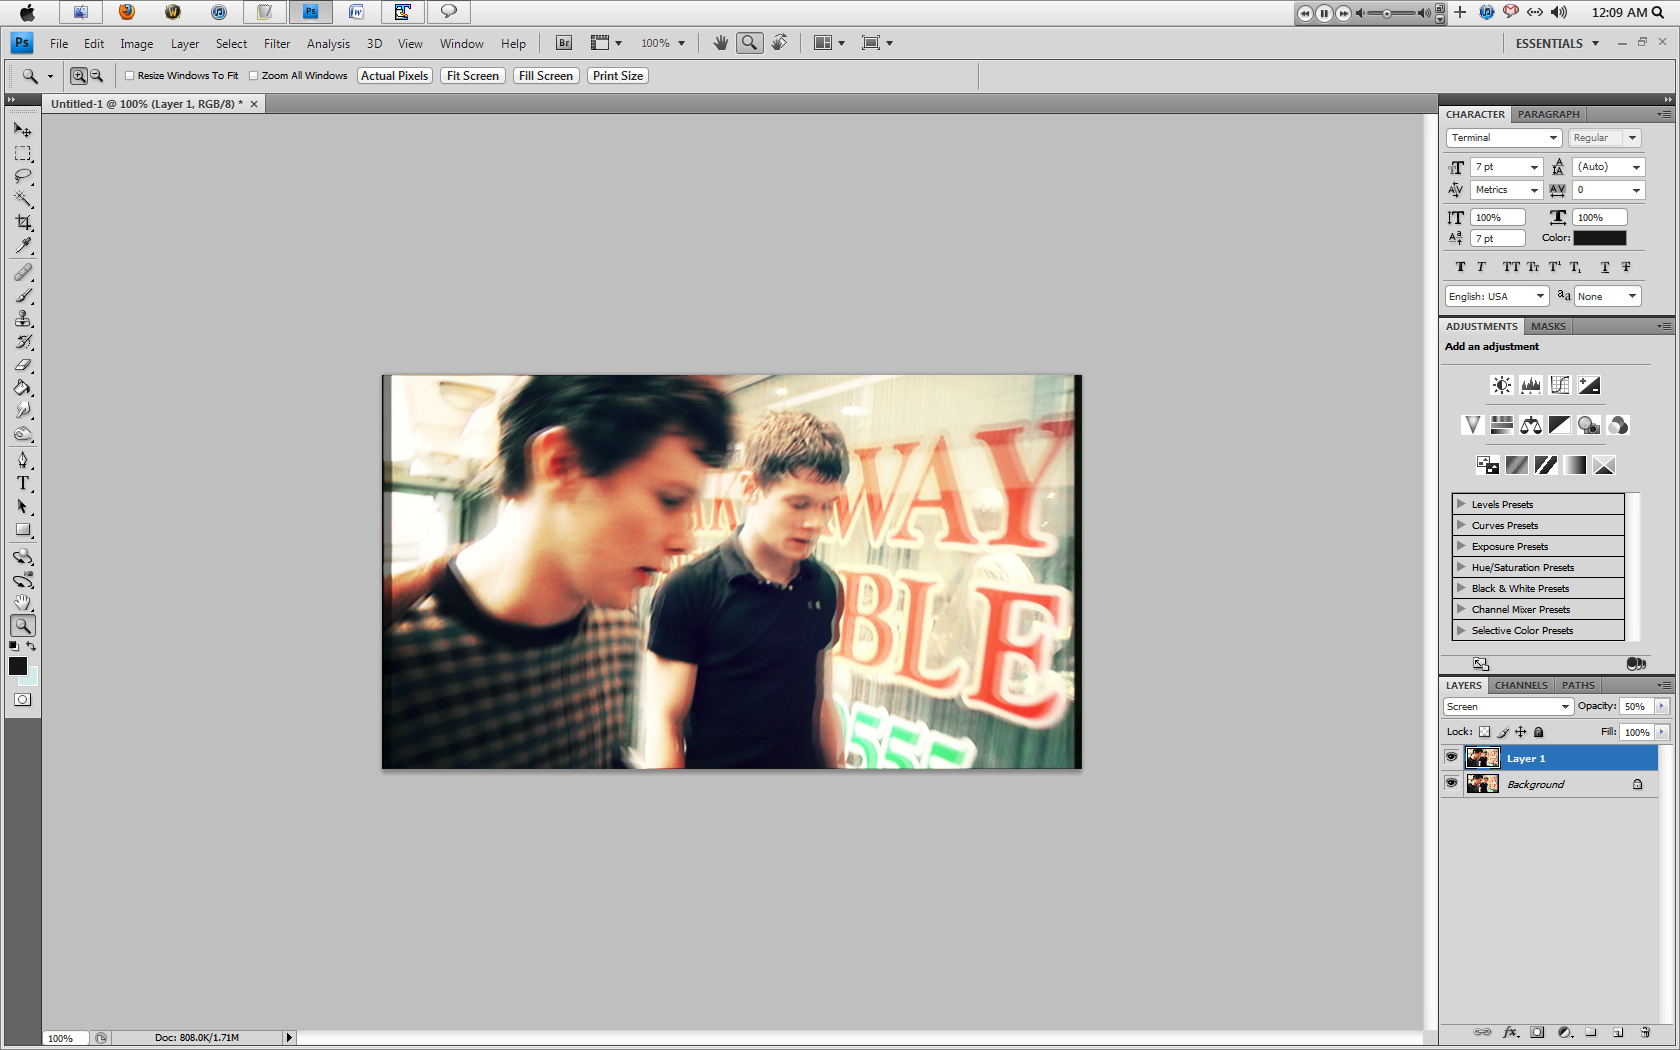
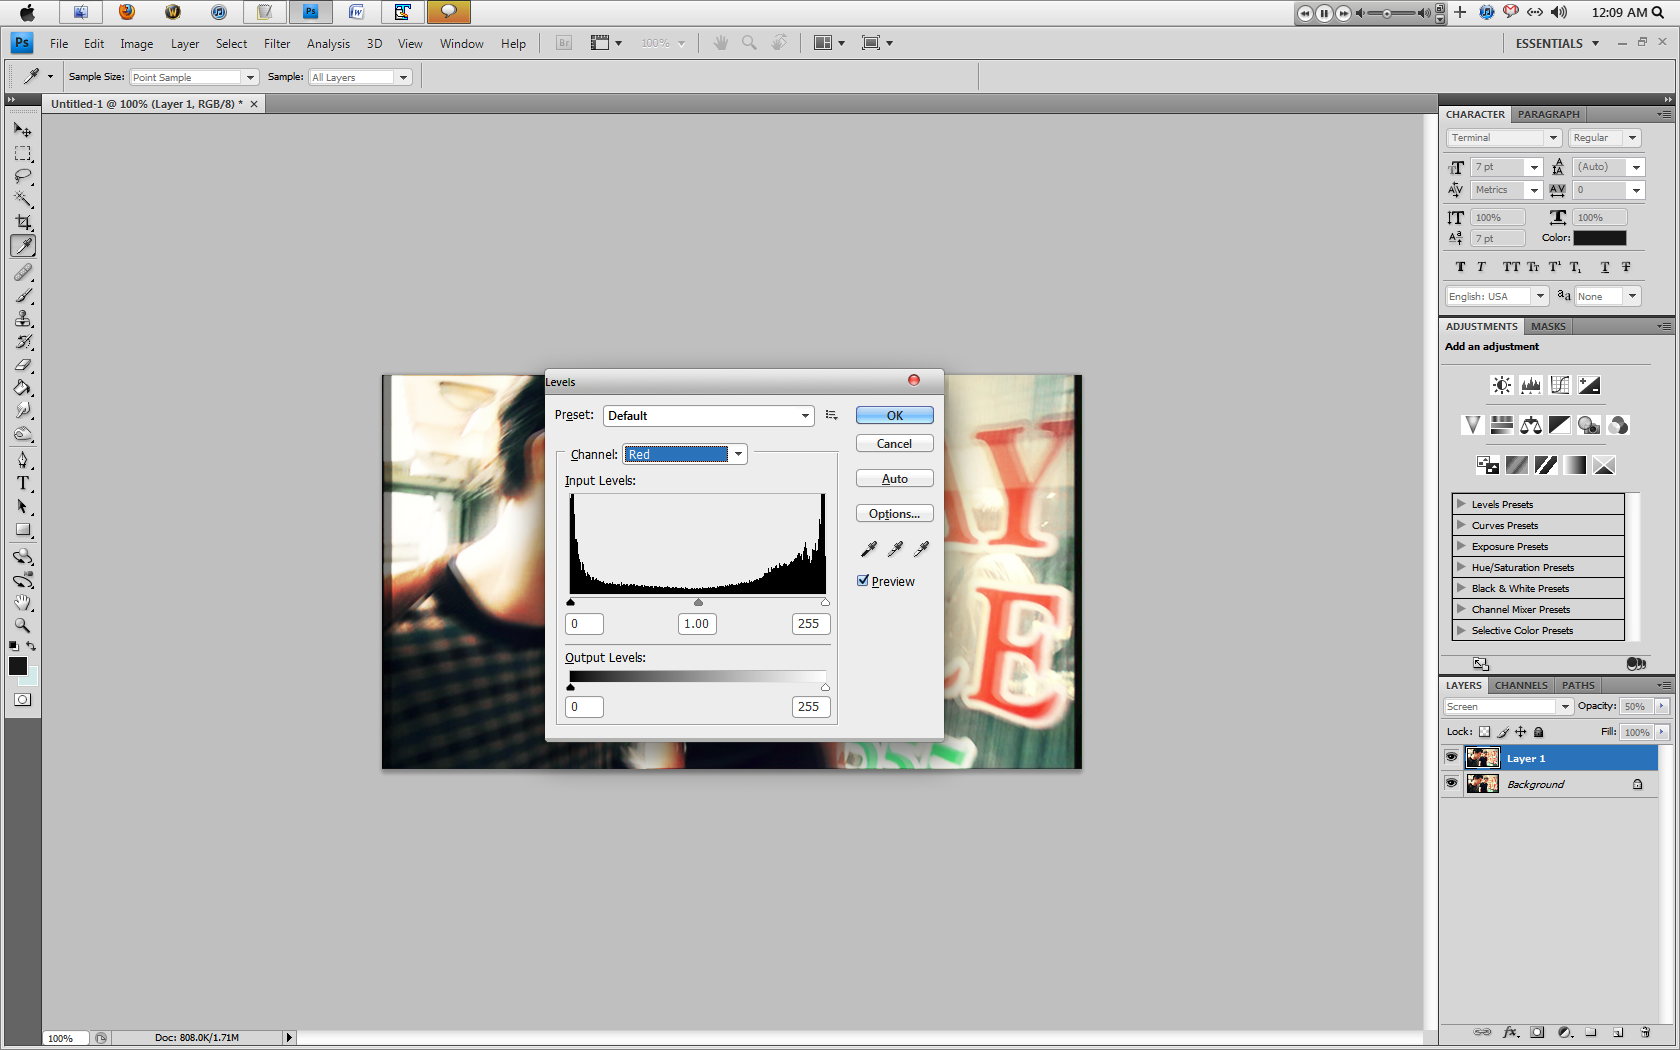
002) With your second image (screen layer), go to Image > Adjustments > Levels and choose the Red channel (in the drop-down menu).
003) Under 'Output', drag the slider under '255' until it's at '0' - this should make your layer green.
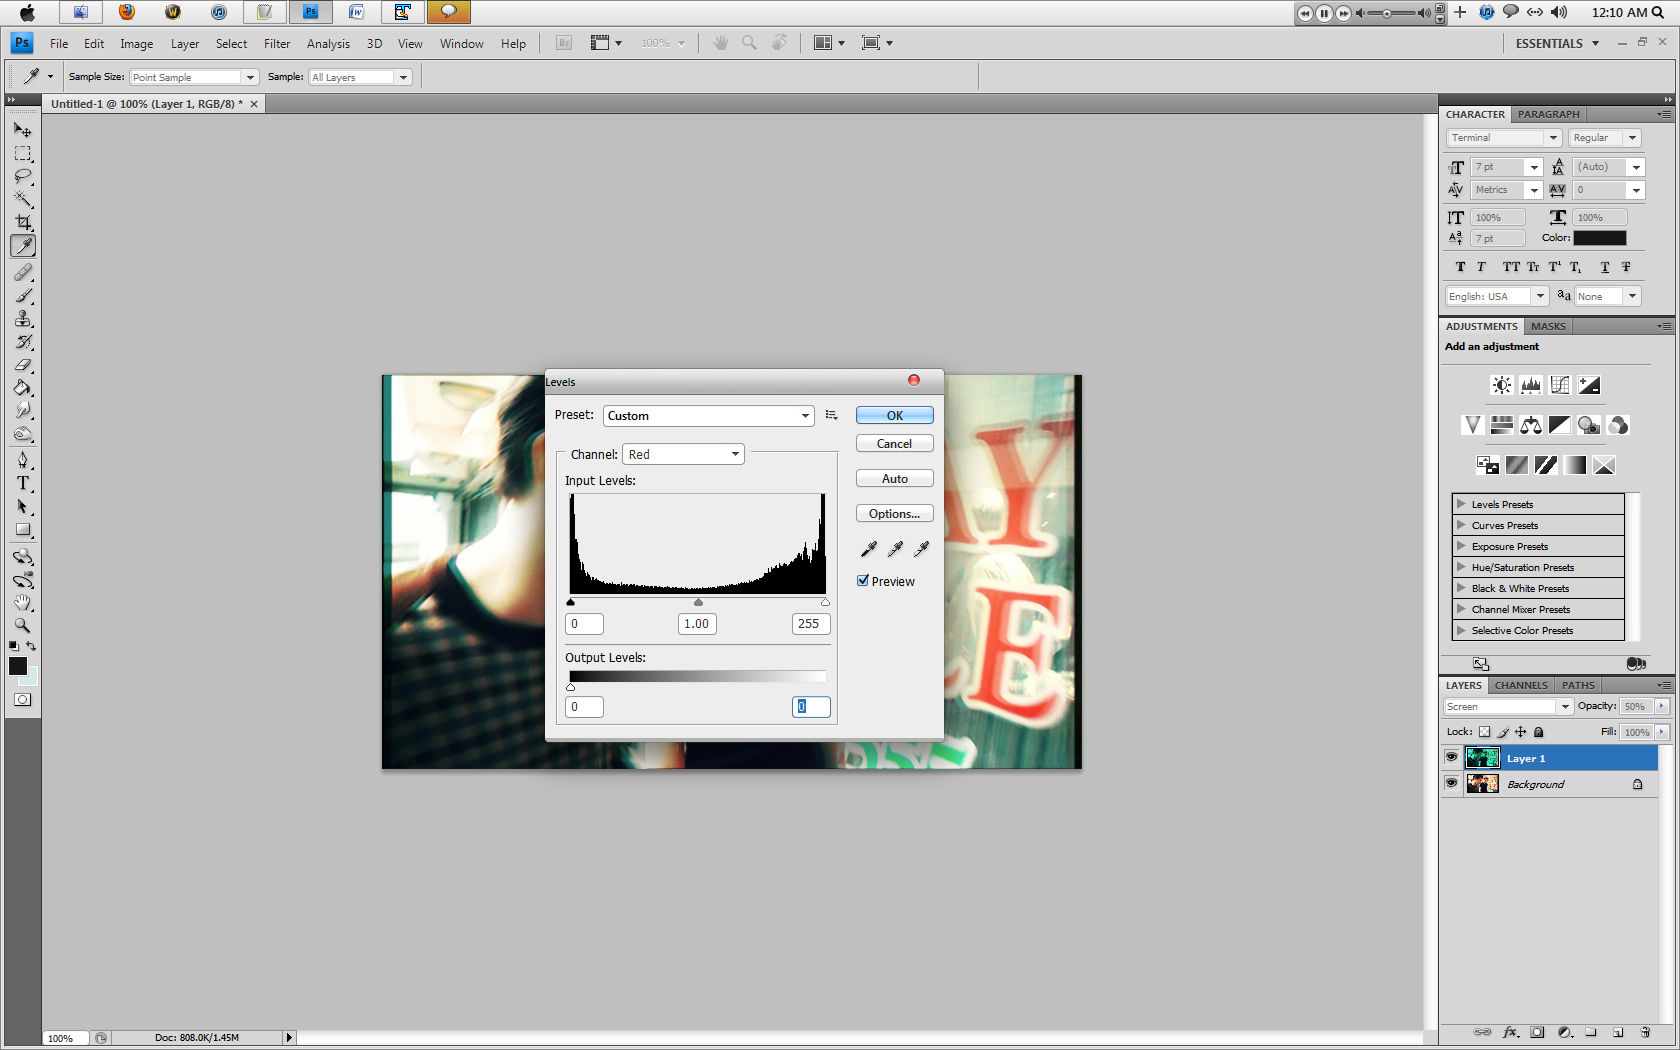
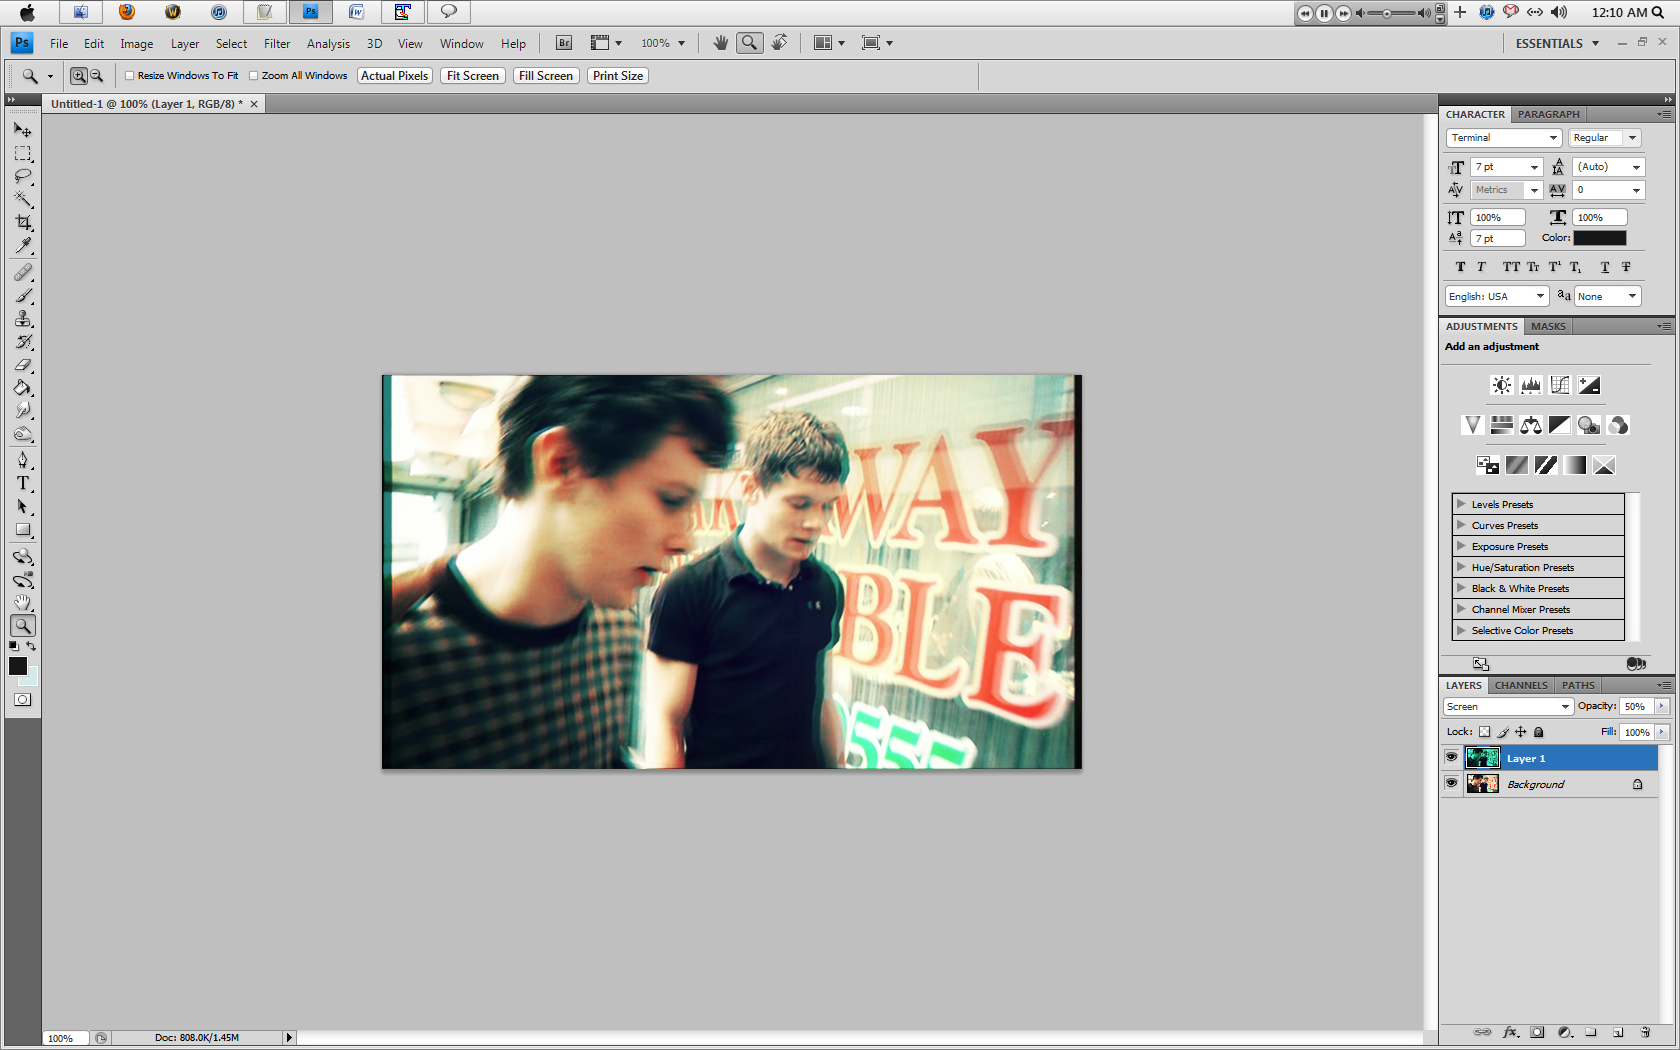
Click the 'eye' next to the layer to make it invisible so we can see what we're doing in the next step.
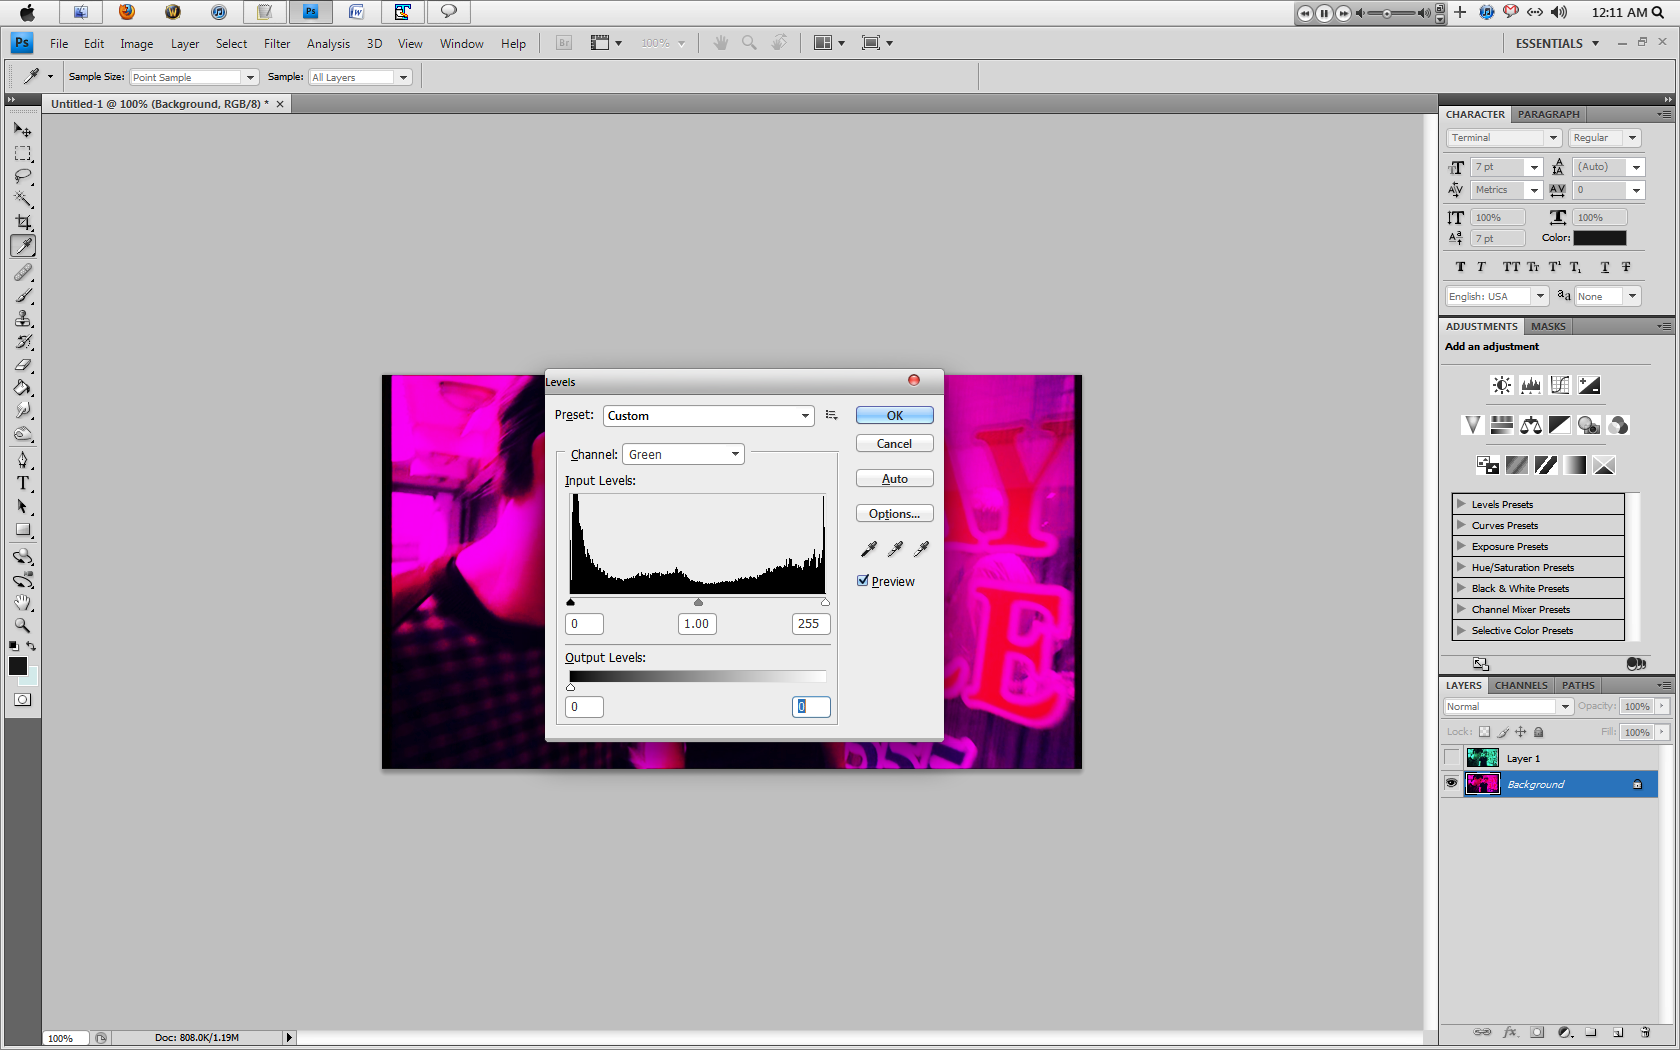
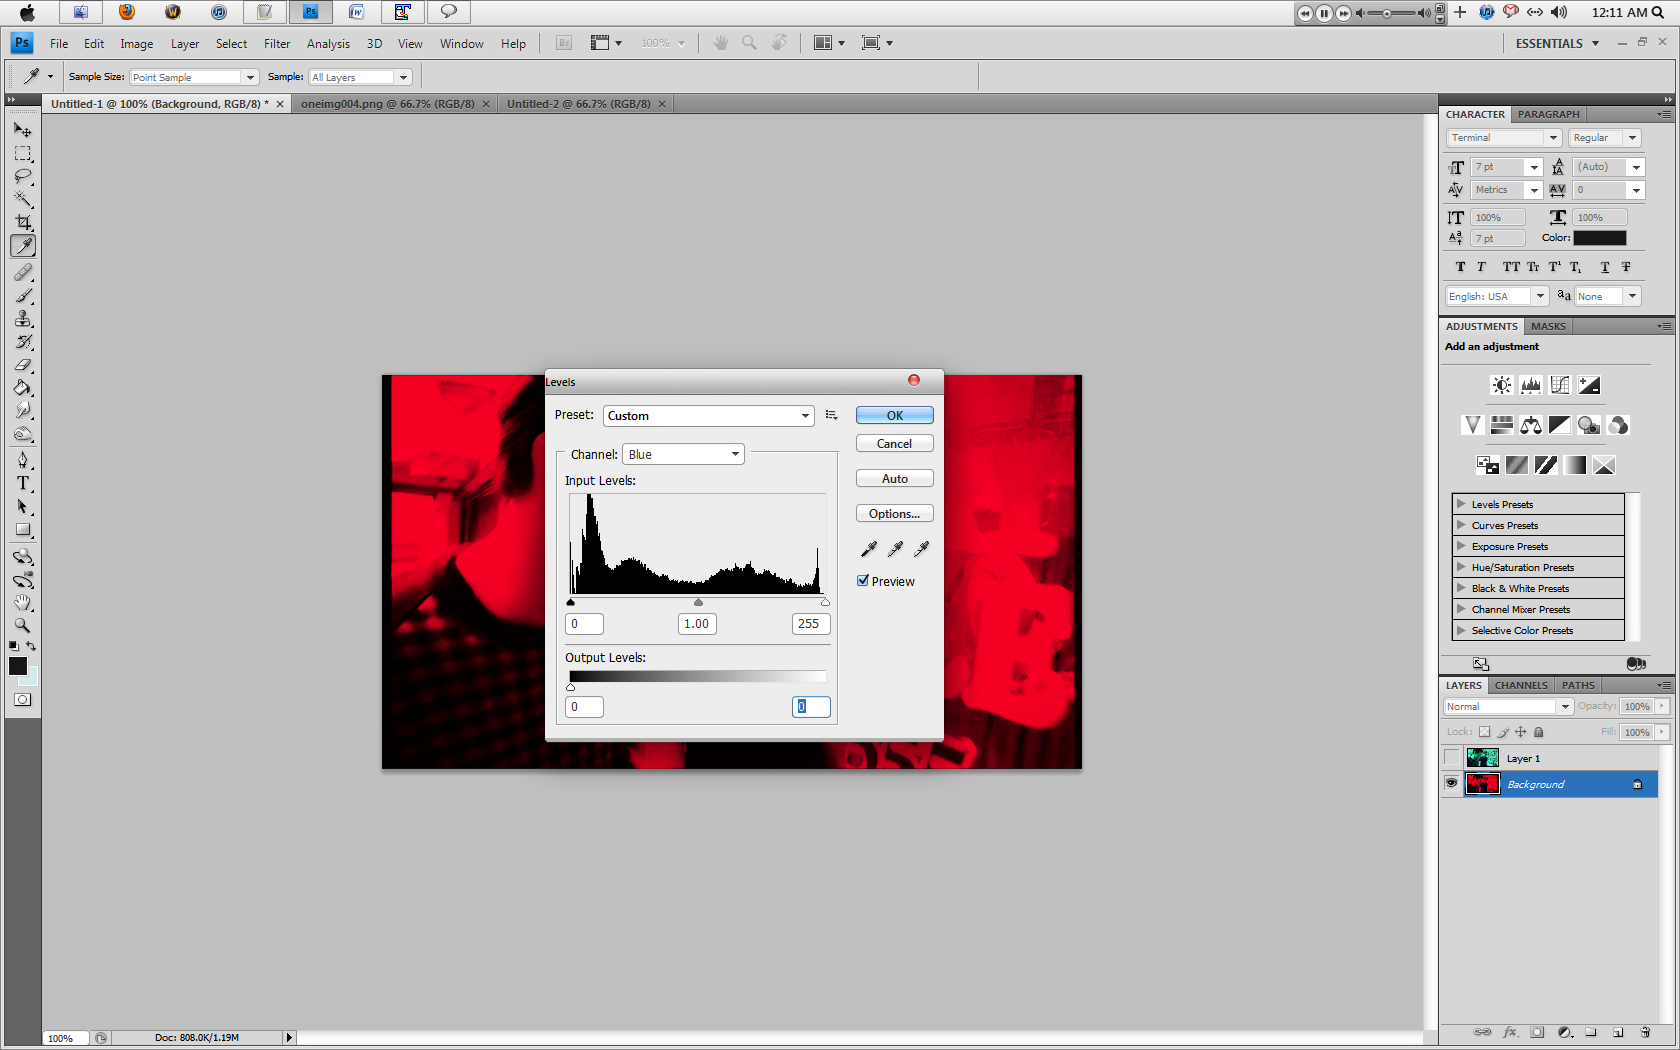
004) Now, with your first layer (under the screen layer), go to Image > Adjustments > Levels and choose the Green channel (in the drop-down menu). Under 'Output', drag the slider under '255' until it's at '0'. Then, choose the Blue channel and under 'Output', drag the slider from '255' to '0'. This should make your layer red.
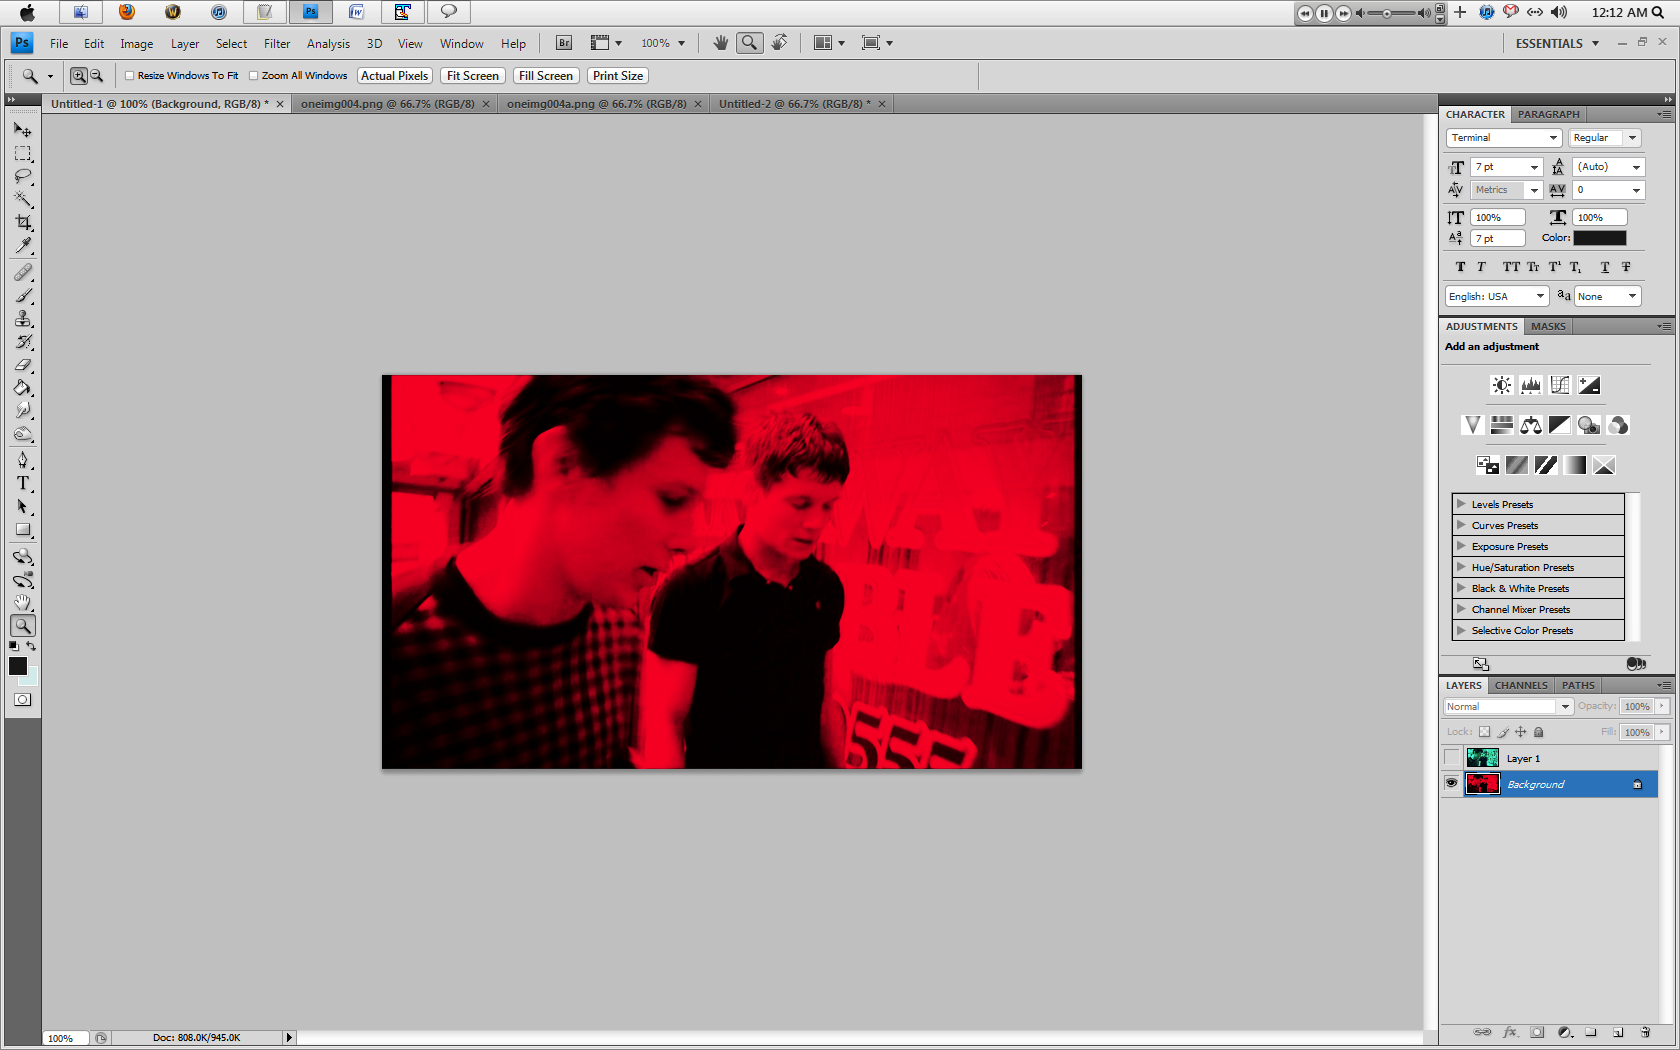
005) Now, make your screen layer visible again (click the eye), and voila! We have our anaglyph image! If you'd like, you can change the opacity on the 'screen' layer to whatever suits your taste. Experiment!
