(no subject)
Ok so yay I think this is my 3rd tutorial? Well this is for PSP9 but I'm sure you can translate it to just about anything. :D
Go from this:
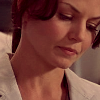
to this: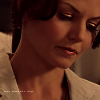
Under the Lj-Cut :D
Alright so I know that there are a lot of tutorials for dark icons. But if you can notice this icon has some red in the color..so it is a tad bit different.
1. Pick your picture this would be mine.

2. Crop the image the way you want it.

3. Fix your photo, whether you need to fix the colors or sharpen. All I did was Unsharp Mask once.

4. Fill the picture with DAC49B. Set to Multiply 100%.

5. Fill with F7ADEA. Set to Burn 30%.


6. Fill with F7D5AD. Set to Soft Light 26%.
7. Fill with DAC49B again. Set to Multiply 100%.

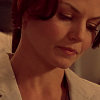
8. Merge all layers.
9. Copy the base and desaturate it. Set it to Soft Light.
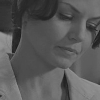
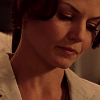
10. Now because I am a trend whore. Soften the face, my brush was set to 50%. Sharpen the lips and the eye lids, my brush was set to 50%.
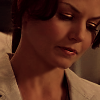
11. Now add text or whatnot. I added a tiny text brush and set it to Soft Light and I duplicated the text layer so you could see the text better.

And you are done :D
Other icons made with this style.
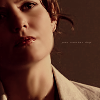
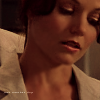
Remember that the outcome of your icon will depend greatly on the picture you decide to use. So you may have to toy around with opacitys.
Go from this:

to this:

Under the Lj-Cut :D
Alright so I know that there are a lot of tutorials for dark icons. But if you can notice this icon has some red in the color..so it is a tad bit different.
1. Pick your picture this would be mine.

2. Crop the image the way you want it.

3. Fix your photo, whether you need to fix the colors or sharpen. All I did was Unsharp Mask once.

4. Fill the picture with DAC49B. Set to Multiply 100%.


5. Fill with F7ADEA. Set to Burn 30%.


6. Fill with F7D5AD. Set to Soft Light 26%.


7. Fill with DAC49B again. Set to Multiply 100%.


8. Merge all layers.
9. Copy the base and desaturate it. Set it to Soft Light.


10. Now because I am a trend whore. Soften the face, my brush was set to 50%. Sharpen the lips and the eye lids, my brush was set to 50%.

11. Now add text or whatnot. I added a tiny text brush and set it to Soft Light and I duplicated the text layer so you could see the text better.

And you are done :D
Other icons made with this style.


Remember that the outcome of your icon will depend greatly on the picture you decide to use. So you may have to toy around with opacitys.