TUTORIAL NUMBER TWELVE.
pink/purple-ish tutorial psp9.
Going from this to
There is a PSCS2 version in the comments which I added on 03/16/2008.
First you need to open your program you'll be using.
I'm using PSP9.
Open up you image. I'll be using THIS picture of Kristen Bell from the Giant magazine photoshoot.
Crop & Resize.

Add a new layer. Set this layer to EXCLUSION / OPACITY 21. Fill with #1e40d7.
Add a new layer. Set this layer to SOFT LIGHT / OPACITY 75. Fill with #ffcfdc.
Add a new layer. Set this layer to SOFT LIGHT / OPACITY 75. Fill with #f1cbfc.
EDIT >> COPY MERGED. [ctrl + shift + c]
Paste as new layer. [ctrl + l]
Set layer to BURN / OPACITY 100.
EDIT >> COPY MERGED. [ctrl + shift + c]
Paste as new layer. [ctrl + l]
Leave layer at NORMAL / OPACITY 100.
& you should come up with this

ADJUST >> AUTOMATIC COLOR BALANCE
(or enhance photo >> auto color balance)
Put in these settings;
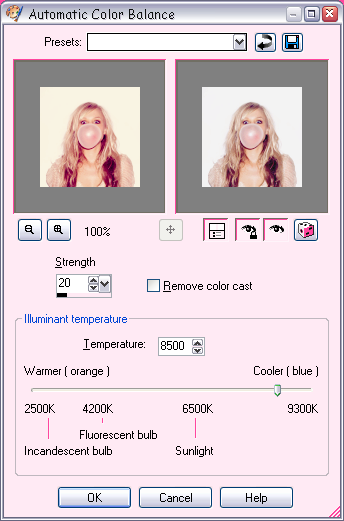
You get;
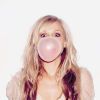
ADJUST >> AUTOMATIC SATURATION ENHANCEMENT
(or enhance photo >> auto saturation enhancement)
Put in these settings;
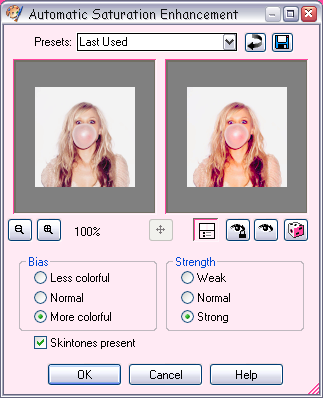
You get;
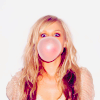
Add a new layer. Set this layer to SOFT LIGHT / OPACITY 100. Fill with #a4e0f4.
LAYER >> NEW ADJUSTMENT LAYER > HUE/SATURATION/LIGHTNESS
Saturation: +35
Merge all.
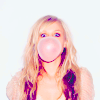
Now it's time for text. I wrote "Kristen Bell" in Print Dashed size 16 across her bubble gum.
Merge all.

Your done. =]
Here is my layers pallete if your curious;
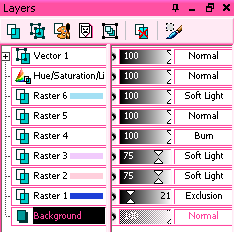
Keep in mind that depending on your base, your icon will turn out different & may require different settings.
Like what you see? Join the community.
Going from this to

There is a PSCS2 version in the comments which I added on 03/16/2008.
First you need to open your program you'll be using.
I'm using PSP9.
Open up you image. I'll be using THIS picture of Kristen Bell from the Giant magazine photoshoot.
Crop & Resize.

Add a new layer. Set this layer to EXCLUSION / OPACITY 21. Fill with #1e40d7.
Add a new layer. Set this layer to SOFT LIGHT / OPACITY 75. Fill with #ffcfdc.
Add a new layer. Set this layer to SOFT LIGHT / OPACITY 75. Fill with #f1cbfc.
EDIT >> COPY MERGED. [ctrl + shift + c]
Paste as new layer. [ctrl + l]
Set layer to BURN / OPACITY 100.
EDIT >> COPY MERGED. [ctrl + shift + c]
Paste as new layer. [ctrl + l]
Leave layer at NORMAL / OPACITY 100.
& you should come up with this

ADJUST >> AUTOMATIC COLOR BALANCE
(or enhance photo >> auto color balance)
Put in these settings;

You get;

ADJUST >> AUTOMATIC SATURATION ENHANCEMENT
(or enhance photo >> auto saturation enhancement)
Put in these settings;

You get;

Add a new layer. Set this layer to SOFT LIGHT / OPACITY 100. Fill with #a4e0f4.
LAYER >> NEW ADJUSTMENT LAYER > HUE/SATURATION/LIGHTNESS
Saturation: +35
Merge all.

Now it's time for text. I wrote "Kristen Bell" in Print Dashed size 16 across her bubble gum.
Merge all.

Your done. =]
Here is my layers pallete if your curious;

Keep in mind that depending on your base, your icon will turn out different & may require different settings.
Like what you see? Join the community.