Tutorial #1
Helllo folks! Today we are going from:

To!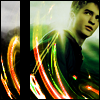
Lets begin shall we? We take our image and crop it 100x100 just to our liking.
Step 2. What i do next is i used the curves tool (Image > Adjustments > Curves) What i do is i actually just adjust the colors to give it it more of a brigter or lighter feel to the icon:
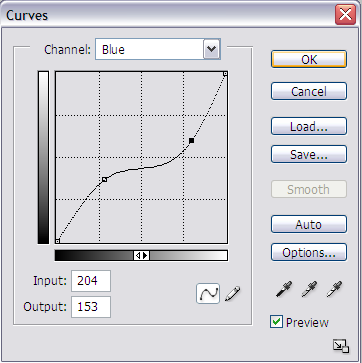
to get:
Step 3. I duplicate this layer and set it to "Soft Light"

Step 4. I then create a new layer and fill it with a dark blue (#070B31) and set to "Exclusion"

Step 5. I create another new layer and fill with a tan type color (#F0E4AB) Then set to either Color Burn OR Multiply. Depends on the image, for me i used Color Burn.

Step 6. I created once again a new blank layer and filled it with a washed out blue color (#A2BBCC) then set to Multiply

Step 7. I duplicated the base layer and set that to Soft Light since well...the icon looks wayyy to washed out for my taste.

Step 8. For an added effect i duplicated the base layer once again i then desaturated it (control + shift + U) and then set that to soft light.
Step 9. I used this texture: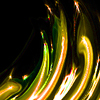
(by: fightstarr) then set it to screen and move it under the top two current layers (which should be the base layers that are set to soft light)

Step 10. I make a selection some where on the image near the edge and use the rectangular marquee to select a small bar and go to Edit > Fill and fill it with black to get this:

Step 11. I make another selection on one of the sides of this bar (if you don't get it heres an example:
)
Step 12. I carefully go to each layer (keeping the selection) then desaturation each layer except for the texture layer to get an intrestin effect.

Step 13. I finally create a new layer and select the whole image (control + A) and go to Edit > Stroke and make a nice fine 1 px black border.
and FIN
If you don't like it all plain feel free to add text, brushes ect. This is your icon, not mine ^^
To!
Lets begin shall we? We take our image and crop it 100x100 just to our liking.
Step 2. What i do next is i used the curves tool (Image > Adjustments > Curves) What i do is i actually just adjust the colors to give it it more of a brigter or lighter feel to the icon:
to get:
Step 3. I duplicate this layer and set it to "Soft Light"
Step 4. I then create a new layer and fill it with a dark blue (#070B31) and set to "Exclusion"
Step 5. I create another new layer and fill with a tan type color (#F0E4AB) Then set to either Color Burn OR Multiply. Depends on the image, for me i used Color Burn.
Step 6. I created once again a new blank layer and filled it with a washed out blue color (#A2BBCC) then set to Multiply
Step 7. I duplicated the base layer and set that to Soft Light since well...the icon looks wayyy to washed out for my taste.
Step 8. For an added effect i duplicated the base layer once again i then desaturated it (control + shift + U) and then set that to soft light.
Step 9. I used this texture:
(by: fightstarr) then set it to screen and move it under the top two current layers (which should be the base layers that are set to soft light)
Step 10. I make a selection some where on the image near the edge and use the rectangular marquee to select a small bar and go to Edit > Fill and fill it with black to get this:
Step 11. I make another selection on one of the sides of this bar (if you don't get it heres an example:
)
Step 12. I carefully go to each layer (keeping the selection) then desaturation each layer except for the texture layer to get an intrestin effect.
Step 13. I finally create a new layer and select the whole image (control + A) and go to Edit > Stroke and make a nice fine 1 px black border.
and FIN
If you don't like it all plain feel free to add text, brushes ect. This is your icon, not mine ^^