Handbook for the Recently Deceased (It reads like stero instructions)
Of course, I'm most known for my Tree of Life Pendants that I've shared on here a few times now.
But, I'm also very crafty in general. I recently did a Halloween swap on Craftster and one of the items I made was a version of the Handbook for the Recently Deceased from the movie, Beetlejuice. I absolutely love how it came out and thought I'd share the process with you all.
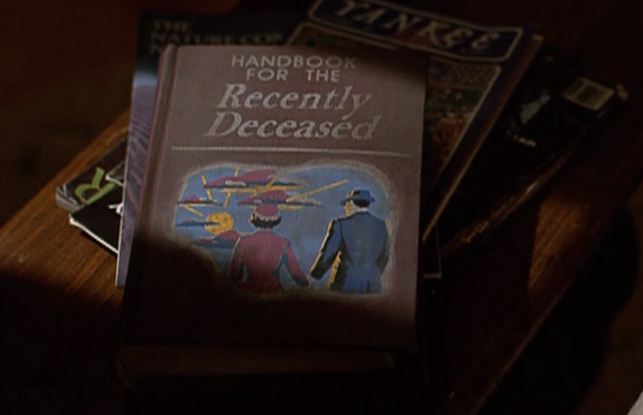
For reference, here's what it looked like in the movie:
First, you start off with a pre-made book form you can get at any craft store. They're made from a thin cardboard-type material and cost a few bucks.
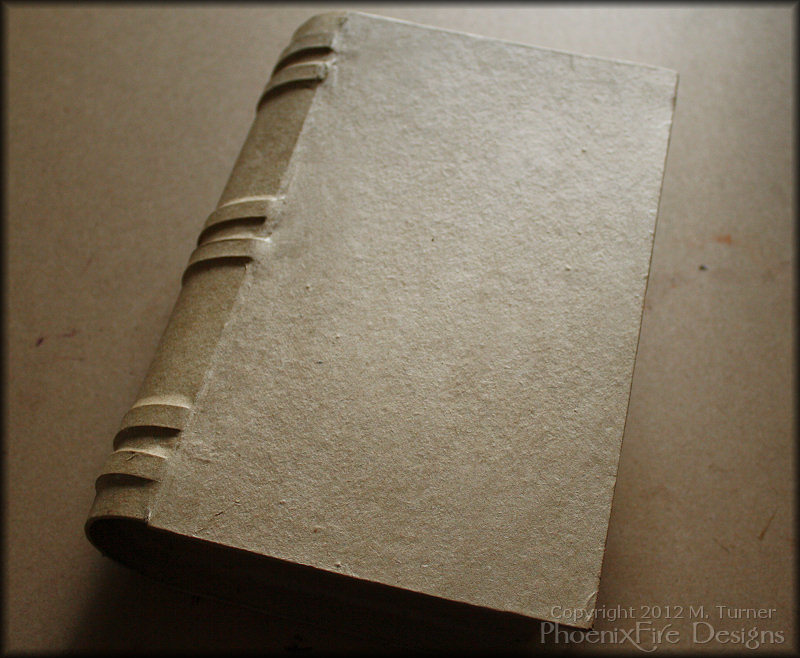
Start with something like this.
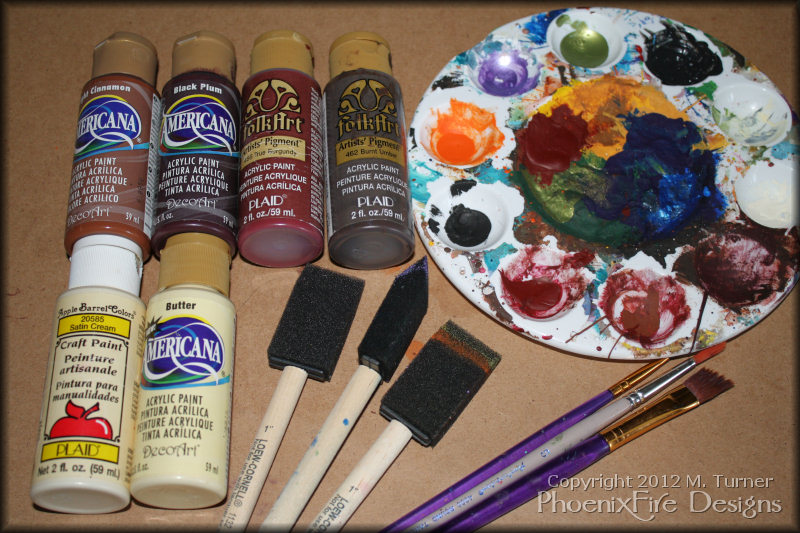
Then you're going to need an assortment of paints. I used a variety of colors, like a deep red, a purple, a couple shades of brown, etc. I also got a cream and a yellow for the sides which I'll show you later. I had all of these on hand already. An assortment of brushes helps too. I did the bulk of the color applying with a foam brush.
Cover the entire book - inside and out - in a base color, and then add variation with other colors as well. You want something that looks old, and worn. If you only do one color, it will look flat and fake. By adding a couple other colors into the mix, you get more texture and believability to it. Since the base is cardboard, be sure not to use a very wet brush! You can warp the book form if you use too much water.
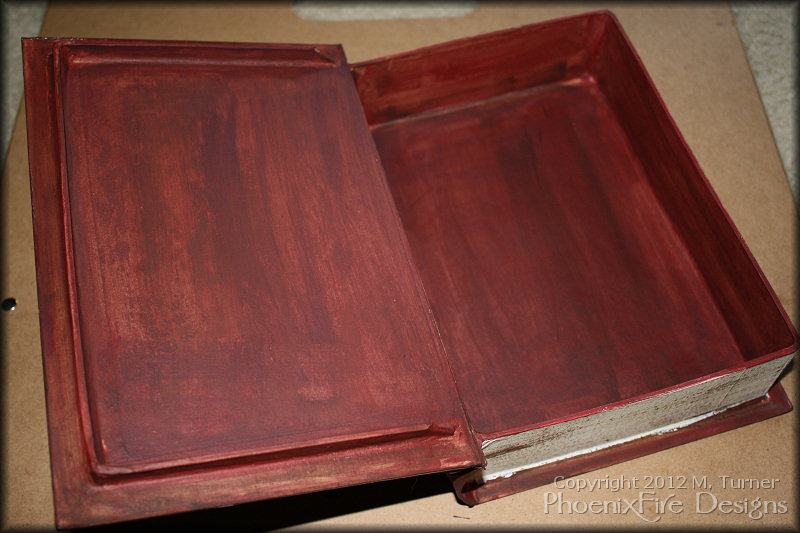
Be sure to get the entire inside and all corners and edges. Don't want to see the original cardboard at all!
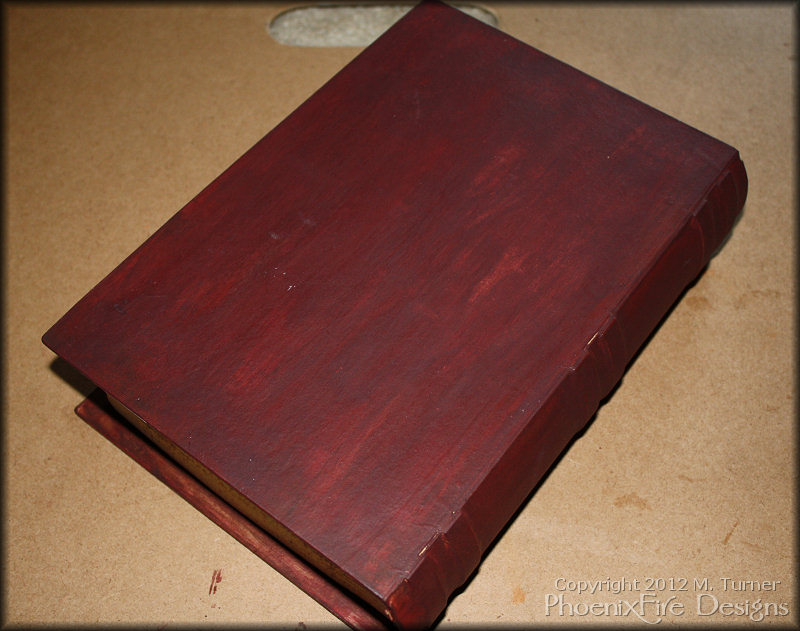
Variations in color are good for a more realistic old, leather book look.
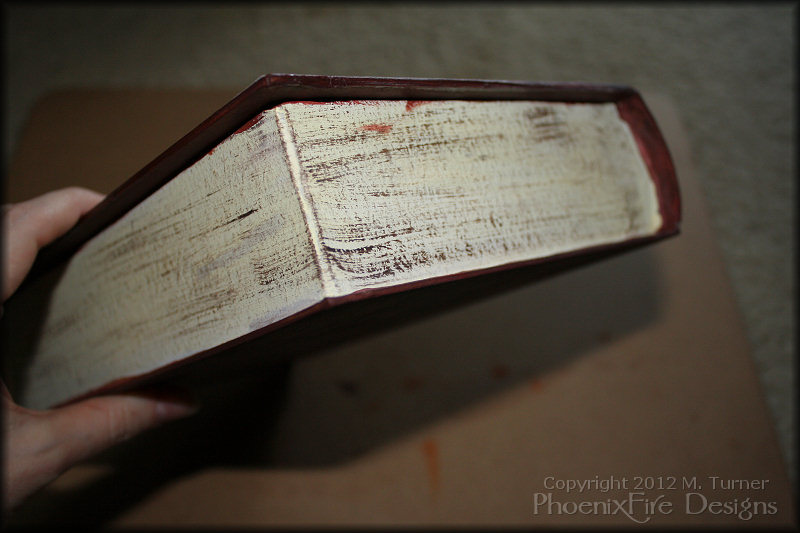
To make the edges look like paper, I first did a mix of a cream and a pale yellow base. Then I took a fan brush and DRY brushed brown in single passes.
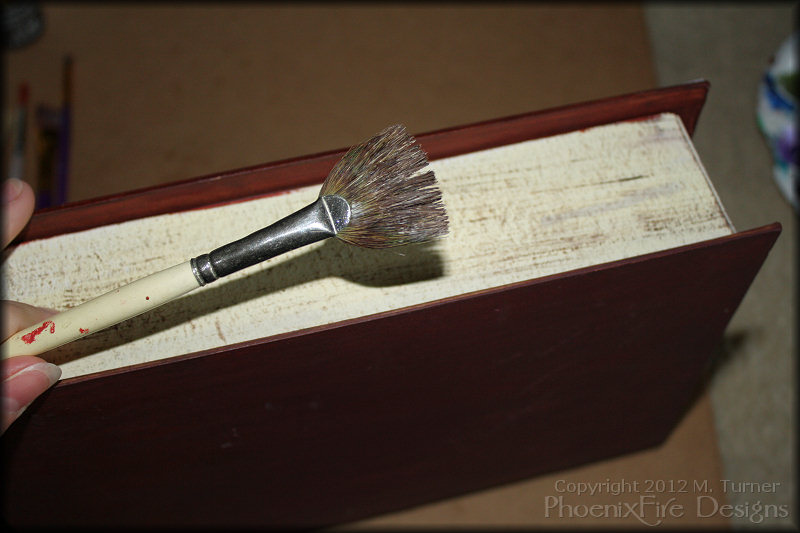
Fan brush used for painting in pages.
You want to get some on the book, but not so much it just paints over the entire cream background. You also want to try to drag your strokes out so it's not wavy in any way. The idea is to get an impression of aged page edges; we're not going for true detailed realism.
Next, you're going to need a print out of the cover image. I found mine through a Google search. I printed it up on my laser printer which gave a very crisp look that didn't look like it was printed. A high-quality inkjet print would work as well, though you need to be sure to let an inkjet print dry and be careful of smudging. Inkjet prints can (and do!) smear and smudge when exposed to any kind of water so take care!
You also need a foam brush and Mod Podge. I put a layer of Mod Podge down on the book front and on the paper. Then I glued the paper to the book. Several thin coats of Mod Podge followed to help seal it in. You're going to need to be patient and take your time in this step, letting it dry between layers so it doesn't damage the paper by making it too wet.

Print out (sized for your book), Mod Podge and a foam brush.
I also put a few light coats on the rest of the book with Mod Podge to finish it and protect it. Take care not to glue your book shut during this process!
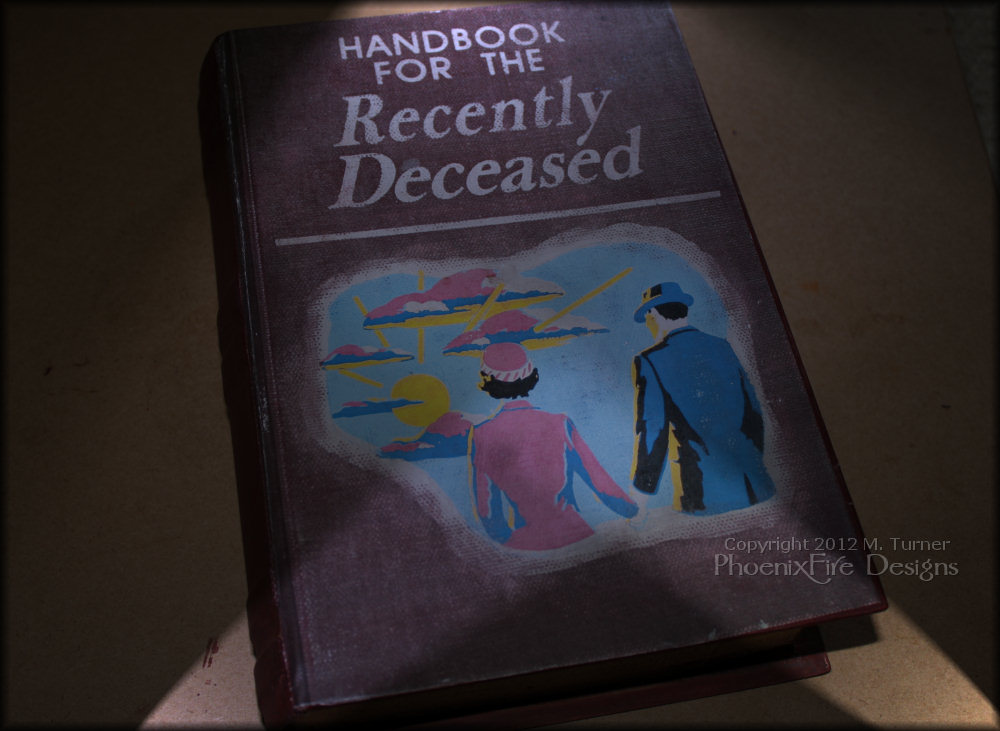
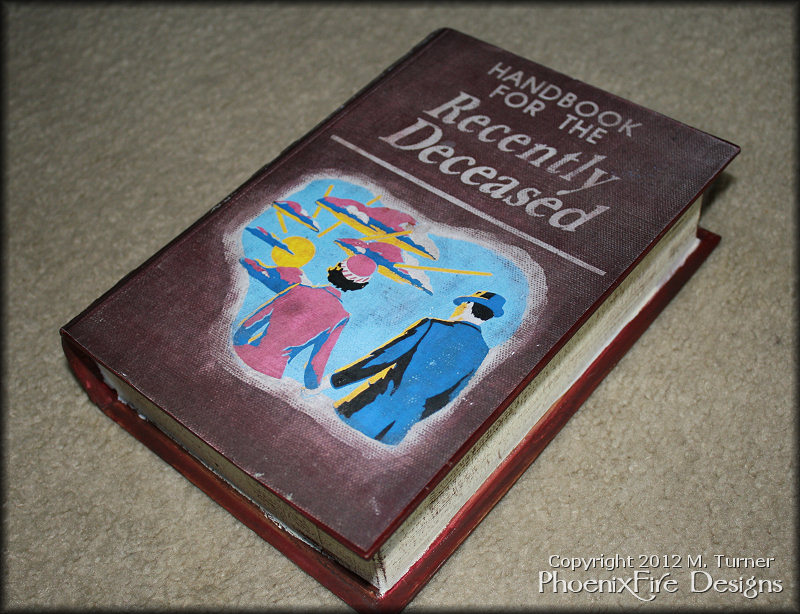
And Voila! You have your very own Handbook for the Recently Deceased!

Hope you enjoyed my how-to tutorial for making your very own Book of the Recently Deceased!
(Larger versions of the images can be found here: http://www.phoenixfiredesigns.com/blog/2012/10/handbook-for-the-recently-deceased/ )
But, I'm also very crafty in general. I recently did a Halloween swap on Craftster and one of the items I made was a version of the Handbook for the Recently Deceased from the movie, Beetlejuice. I absolutely love how it came out and thought I'd share the process with you all.
For reference, here's what it looked like in the movie:
First, you start off with a pre-made book form you can get at any craft store. They're made from a thin cardboard-type material and cost a few bucks.
Start with something like this.
Then you're going to need an assortment of paints. I used a variety of colors, like a deep red, a purple, a couple shades of brown, etc. I also got a cream and a yellow for the sides which I'll show you later. I had all of these on hand already. An assortment of brushes helps too. I did the bulk of the color applying with a foam brush.
Cover the entire book - inside and out - in a base color, and then add variation with other colors as well. You want something that looks old, and worn. If you only do one color, it will look flat and fake. By adding a couple other colors into the mix, you get more texture and believability to it. Since the base is cardboard, be sure not to use a very wet brush! You can warp the book form if you use too much water.
Be sure to get the entire inside and all corners and edges. Don't want to see the original cardboard at all!
Variations in color are good for a more realistic old, leather book look.
To make the edges look like paper, I first did a mix of a cream and a pale yellow base. Then I took a fan brush and DRY brushed brown in single passes.
Fan brush used for painting in pages.
You want to get some on the book, but not so much it just paints over the entire cream background. You also want to try to drag your strokes out so it's not wavy in any way. The idea is to get an impression of aged page edges; we're not going for true detailed realism.
Next, you're going to need a print out of the cover image. I found mine through a Google search. I printed it up on my laser printer which gave a very crisp look that didn't look like it was printed. A high-quality inkjet print would work as well, though you need to be sure to let an inkjet print dry and be careful of smudging. Inkjet prints can (and do!) smear and smudge when exposed to any kind of water so take care!
You also need a foam brush and Mod Podge. I put a layer of Mod Podge down on the book front and on the paper. Then I glued the paper to the book. Several thin coats of Mod Podge followed to help seal it in. You're going to need to be patient and take your time in this step, letting it dry between layers so it doesn't damage the paper by making it too wet.
Print out (sized for your book), Mod Podge and a foam brush.
I also put a few light coats on the rest of the book with Mod Podge to finish it and protect it. Take care not to glue your book shut during this process!
And Voila! You have your very own Handbook for the Recently Deceased!
Hope you enjoyed my how-to tutorial for making your very own Book of the Recently Deceased!
(Larger versions of the images can be found here: http://www.phoenixfiredesigns.com/blog/2012/10/handbook-for-the-recently-deceased/ )