Tutorial #001

TUTORIAL #001
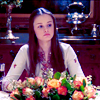
Gilmore Girls: Lorelai Gilmore
made with PS CS2
1. Start with your base and duplicate it.
2. Set the duplicate to screen(if it's still too dark you might have to do this step once again).
3. Now go to Layer>>New Adjustment Layer>>Selective Color
>>REDS
Cyan: -100
Yellow: -34
>>YELLOWS
Cyan: -49
Yellow: +59
>>NEUTRALS
Cyan: +57
Yellow: -54
4. Go to Layer>>New Adjustment Layer>>Levels
>>Input Levels: 45 / 1,00 / 255
And you're finished!
Not that hard, is it? If you have any questions, feel free to ask!
I'd love to see what you do with the coloring.
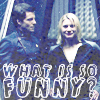
other icons using this or similar technique

you don't have to copy each step exactly
feel free to FRIEND the comm(you cannot join)
Affiliates; Awards; Font Guide; Requests; Resources; The List