Animation Tutorial-Public-
INFORMATION ABOUT THIS TUTORIAL:
haha hi first of alll =]
This tutorial was made in Adobe Photoshop CS3 Extended
however can be used in Adobe Photoshop CS3 and higher
note that there are many ways to make animations, and this is just one way
i do not own any of the clips used to make animations or anything
if you have questions please ask
this is my first tutorial in a LONG time,
so any feedback is appreciated
ermm i think that is alll, and
if i get good feedback, i can make other ones
June 13th, 2009
DO NOT repost this tutorial
without proper credit-credit means
linking to my LiveJournal and saying
that I created it-you can credit me as
Sema/Semz/crazysemz/cookiemeelmo
LETS BEGIN
[STEP ONE] Preparing Your Video
you need your video to be in .mov form
-if you are using a video from youtube:
--rip the video with mediaconverter or zamzar
--simply tell it to convert it to .mov when you're doing that
-if the video is coming from a fansite
--most the time, those video's are in .wvm form
--use mediaconverter or another conversion site to convert it to .mov
--you can also download a video converter, such as the one from movietoolbox
anyways, just get a video you desire into .mov format
[FOR PURPOSES OF THIS TUTORIAL]
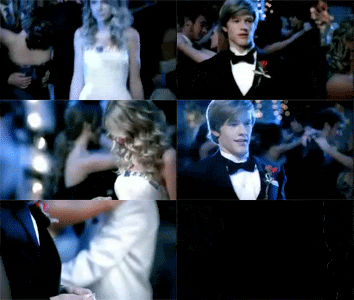
i will be using this video (by taylor swift) that is in .mov format here
[STEP TWO] Importing Your Video
go to File>>Import>>Video Frames To Layers-here
--find your video and press load
[STEP THREE] Importing Video To Layers
okay so you see two main options: from beg to end or selected range and a coule checkable boxes; i'll go over what everything is first
-from beg to end
--i highly DO NOT recommend this, as there is a limit for 500 frames, which means that most likely you will not have the whole thing in high quality
-selected range only
--this is the method that i use all the time, and that i recommend you using
-limit to every ____ frames
--this is something to control your animation
--in my experience, limiting the animation to every 3 of 5 frames works best
-make frame animation
--this is something that NEEDS to be checked or you are going to wonder wtf you've done and why
so pic which part you want in the gif, limit it to 3 frames, check the make frame animation box and hit okay-cap
{for my purposes, im using 0:52-1:01 of the video if you are wondering}
[STEP FOUR] Opening the Animation Window/Timings Of The Frames
Go To Window>>Animation
-Something similar to this will pop up
the first thing we're going to do is adjust the time settings
--click the triple line in the animation window, look here and press select all frames
--next click any one of the time things-here-and go to other
--change the timing to 0.001seconds-here-
[MAKE SURE] Making It Go On Forever
Underneath the first frame, in your animation window, make sure that it says Forever and not once. if it says once, click it and change it to forever.
[STEP FIVE] Adding the last black frame
Most animations have a black frame in between the end/before it begins again,and that's what this step is going to teach you to do
-On your animation window, scroll sideways until you reach your last frame.
--next, duplicate it by pressing the button next to the trash can-look here
--next, on the layer palette, scroll up, and select the "highest" layer
--add a new layer--ctrl+shift+N
--fill this layer with pure black--Edit>>Fill
--go back to the animation window, select all layers-click the triple line in the animation window, look here and press select all frames-here
--turn off the layer you just made-here
--on your animation window, scroll sideways until you reach your last frame and select it
--now turn the layer back on (press in the empty box where the eye used to be)
--next change the timing of this layer. here. i advise you to change it to at least half a second, but its up to you
[NOTE] This is where you can simply stop and skip to the [SAVE] Step
[TEXT] Adding Text To The Black Layer
Simply adding text to the black layer is quite easy
-add a text layer, and customize it, and then merge it with the black layer
-make sure the layer is only on for that frame
-make the timing a little bit longer, at least a second or two
[OPTIONAL] Optimizing the Animation
i dont know why this makes everything look better but it does
-select all frames (read above if you don't remember how) on the animation window
--click the triple line thing and go to optimize animation-here
--check both boxes and click okay-here
[RESIZE] Resizing the Animation
many times animations are huge-around 320x240
-however this is often big and will slow down a computer, therefore i advise you to resize it
--the way you resize an animation is the same for resizing a graphic
--image>>image size (if you're a loser like me you know that ctrl+alt+i does the same)
--pick what you want to resize it to
--i like making the height 100 and the width whatever stays scaled-cap
[ICON] Making it Icon Sized
-resize it so the height is 100
-using the crop tool, hold shift, and crop a perfect square(center it if desired)
[BORDER] Adding A Border
adding a border often helps it look a bit more classy. this is a COMPLETELY optional step however
-on the animation window, select all frames
-on the layer palette, go to the top layer and ,make a new layer.
-fill it with a RANDOM color, not the one you are going to use for the border though (edit>>fill)
-next go to edit>>stroke, and pick the color you want to use and the thickness of the border.
-make sure the location is INSIDE or it will not show up-cap
-next, use the magic eraser to erase the random color, so all that is left is your border
-make sure all frames are still selected on the animation window throughout it
[COLORING] Adding Any Kind Of Coloring
i rarely do, but some people are over achievers, so i'll talk about it anyways
basically, you add coloring the same way as borders-on top of everything
which means unless you want to do it to EVERY frame, stay away from colorings
requiring duplicating the base in any way.
[SAVE] Saving the Animation
you can save the animation whenever you want in this tutorial, but here is how
-File>>save for web and devices
--it's VERY important you save for web and devices or it won't work
--file>>save as saving as a GIF will NOT work
--you MUST MUST go File>>save for web and devices
--click save, and then name it and hit save again-here
Examples: (too lazy to look through my tinypic and find all of them, so here are most recent-taylor swift)


haha hi first of alll =]
This tutorial was made in Adobe Photoshop CS3 Extended
however can be used in Adobe Photoshop CS3 and higher
note that there are many ways to make animations, and this is just one way
i do not own any of the clips used to make animations or anything
if you have questions please ask
this is my first tutorial in a LONG time,
so any feedback is appreciated
ermm i think that is alll, and
if i get good feedback, i can make other ones

June 13th, 2009
DO NOT repost this tutorial
without proper credit-credit means
linking to my LiveJournal and saying
that I created it-you can credit me as
Sema/Semz/crazysemz/cookiemeelmo
LETS BEGIN
[STEP ONE] Preparing Your Video
you need your video to be in .mov form
-if you are using a video from youtube:
--rip the video with mediaconverter or zamzar
--simply tell it to convert it to .mov when you're doing that
-if the video is coming from a fansite
--most the time, those video's are in .wvm form
--use mediaconverter or another conversion site to convert it to .mov
--you can also download a video converter, such as the one from movietoolbox
anyways, just get a video you desire into .mov format
[FOR PURPOSES OF THIS TUTORIAL]
i will be using this video (by taylor swift) that is in .mov format here
[STEP TWO] Importing Your Video
go to File>>Import>>Video Frames To Layers-here
--find your video and press load
[STEP THREE] Importing Video To Layers
okay so you see two main options: from beg to end or selected range and a coule checkable boxes; i'll go over what everything is first
-from beg to end
--i highly DO NOT recommend this, as there is a limit for 500 frames, which means that most likely you will not have the whole thing in high quality
-selected range only
--this is the method that i use all the time, and that i recommend you using
-limit to every ____ frames
--this is something to control your animation
--in my experience, limiting the animation to every 3 of 5 frames works best
-make frame animation
--this is something that NEEDS to be checked or you are going to wonder wtf you've done and why
so pic which part you want in the gif, limit it to 3 frames, check the make frame animation box and hit okay-cap
{for my purposes, im using 0:52-1:01 of the video if you are wondering}
[STEP FOUR] Opening the Animation Window/Timings Of The Frames
Go To Window>>Animation
-Something similar to this will pop up
the first thing we're going to do is adjust the time settings
--click the triple line in the animation window, look here and press select all frames
--next click any one of the time things-here-and go to other
--change the timing to 0.001seconds-here-
[MAKE SURE] Making It Go On Forever
Underneath the first frame, in your animation window, make sure that it says Forever and not once. if it says once, click it and change it to forever.
[STEP FIVE] Adding the last black frame
Most animations have a black frame in between the end/before it begins again,and that's what this step is going to teach you to do
-On your animation window, scroll sideways until you reach your last frame.
--next, duplicate it by pressing the button next to the trash can-look here
--next, on the layer palette, scroll up, and select the "highest" layer
--add a new layer--ctrl+shift+N
--fill this layer with pure black--Edit>>Fill
--go back to the animation window, select all layers-click the triple line in the animation window, look here and press select all frames-here
--turn off the layer you just made-here
--on your animation window, scroll sideways until you reach your last frame and select it
--now turn the layer back on (press in the empty box where the eye used to be)
--next change the timing of this layer. here. i advise you to change it to at least half a second, but its up to you
[NOTE] This is where you can simply stop and skip to the [SAVE] Step
[TEXT] Adding Text To The Black Layer
Simply adding text to the black layer is quite easy
-add a text layer, and customize it, and then merge it with the black layer
-make sure the layer is only on for that frame
-make the timing a little bit longer, at least a second or two
[OPTIONAL] Optimizing the Animation
i dont know why this makes everything look better but it does
-select all frames (read above if you don't remember how) on the animation window
--click the triple line thing and go to optimize animation-here
--check both boxes and click okay-here
[RESIZE] Resizing the Animation
many times animations are huge-around 320x240
-however this is often big and will slow down a computer, therefore i advise you to resize it
--the way you resize an animation is the same for resizing a graphic
--image>>image size (if you're a loser like me you know that ctrl+alt+i does the same)
--pick what you want to resize it to
--i like making the height 100 and the width whatever stays scaled-cap
[ICON] Making it Icon Sized
-resize it so the height is 100
-using the crop tool, hold shift, and crop a perfect square(center it if desired)
[BORDER] Adding A Border
adding a border often helps it look a bit more classy. this is a COMPLETELY optional step however
-on the animation window, select all frames
-on the layer palette, go to the top layer and ,make a new layer.
-fill it with a RANDOM color, not the one you are going to use for the border though (edit>>fill)
-next go to edit>>stroke, and pick the color you want to use and the thickness of the border.
-make sure the location is INSIDE or it will not show up-cap
-next, use the magic eraser to erase the random color, so all that is left is your border
-make sure all frames are still selected on the animation window throughout it
[COLORING] Adding Any Kind Of Coloring
i rarely do, but some people are over achievers, so i'll talk about it anyways
basically, you add coloring the same way as borders-on top of everything
which means unless you want to do it to EVERY frame, stay away from colorings
requiring duplicating the base in any way.
[SAVE] Saving the Animation
you can save the animation whenever you want in this tutorial, but here is how
-File>>save for web and devices
--it's VERY important you save for web and devices or it won't work
--file>>save as saving as a GIF will NOT work
--you MUST MUST go File>>save for web and devices
--click save, and then name it and hit save again-here
Examples: (too lazy to look through my tinypic and find all of them, so here are most recent-taylor swift)


