tutorial- adding music to a layout
this is done using one of the 5x5 musical cards. when you open it, it plays music. i cut the card down around the musical portion and peeled the paper covering off of the side with the music device. i did this awhile ago so i didnt think to take a photo of this step. sorry. you are left with this though:

from here, you need to carefully break the tab that moves when the card opens and closes. dont worry about breaking the music device, just stick a finger or a scissor under there and pop that sucker open.

trim around the device again and you are left with this:
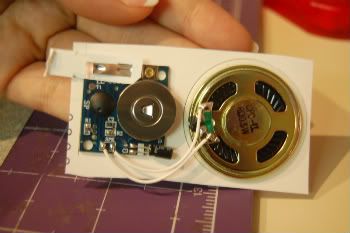
mount on a piece of heavy cardstock. the cardstock only needs to be a bit bigger than the music device, so use scraps! you will want about an inch around the edges. it doesnt matter what color it is because you wont see this.

you should already have a basic idea of what you want your layout to look like. flip it over and reinforce using a piece of heavy cardstock. this is super important because you want the layout to support the weight of your music device once it is in a page protector or on display! i used glue and tape around the edges
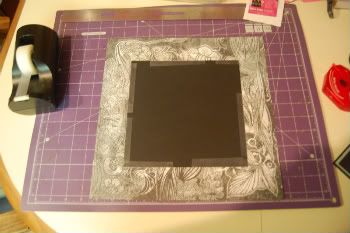
THIS STEP IS IMPORTANT. because the music device has a lot of depth to it, you will need to CUT THROUGH the layout and put the device in the back instead of just gluing it on top of your base page.
flip the layout back over and place your photo on the layout. mark the edges lightly with a pencil. remove the photo and lay the music device on the layout and roughly estimate the size hole you will need in the layout.
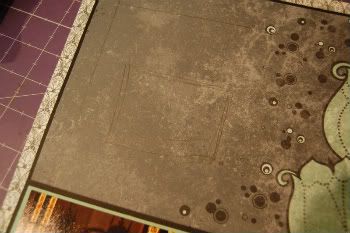
cut out the smaller square using a craft knife.
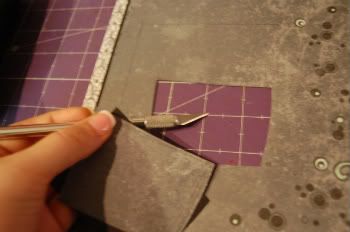
IMPORTANT
the music device runs on a battery which has the potential of needing to be replaced. if you anticipate a lot of wear and tear on your albums only adhere square holding the device to the back of the layout using TAPE. this way you can get into the layout and replace the battery. for me, we dont get a lot of wear and tear on our albums so i used adhesive in there too. its up to you but i would recommend tape.
when you place the device in your layout, you want the pull tab to be on the side it will be in the layout.
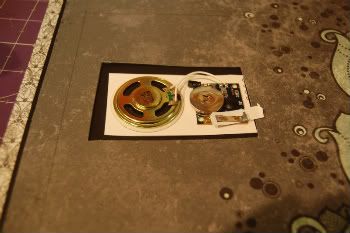
put a heavy layer of pop dots around the edge of the device leaving plenty of room where the tab is.
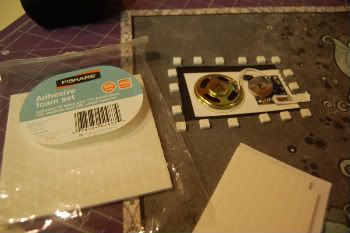
put a heavy layer of pop dots around the edge of the photo leaving plenty of room where the tab will be. i have shown the reverse of my photo here to illustrate. DO NOT ADHERE YET.
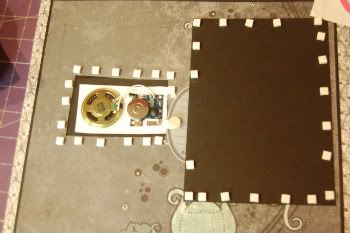
gently remove your tab. when you remove the tab, it causes the circuit to be completed on the music. just stick a piece of cardstock or paper in there to get it to stop. if your tab isnt long enough for your liking, you can probably make one a little longer. i used a journal tab and a button on mine.
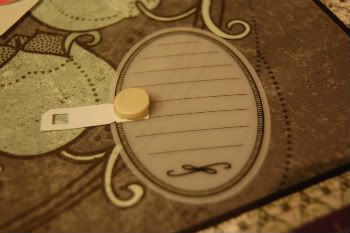
reattach the tab. double check that it still works. annoy your husband with it if you can and you can thank me for it later.
attach your photo. finish embellishing and then marvel over the final layout!
(mine plays the disney song "every girl can be a princess" and was from a happy birthday card.)
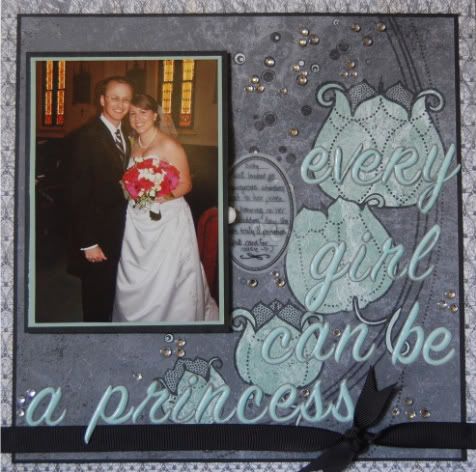
as always, thanks for looking. as always, feedback and comments appreciated.
Layout count for 2008: 451
YTD layout count for 2009: 449 (+24 calendar pages not shown and a 20 page gift album not shown), total 493

from here, you need to carefully break the tab that moves when the card opens and closes. dont worry about breaking the music device, just stick a finger or a scissor under there and pop that sucker open.

trim around the device again and you are left with this:

mount on a piece of heavy cardstock. the cardstock only needs to be a bit bigger than the music device, so use scraps! you will want about an inch around the edges. it doesnt matter what color it is because you wont see this.

you should already have a basic idea of what you want your layout to look like. flip it over and reinforce using a piece of heavy cardstock. this is super important because you want the layout to support the weight of your music device once it is in a page protector or on display! i used glue and tape around the edges

THIS STEP IS IMPORTANT. because the music device has a lot of depth to it, you will need to CUT THROUGH the layout and put the device in the back instead of just gluing it on top of your base page.
flip the layout back over and place your photo on the layout. mark the edges lightly with a pencil. remove the photo and lay the music device on the layout and roughly estimate the size hole you will need in the layout.

cut out the smaller square using a craft knife.

IMPORTANT
the music device runs on a battery which has the potential of needing to be replaced. if you anticipate a lot of wear and tear on your albums only adhere square holding the device to the back of the layout using TAPE. this way you can get into the layout and replace the battery. for me, we dont get a lot of wear and tear on our albums so i used adhesive in there too. its up to you but i would recommend tape.
when you place the device in your layout, you want the pull tab to be on the side it will be in the layout.

put a heavy layer of pop dots around the edge of the device leaving plenty of room where the tab is.

put a heavy layer of pop dots around the edge of the photo leaving plenty of room where the tab will be. i have shown the reverse of my photo here to illustrate. DO NOT ADHERE YET.

gently remove your tab. when you remove the tab, it causes the circuit to be completed on the music. just stick a piece of cardstock or paper in there to get it to stop. if your tab isnt long enough for your liking, you can probably make one a little longer. i used a journal tab and a button on mine.

reattach the tab. double check that it still works. annoy your husband with it if you can and you can thank me for it later.
attach your photo. finish embellishing and then marvel over the final layout!
(mine plays the disney song "every girl can be a princess" and was from a happy birthday card.)

as always, thanks for looking. as always, feedback and comments appreciated.
Layout count for 2008: 451
YTD layout count for 2009: 449 (+24 calendar pages not shown and a 20 page gift album not shown), total 493