(no subject)
Tihana's tut remind me that I promised a tutorial to Laura prettybutt (like she needs any...)
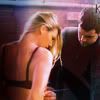
Here's the icon I was asked to make the tut.

Others icon created with this technique


* The tutorial is only about the colors,texture and text are all optional.
From this:
To this:
PSD file here
Step 1
Pick your image,resize it (I always do "350x200") and sharpen it once.

Step 2
Duplicate layer and set it on "screen"

Step 3
New fill layer
* Please note : The color of the new fill layer depends on the image you wanna icon.
For Example,if your image has kinda blue background you have to pick a very dark blue(like on this case). If the background is yellowish or greenish then you should pick a dark brown or dark green.
So New fill layer #0b161a set it on "Exclusion"

Step 4
Add a hue/saturation layer. This is up to you and your imagine,I usually set saturation "20/30"

Step 5
Add curves layers
*please not : Like for the fill layer the curves layers also depends on the Imagine you have,I wont even put all my inputs/outputs it will be kinda useless on a different image.I'll giv eyou the PSD file anyway so you can check.

Step 6
Selective Colors
*Same ol' as the curves layers

Step 7
New Fill layer
*see the note on step 3
New fill layer #d8f6ff set it on color burn

Step 8
New Filler layer
*it always have to match the image.
#f5d8ff set it on soft Light
With this fill layer I just want to hightlights some parts like a side of Kate's face,the chair a little bit of background. So I add this layer and then erase the parts I dont need with the eraser tool

Step 9
Smudge Tool (otional)
Go to your first layer and use the smudge tool over the pic. It just gave a cooler look to your colors.

Then of course you resize it,add textures (I mostly use the ones from daynawashere HERE) and text.
I hope you liked it,its nothing new tho just some stuff I tried combined to others tutorial I followed ;)
Now you Laura have to make me a tutorial,pronto! :D
Here's the icon I was asked to make the tut.
Others icon created with this technique
* The tutorial is only about the colors,texture and text are all optional.
From this:

To this:

PSD file here
Step 1
Pick your image,resize it (I always do "350x200") and sharpen it once.
Step 2
Duplicate layer and set it on "screen"
Step 3
New fill layer
* Please note : The color of the new fill layer depends on the image you wanna icon.
For Example,if your image has kinda blue background you have to pick a very dark blue(like on this case). If the background is yellowish or greenish then you should pick a dark brown or dark green.
So New fill layer #0b161a set it on "Exclusion"
Step 4
Add a hue/saturation layer. This is up to you and your imagine,I usually set saturation "20/30"
Step 5
Add curves layers
*please not : Like for the fill layer the curves layers also depends on the Imagine you have,I wont even put all my inputs/outputs it will be kinda useless on a different image.I'll giv eyou the PSD file anyway so you can check.
Step 6
Selective Colors
*Same ol' as the curves layers
Step 7
New Fill layer
*see the note on step 3
New fill layer #d8f6ff set it on color burn
Step 8
New Filler layer
*it always have to match the image.
#f5d8ff set it on soft Light
With this fill layer I just want to hightlights some parts like a side of Kate's face,the chair a little bit of background. So I add this layer and then erase the parts I dont need with the eraser tool
Step 9
Smudge Tool (otional)
Go to your first layer and use the smudge tool over the pic. It just gave a cooler look to your colors.
Then of course you resize it,add textures (I mostly use the ones from daynawashere HERE) and text.
I hope you liked it,its nothing new tho just some stuff I tried combined to others tutorial I followed ;)
Now you Laura have to make me a tutorial,pronto! :D