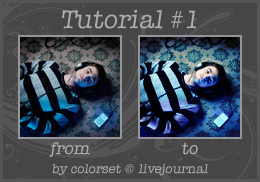
Colorization Tutorial #1
Finally, here's my first tutorial and I hope you like it.
* This tutorial was made in PS CS2

Step #1
Choose an image and crop it. I recommend this tutorial for dark images, but you can use images with a bright backgrounds and the result will be a little different but you will get a good icon.
Step #2
Duplicate your base and set the layer to Screen, opacity 100%.
Step #3
Now go to your base and duplicate it, drag it to the top and desaturate it. Set the layer to Lighten and don't forget to adjust the opacity, I use 45% but it depends of your base.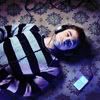
Step #4
Create a Selective Color Layer
Reds: -100 / -18 / +100 / +25
Cyans: -100 / +35 / +100 / +51
Blues: +16 / 0 / 0 / 0
Magentas: 0 / -100 / +100 / -100
Whites: 0 / 0 / +14 / +100
Neutrals: +20 / +26 / 0 / +9
Step #5
Create a Brightness/Contrast Layer and set contrast to +8.
Step #6
To make your icon bluer you will need to create another Selective Color Layer
Neutrals: +40 / -10 / -7 / 0
This can be your final step if you want this colorization.
(Variation)
Step #7
If you want more color for your icon and make it greener create one more Selective Color Layer
Magentas: +100 / +8 / 0 / +100
Neutrals: +19 / 0 / +30 / 0
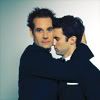
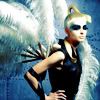
ICONS WITH THE SAME THECHNIQUE


Remember
+ Comments are love and appreciated
+ Credit would be nice
+ Don't claim this tutorias as yours
* This tutorial was made in PS CS2
Step #1
Choose an image and crop it. I recommend this tutorial for dark images, but you can use images with a bright backgrounds and the result will be a little different but you will get a good icon.
Step #2
Duplicate your base and set the layer to Screen, opacity 100%.
Step #3
Now go to your base and duplicate it, drag it to the top and desaturate it. Set the layer to Lighten and don't forget to adjust the opacity, I use 45% but it depends of your base.
Step #4
Create a Selective Color Layer
Reds: -100 / -18 / +100 / +25
Cyans: -100 / +35 / +100 / +51
Blues: +16 / 0 / 0 / 0
Magentas: 0 / -100 / +100 / -100
Whites: 0 / 0 / +14 / +100
Neutrals: +20 / +26 / 0 / +9
Step #5
Create a Brightness/Contrast Layer and set contrast to +8.
Step #6
To make your icon bluer you will need to create another Selective Color Layer
Neutrals: +40 / -10 / -7 / 0
This can be your final step if you want this colorization.
(Variation)
Step #7
If you want more color for your icon and make it greener create one more Selective Color Layer
Magentas: +100 / +8 / 0 / +100
Neutrals: +19 / 0 / +30 / 0
ICONS WITH THE SAME THECHNIQUE
Remember
+ Comments are love and appreciated
+ Credit would be nice
+ Don't claim this tutorias as yours