tutorial 05
ok, today we will be making this icon:
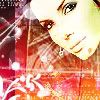
ok, we'll start off with this base of the beautiful Sandra Bullock:

duplicate twice, desaturate both and set the first one, or the middle one, to screen and the second one, the top one, to softlight, flatten and sharpen to your liking.
new layer:

which comes default wiht PS CS and set it to lighten
new layer:

set to color burn
new layer:
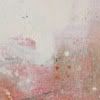
texture by ___robotpirate as are the next two, and set it to color burn
new layer:
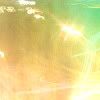
set to overlay
new layer:
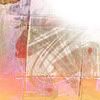
set to hard light, and I erased the bit on her face.
new layer:

use the selection tool and select a small rectangualr spot and flood fill with black
new layer:
brush from 100x100_brushes
if you know who made it, please tell me<33
new layer:
now, for this one I'm going to use a BUNCH of different brushes at once, all in white:

<--- THIS IS NOT A TEXTURE.
please make your own brushes on one layer, I've seen a lot of people just copying and pasting it on their icon, that's NOT why I made it.
brushes by: dorky_duck, azn_girl,crumblingwalls and 100x100_brushes.
new layer:

set to screen, by colorfilter
then, add text if you like, I chose to leave mine textless, and TA DA!!
now, my onlt rule is PLEASE PLEASE don't copy this tutorial exactly, it's meant to guid you and give you ideas.
have fun, and feel free to use the icon if you like, but please credit:D

ok, we'll start off with this base of the beautiful Sandra Bullock:

duplicate twice, desaturate both and set the first one, or the middle one, to screen and the second one, the top one, to softlight, flatten and sharpen to your liking.
new layer:

which comes default wiht PS CS and set it to lighten
new layer:

set to color burn
new layer:

texture by ___robotpirate as are the next two, and set it to color burn
new layer:

set to overlay
new layer:

set to hard light, and I erased the bit on her face.
new layer:

use the selection tool and select a small rectangualr spot and flood fill with black
new layer:

brush from 100x100_brushes
if you know who made it, please tell me<33
new layer:
now, for this one I'm going to use a BUNCH of different brushes at once, all in white:

<--- THIS IS NOT A TEXTURE.
please make your own brushes on one layer, I've seen a lot of people just copying and pasting it on their icon, that's NOT why I made it.
brushes by: dorky_duck, azn_girl,crumblingwalls and 100x100_brushes.
new layer:

set to screen, by colorfilter
then, add text if you like, I chose to leave mine textless, and TA DA!!
now, my onlt rule is PLEASE PLEASE don't copy this tutorial exactly, it's meant to guid you and give you ideas.
have fun, and feel free to use the icon if you like, but please credit:D