Tutorial #8
I haven't made a tutorial in a long while, with college life and all. Do NOT COPY the tutorial step by step. It's simply meant to be a guide, nothing more.
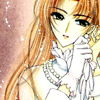
to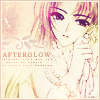
Made in PS7, probably translatable.
1. Grab your base. Spice it up with a little Auto Contrast and Auto Levels.
2. Create a new adjustment layer and select Gradient Map (for this: make sure the colors are your default Black & White) and change its Fill opacity to 60%. Another alternative is to make a new fill layer, fill it with black, set to Color and adjust the opacity to 60%. Or something relatively lower to than 90%.
3. Grab this texture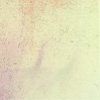
by Tre and set it to Darken.
4. Create a new layer, fill it with any dark blue color (mine's #08173B) and set it to Exclusion.
5. Duplicate your base, put it on top and set it to soft light.
6. New layer: fill it with a rather light pinkish-blue gradient (mine came from framedinblood, change the opacity to 20% and set it to Saturation.
7. New layer: fill it with this gradient
(no idea who's it from, anybody wanna help?), change the opacity to 47% and set to soft light.
8. Another new layer: fill it with #AABB9B or any shade of green, change the opacity to 50% and set to soft light.
9. Grab this texture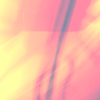
by silverqe, change the opacity to 57% and set to Hard Light.
10. New layer: Use a dark blue gradient (mine, again, came from framedinblood) and set to Lighten.
11. Duplicate your base, place it on top of everything, desaturate then set to soft light.
12. New layer. Using the rectangular marquee tool, make a small rectangle and fill it with a light color that came from your image. Then go to Filter->Blur and select Gausian Blur with a radius of 5-6.0 pixels.
13. Add your text and your borders.
14.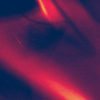
Another texture by silverqe. Set to lighten but change its opacity to 59%.
15. Grab this light texture
by awmpdotnet and set to screen.
And you're done.

to
Made in PS7, probably translatable.
1. Grab your base. Spice it up with a little Auto Contrast and Auto Levels.
2. Create a new adjustment layer and select Gradient Map (for this: make sure the colors are your default Black & White) and change its Fill opacity to 60%. Another alternative is to make a new fill layer, fill it with black, set to Color and adjust the opacity to 60%. Or something relatively lower to than 90%.
3. Grab this texture

by Tre and set it to Darken.
4. Create a new layer, fill it with any dark blue color (mine's #08173B) and set it to Exclusion.
5. Duplicate your base, put it on top and set it to soft light.
6. New layer: fill it with a rather light pinkish-blue gradient (mine came from framedinblood, change the opacity to 20% and set it to Saturation.
7. New layer: fill it with this gradient

(no idea who's it from, anybody wanna help?), change the opacity to 47% and set to soft light.
8. Another new layer: fill it with #AABB9B or any shade of green, change the opacity to 50% and set to soft light.
9. Grab this texture

by silverqe, change the opacity to 57% and set to Hard Light.
10. New layer: Use a dark blue gradient (mine, again, came from framedinblood) and set to Lighten.
11. Duplicate your base, place it on top of everything, desaturate then set to soft light.
12. New layer. Using the rectangular marquee tool, make a small rectangle and fill it with a light color that came from your image. Then go to Filter->Blur and select Gausian Blur with a radius of 5-6.0 pixels.
13. Add your text and your borders.
14.

Another texture by silverqe. Set to lighten but change its opacity to 59%.
15. Grab this light texture

by awmpdotnet and set to screen.
And you're done.