animated icon tutorial
For Raddy
Okay, here's the tutorial!
To make this:
Oh, just an fyi, this computer only has CS3 extended but CS3 and 4 are very similar so it'll still be applicable for you. :)
1. Load your gif (since you told me that you already know how to make gifs, I figured I'd skip this step)
2. Open a new window (for my example, I used my icon so the window is 100x100) then open the caps that you want to include with the gif.
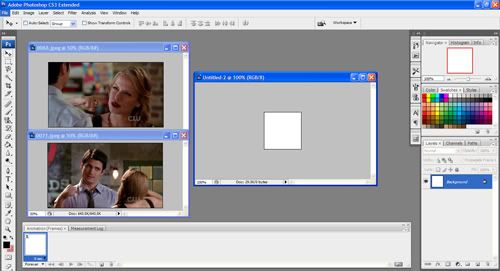
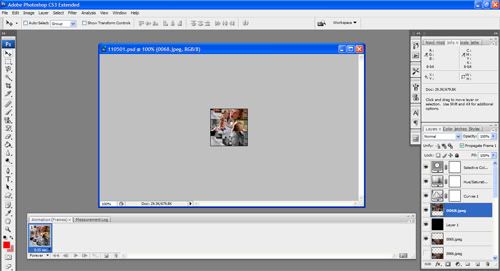
3. Drag the caps into the 100x100 window and adjust the pictures to however you want them to look like keeping in mind where you want your gif to be. For my example, I wanted my gif to be at the bottom of the icon as a sort of sequence to the individual caps that I chose.
4. Go to the window where your gif is (see, step 1). On the LAYERS window highlight (click the first layer+shift+click the last layer) all the layers that have the caps of your gif then transfer all the layers to the window where your caps are (see, step 3). For my example, I already resized the gif. To do that, just make sure that the layers of the gif are all highlighted, press ctrl+t and choose your desired size)
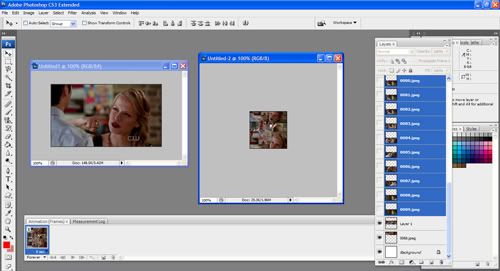
5. You may want to edit the position of your gif, to do that, do the same as in step 4. Make sure that the layers of the gif are all highlighted then you can change the position to where ever you want it to be. You can also do the necessary coloring for both the screencaps and the gif - just transfer the necessary layers on top of each other on the LAYERS window. Personally, I put all the layers that are part of the gif at the bottom of the LAYERS window so that I don't get confused. Plus, it's easier to make the other layers visible once you get to step 7. :)
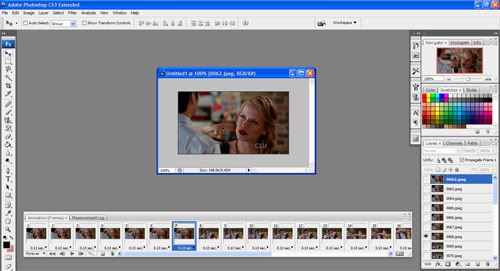
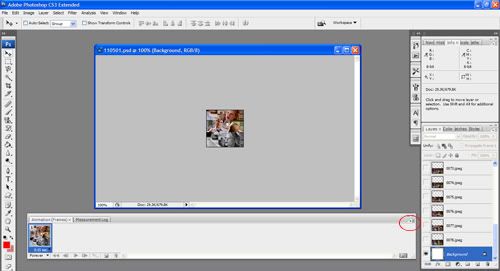
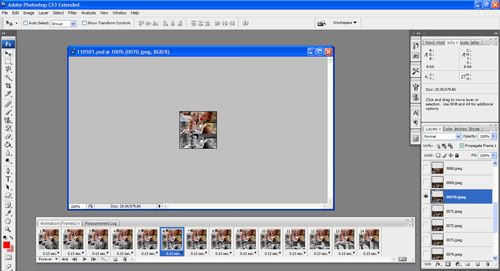
6. After editing, on the ANIMATION window, click "MAKE FRAMES FROM LAYERS" then "REVERSE FRAMES" . As soon as you click on it, you'll see that your ANIMATION window has all of your layers in individual frames. All you have to do is delete all the frames that DO NOT have the caps of your gif. I already highlighted the frames that do not have the caps of the gif. (see second picture below). To delete the frames, don't press the delete button but press the trash bin in the ANIMATION window.
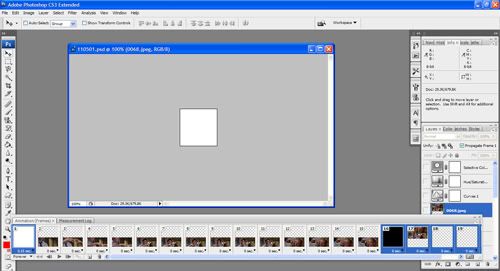
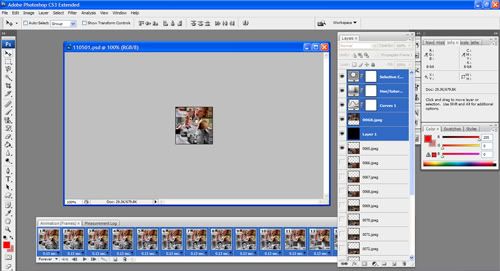
7. Highlight all the frames on the ANIMATION window (click on the first frame+shift+click on the last frame). Go to your LAYERS window and click on the small box of the layers that are NOT part of the gif to make them visible. (In the picture, I've already highlighted the layers on the LAYERS window that need to be VISIBLE) At the same time, adjust the secs per frame. (I usually set mine to 0.13 to 0.15 but that really depends on the gap between your caps.)
8. TEST IT! When you press play and your gif continues to play while your screencaps stay in place, you've done it! :D
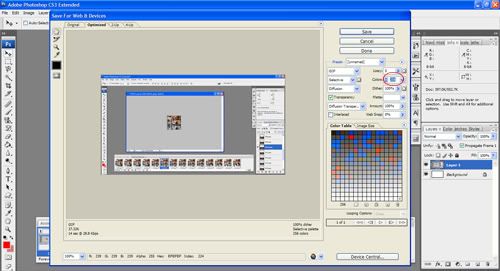
9. Save it! Go to File+Save For Web and Devices+Save If the file is bigger than 40KB, try adjusting the colors to 16, 32, 64, or 128 to see if it'll be able to be less than 40KB.
TIP:
- For animated icons, the maximum size is 40KB. I suggest you lessen the caps (less than 15) for the gif or make the gif black and white.
Okay, here's the tutorial!
To make this:
Oh, just an fyi, this computer only has CS3 extended but CS3 and 4 are very similar so it'll still be applicable for you. :)
1. Load your gif (since you told me that you already know how to make gifs, I figured I'd skip this step)

2. Open a new window (for my example, I used my icon so the window is 100x100) then open the caps that you want to include with the gif.

3. Drag the caps into the 100x100 window and adjust the pictures to however you want them to look like keeping in mind where you want your gif to be. For my example, I wanted my gif to be at the bottom of the icon as a sort of sequence to the individual caps that I chose.
4. Go to the window where your gif is (see, step 1). On the LAYERS window highlight (click the first layer+shift+click the last layer) all the layers that have the caps of your gif then transfer all the layers to the window where your caps are (see, step 3). For my example, I already resized the gif. To do that, just make sure that the layers of the gif are all highlighted, press ctrl+t and choose your desired size)

5. You may want to edit the position of your gif, to do that, do the same as in step 4. Make sure that the layers of the gif are all highlighted then you can change the position to where ever you want it to be. You can also do the necessary coloring for both the screencaps and the gif - just transfer the necessary layers on top of each other on the LAYERS window. Personally, I put all the layers that are part of the gif at the bottom of the LAYERS window so that I don't get confused. Plus, it's easier to make the other layers visible once you get to step 7. :)

6. After editing, on the ANIMATION window, click "MAKE FRAMES FROM LAYERS" then "REVERSE FRAMES" . As soon as you click on it, you'll see that your ANIMATION window has all of your layers in individual frames. All you have to do is delete all the frames that DO NOT have the caps of your gif. I already highlighted the frames that do not have the caps of the gif. (see second picture below). To delete the frames, don't press the delete button but press the trash bin in the ANIMATION window.


7. Highlight all the frames on the ANIMATION window (click on the first frame+shift+click on the last frame). Go to your LAYERS window and click on the small box of the layers that are NOT part of the gif to make them visible. (In the picture, I've already highlighted the layers on the LAYERS window that need to be VISIBLE) At the same time, adjust the secs per frame. (I usually set mine to 0.13 to 0.15 but that really depends on the gap between your caps.)

8. TEST IT! When you press play and your gif continues to play while your screencaps stay in place, you've done it! :D

9. Save it! Go to File+Save For Web and Devices+Save If the file is bigger than 40KB, try adjusting the colors to 16, 32, 64, or 128 to see if it'll be able to be less than 40KB.

TIP:
- For animated icons, the maximum size is 40KB. I suggest you lessen the caps (less than 15) for the gif or make the gif black and white.