Christmas Bakerage Part 1: Poinsettia Christmas Cake

Traditionally made as a log cake, I abandoned this idea a little over a year ago for the sake of aesthetics. I wanted the awesomeness of the ripple cake, but I also wanted it to look like an actual cake. Ever since I figured out how to make this as a round cake, I have never gone back.
Here's a cake that requires more assemblage than baking itself, but the theme atop the cake can be applied to any cake. You can even skip the baking step altogether and just buy biscuits, but home made is always so much nicer. I will skip the cookie-baking step as the best thing really is to simply use your favourite chocolate cookie recipe. Choc chip cookies work really well. ANZAC biscuits are also great to use if you want the resultant cake to be on the more fruity/nutty side - in which case you would omit the peppermint and ganache. You want your cookies to be relatively flat and even, or else you will find it difficult to assemble the finished product. The choices are endless. Which is why the 'recipe' will be more of a general guideline. Quantities will differ based on your personal choices, and exactly how tall and wide you want your cake to be.

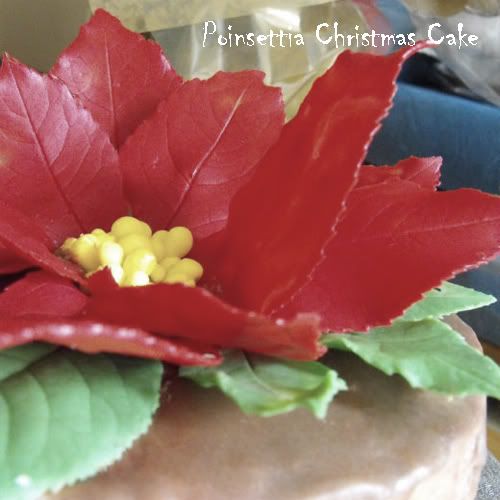
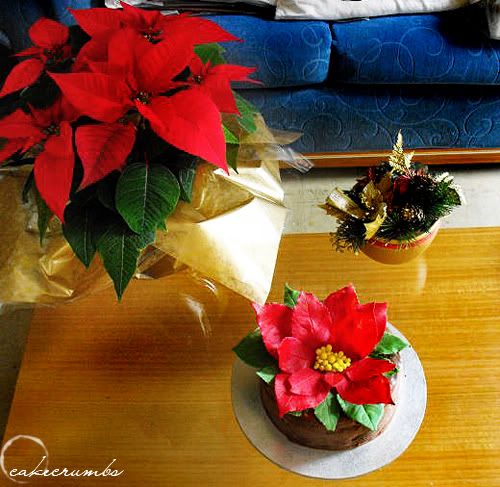
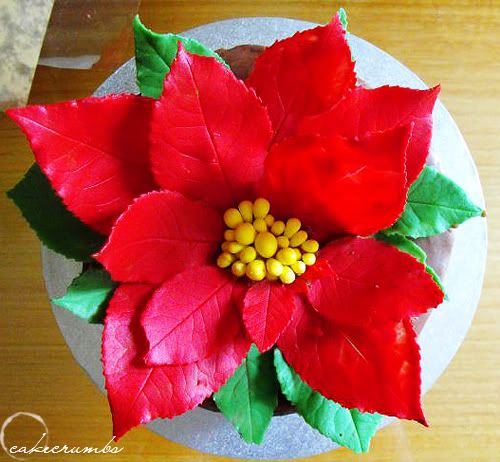
Spot the difference! I know, I'm kidding myself if I pretend it looks much anything like the real thing, but hey, we can pretend.

Though people did look at it and go, "Hey, a poinsettia!", so I suppose there's a small victory?
Here's how to do it if you want to:
Poinsettia Cake
Ingredients
Chocolate Ripple Cake
Desired quantity of cookies
600ml cream
Finely grated peppermint crisp (or other flavoured chocolate, or even flavouring itself)
Chocolate Ganche
50g butter
100g dark chocolate
4 tbsp double cream
Chocolate Poinsettia
200g white chocolate
Green powdered food colouring
Red powdered food colouring
Rose leaves (you could use poinsettia leaves to ensure accuracy, but I couldn’t bear to pull one apart)
Fondant
Yellow gel paste
Method
Chocolate Ripple Cake
1. Whip cream to a stiff peak, fold in peppermint crisp. This needs to be grated fairly finely, or else chunks of chocolate will give you uneven gaps between your cookies.
2. Spread a thin layer of cream onto your cake board.
3. Position one cookie in the centre of where you want your cake to be. Place an outer ring of cookies around your central cookie. Depending on how large you made your cookies, the number will differ. For me, it is usually 6 cookies in the outer ring.
4. Cover this first layer with a thin layer of cream. This layer needs to be enough so that cookies placed on above layers will “adhere” to those below.
5. Proceed to “build” your cake upwards by alternating the position of your cookies in the outer ring: the central cookie will stay centralised, but the position of the cookie on outer ring should fall between that of the cookie below it: just like a brick wall. Press down gently on your cookie as you place it to squeeze out excess cream and ensure it adheres properly. Don’t forget to fill in your gaps as you go. Especially those on the outside of the cake.
6. Once you have reached your desired height, coat the cake in a final layer of cream.
7. If desired, pour over chocolate ganache.
8. Decorate
9. Chill in the fridge. You will need at least 6 hours to turn your creation into a cake-like texture. Overnight is ideal. Your cake will proceed to get somewhat mushier over time. Some people prefer the texture after 2 days, so any leftovers will still be delicious.
Chocolate Ganache
1. Place the ingredients in a small saucepan and stir until combined.
2. Remove from heat and allow to cool as much as you can before it solidifies: you don’t want to pour hot ganache over a cake consisting largely of cream. Stir it occasionally to avoid it developing a skin, and to maintain and even texture.
3. Pour over cake
Chocolate Poinsettia
1. Wash rose leaves
2. Melt your white chocolate
3. Pour 1 third of your chocolate into a separate bowl and colour green
4. ‘Paint’ an assortment of some of the largest rose leaves green. Some people use a paint brush, but I just use the back of a teaspoon. (NB: Make sure you paint onto the side of the leaf that have the veins sticking out)
5. Colour the remaining chocolate red.
6. Paint an assortment of different sized rose leaves red.
7. Place leaves in the freezer for 10 minutes, or until solidified (but not frozen).
8. Peel off the rose leaves. (NB: Ensuring your fingers tips and cool and that you don’t hold the leaf in the same spot for too long will help you avoid a lot of frustration)
9. Place the leaves on the cake, ensuring you leave a small ring in the centre of them for the flower buds
(NB: Before chilling, I lay my leaves onto the tray in a variety of positions. I don't like flat leaves and like to give them character by raising a centre here, twisting a point there. But keep in mind, whatever position you shape it in to here will be opposite to how it will look once finished, i.e., your leaf is face-down on your tray. If it is positioned to be concave here, it will look convex once the leaf is removed)
10. Colour a small batch of fondant yellow.
11. Roll small balls of it into teardrop shapes.
12. Place pointy side down in the centre of the cake
x-posted here @ bakebakebake