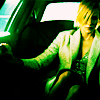
Tutorial #1: Vibrant Greens (PS7)
I was debating over wether or not to post this, but I tried it out on a bunch of pictures and thought it worked well, so here it is! This is my very first tutorial, so feedback is much appreciated. Also, please credit me if you're going to use any of the icons posted in this tutorial. You don't have to credit me if you're using the tutorial. That's just silly. ;)
This tutorial was made in Photoshop 7. It includes Selective Colouring, so it is NOT translatable. Sorry PSP users!
Today, we'll be going from this to
this!
1 - Take your picture (I'll be using this one), crop it and resize it to 100x100. I then did auto-contrast and used unsharp mask at 20.
2 - Take your base and duplicate it (Ctrl+J) and set it to screen at 50%. Note that my base was already fairly light. If your base is darker, add more screen layers or change the opacity of the screen layer.
3 - Go to Layer>New Adjustment Layer>Curves. Put in the following:
RBG:
Input: 180
Output: 166
Green:
Input: 124
Output: 147
(Note: the next two steps are from this tutorial by sboardman711)
4 - Make a new layer (Ctrl+Shift+N) and fill it with #F9AD81. Set this layer to multiply and reduce the opacity to 40%.
5 - Make a new layer (Ctrl+Shift+N) and fill it with #217B8E. Set this layer to overlay and reduce the opacity to 60%.
6 - Go back to your base, duplicate it (Ctrl+J) and bring the copy to the top of your layers. Change the blending to Soft Light.
7 - Go to Layer>New Adjustment Layer>Selective Colouring and put in the following:
Reds:
Cyan: -50
Magenta: 0
Yellow: 50
Black: 0
Yellows:
Cyan: -50
Magenta: 0
Yellow: 100
Black: 0
Greens:
Cyan: 100
Magenta: -100
Yellow: 100
Black: 100
Cyans:
Cyan: 100
Magenta: 0
Yellow: 0
Black: 50
Whites:
Cyan: 100
Magenta: 0
Yellow: 40
Black: 0
Blacks:
Cyan: 0
Magenta: 0
Yellow: 0
Black: 10
8 - Go to Layer>New Adjustment Layer>Colour Balance and put in the following
midtones: -10, 50, -5
shadows: 0, 50, 0
Make sure Preserve Luminosity is checked
Set to Soft Light
9 - Add brushes, borders, flatten image and you're finished!
Examples:


Note: This tutorial works best on lighter images with muted or light traces of green in it. Play with it! Not all images require the same settings that I've used here. Have fun! Feel free to ask any questions.
This tutorial was made in Photoshop 7. It includes Selective Colouring, so it is NOT translatable. Sorry PSP users!
Today, we'll be going from this to

this!
1 - Take your picture (I'll be using this one), crop it and resize it to 100x100. I then did auto-contrast and used unsharp mask at 20.
2 - Take your base and duplicate it (Ctrl+J) and set it to screen at 50%. Note that my base was already fairly light. If your base is darker, add more screen layers or change the opacity of the screen layer.
3 - Go to Layer>New Adjustment Layer>Curves. Put in the following:
RBG:
Input: 180
Output: 166
Green:
Input: 124
Output: 147
(Note: the next two steps are from this tutorial by sboardman711)
4 - Make a new layer (Ctrl+Shift+N) and fill it with #F9AD81. Set this layer to multiply and reduce the opacity to 40%.
5 - Make a new layer (Ctrl+Shift+N) and fill it with #217B8E. Set this layer to overlay and reduce the opacity to 60%.
6 - Go back to your base, duplicate it (Ctrl+J) and bring the copy to the top of your layers. Change the blending to Soft Light.
7 - Go to Layer>New Adjustment Layer>Selective Colouring and put in the following:
Reds:
Cyan: -50
Magenta: 0
Yellow: 50
Black: 0
Yellows:
Cyan: -50
Magenta: 0
Yellow: 100
Black: 0
Greens:
Cyan: 100
Magenta: -100
Yellow: 100
Black: 100
Cyans:
Cyan: 100
Magenta: 0
Yellow: 0
Black: 50
Whites:
Cyan: 100
Magenta: 0
Yellow: 40
Black: 0
Blacks:
Cyan: 0
Magenta: 0
Yellow: 0
Black: 10
8 - Go to Layer>New Adjustment Layer>Colour Balance and put in the following
midtones: -10, 50, -5
shadows: 0, 50, 0
Make sure Preserve Luminosity is checked
Set to Soft Light
9 - Add brushes, borders, flatten image and you're finished!
Examples:


Note: This tutorial works best on lighter images with muted or light traces of green in it. Play with it! Not all images require the same settings that I've used here. Have fun! Feel free to ask any questions.