First icon colouring tutorial [enchanced yellows]
My very very first tutorial. xD
We're going to do this:
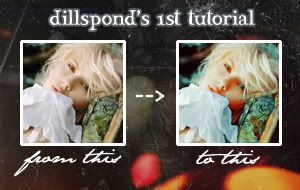
Involves selective colouring, made in Photoshop CS
Today, we are going from this:
to this: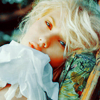
.
To start off, open your base. Do not sharpen your image just yet.

Duplicate the base image, and set it to screen. I set my opacity to about 30%, but it depends on your image.
Go to Layers > New Adjustment Layer > Selective Color.
Make sure at the bottom, it's checked at the Relative option, not the Absolute option.
Put these settings in:
Reds
Cyan: -62
Magenta: 0
Yellow: +12
Black: 0
Yellows
Cyan: -65
Magenta: 0
Yellow: +32
Black: +36
Cyans
Cyan: -100
Magenta: 0
Yellow: +100
Black: 0
Neutrals
Cyan: +16
Magenta: 0
Yellow: -8
Black: 0
Duplicate the selective colouring layer.
Fill a new layer with #FFEDED and set it to Colour Burn, opacity 100%.
Then, fill a new layer with #EFFFF6 and set it to Multiply, opacity 100%.
Go to Layer > New Adjustment Layer > Selective Color
Put in these settings
Reds
Cyan: -22
Magenta: 0
Yellow: +15
Black: 0
Yellows
Cyan: +32
Magenta: 0
Yellow: -20
Black: 0
Neutrals
Cyan: +11
Magenta: -3
Yellow: -8
Black: 0
Duplicate this selective colouring layer, and set it to Darken, opacity 100%.
Now, go to Layer > New Adjustment Layer > Hue/Saturation.
Enter these settings:
Master
Saturation: +8
Reds
Saturation: +16
Yellows
Saturation: +9
And.... we are done!!
You can now flatten the image, and sharpen to your liking.

Note, that this colouring does not work with all images.
For example, with this base:
I got this:
Yes, exactly, not very nice looking :/
Download the PSD
Good examples made with this colouring
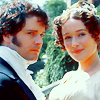
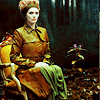
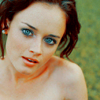
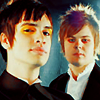
Feel free to take this icons but credit please.
I would love to see your results! ♥ ♥ ♥ ♥
And comment!!
I <3 comments.
We're going to do this:
Involves selective colouring, made in Photoshop CS
Today, we are going from this:
to this:
.
To start off, open your base. Do not sharpen your image just yet.
Duplicate the base image, and set it to screen. I set my opacity to about 30%, but it depends on your image.
Go to Layers > New Adjustment Layer > Selective Color.
Make sure at the bottom, it's checked at the Relative option, not the Absolute option.
Put these settings in:
Reds
Cyan: -62
Magenta: 0
Yellow: +12
Black: 0
Yellows
Cyan: -65
Magenta: 0
Yellow: +32
Black: +36
Cyans
Cyan: -100
Magenta: 0
Yellow: +100
Black: 0
Neutrals
Cyan: +16
Magenta: 0
Yellow: -8
Black: 0
Duplicate the selective colouring layer.
Fill a new layer with #FFEDED and set it to Colour Burn, opacity 100%.
Then, fill a new layer with #EFFFF6 and set it to Multiply, opacity 100%.
Go to Layer > New Adjustment Layer > Selective Color
Put in these settings
Reds
Cyan: -22
Magenta: 0
Yellow: +15
Black: 0
Yellows
Cyan: +32
Magenta: 0
Yellow: -20
Black: 0
Neutrals
Cyan: +11
Magenta: -3
Yellow: -8
Black: 0
Duplicate this selective colouring layer, and set it to Darken, opacity 100%.
Now, go to Layer > New Adjustment Layer > Hue/Saturation.
Enter these settings:
Master
Saturation: +8
Reds
Saturation: +16
Yellows
Saturation: +9
And.... we are done!!
You can now flatten the image, and sharpen to your liking.
Note, that this colouring does not work with all images.
For example, with this base:
I got this:
Yes, exactly, not very nice looking :/
Download the PSD
Good examples made with this colouring
Feel free to take this icons but credit please.
I would love to see your results! ♥ ♥ ♥ ♥
And comment!!
I <3 comments.