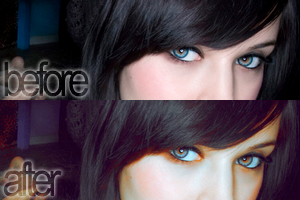
Coloring #4

Program: Photoshop 7
Steps: 5
Has hue/saturation, channel mixer, and selective coloring.
This is good for pictures with dark browns, pale skin, and pale pink.
STEP 1.
Prepare your base. Mine is of Hanna Beth.

STEP 2.
Add a SELECTIVE COLORING layer with the settings of:
RED: -100; 0; +100;0
CYAN: -100; 0; 0; 0
WHITE: +100; -7; -48; -24
NEUTRALS: +7; +4; +14; -5
BLACK: -11; -4; -13;0
This makes the reds stand out bringing back the color into her flesh.

STEP 3.
Add a HUE/SATURATION level with the settings of:
MASTER: 0;+20;0
This layer makes all colors pop.

STEP 4.
Add a SELECTIVE COLORING layer with the settings of:
RED: -100; 0; +57; 0
I wanted to add more red if you can see the little bit of blush she has.

STEP 5.
Add a CHANNEL MIXER layer with the settings of:
RED: +96; -2; +4
GREEN: +8; +98; -4
BLUE: +2; +10; +90
This reduces the red in her whole face, and makes it a bit whiter.

Other examples:


Please comment if you take the PSD! Which you can find {here}!