GIF-Making Tutuorial
Here's a short gif-making tutorial.
I generally just make gifs out of either DVDs or YouTube videos, but there's a high chance anyone that reads this won't have the same DVD Decrypter software that I have or wants to use the same converter site, so this tutorial doesn't include parts about that. If you have a DVD decrypter software, all you have to do is decrypt a dvd and make sure it saves into a file type that's recognized by VirtualDub (the program I use to cap, which I downloaded from here originally, in case you want to do that).
If you ARE interested, I like to use Convert.Files, to download YouTube videos.
I also use Adobe ImageReady 7.0, but I assume the same process would work with other versions of ImageReady, but I've never used those versions so I don't know if things look/are the same.
Anyway,
VirtualDub: Capping the Video
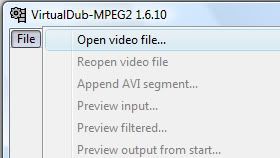
Open up VirtualDub, and then open your video file.
Once the file is open, you can use the play and stop buttons to watch the video
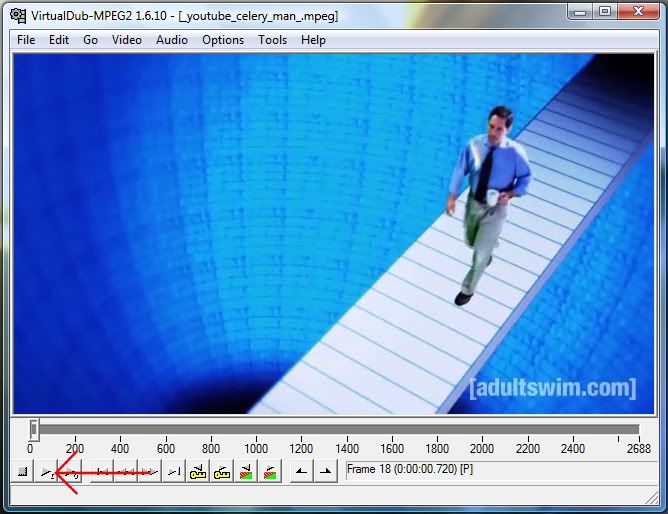
If it's a really long video, you can just grab the slider and move to the place you want, either way, stop the video and then use the left and right arrows on the keyboard to move back and forth one frame at a time. Once you find the frame you want to start at, hit the "home" button on the keyboard, or press this button:
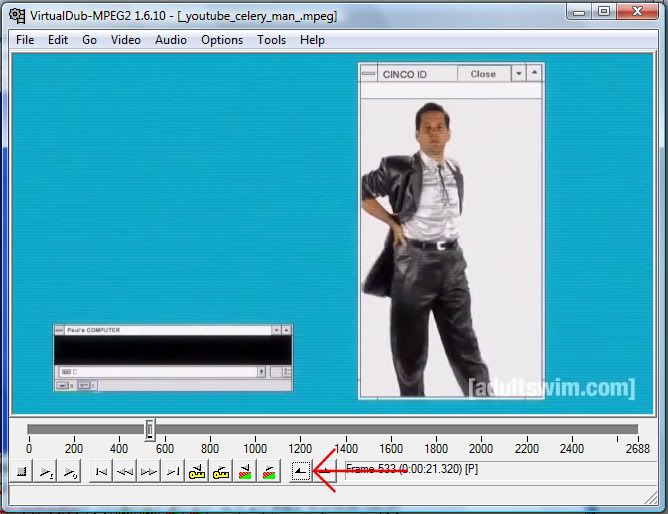
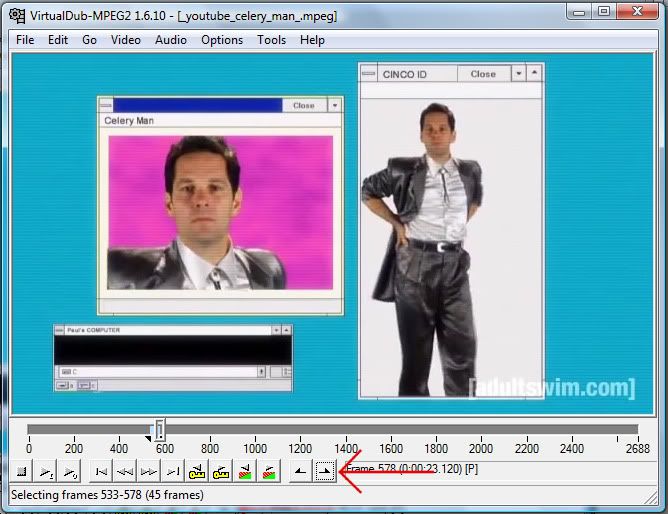
Then, press play or use the right arrow until you get to the last frame you want. Hit the "end" button on the keyboard, or press this button to end the selection of frames:
Now we have to set the frame rate.
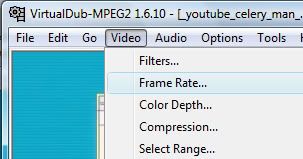
Here's the section you need to concern yourself with:

I usually process all frames and then delete individual frames by hand, but that's just me. It's a good idea to decimate by 2 or 3.
Basically what this means is that VirtualDub will save only every 2nd or 3rd frame, which will drop the file size and will make sure the gif moves fast enough.
Once that's done, you need to save the caps.
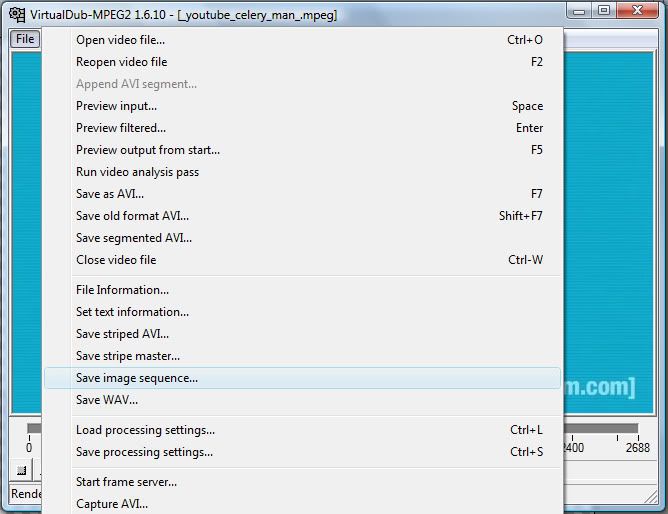
The following window will pop up with your save options:
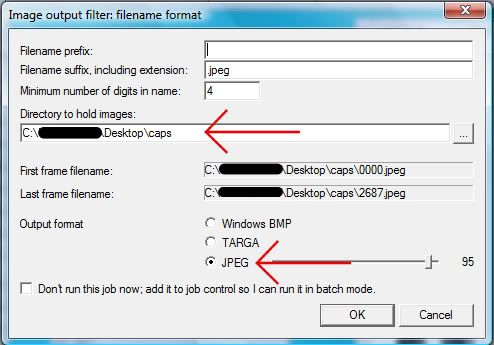
I don't add a prefix or anything, but you can if you want. The really important parts here are the save location and the file type. I like to just name a file "caps" (nice and simple), but name and location is up to you. The important thing is that there's NOTHING ELSE in the folder besides the caps that you save. Then make sure they save as JPEGs.
Ta-da! Done capping!
ImageReady: Make That Shit Move
We need to open up the caps.

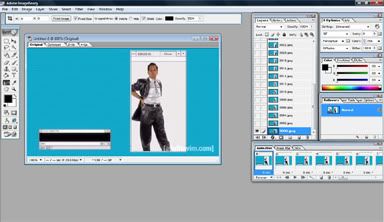
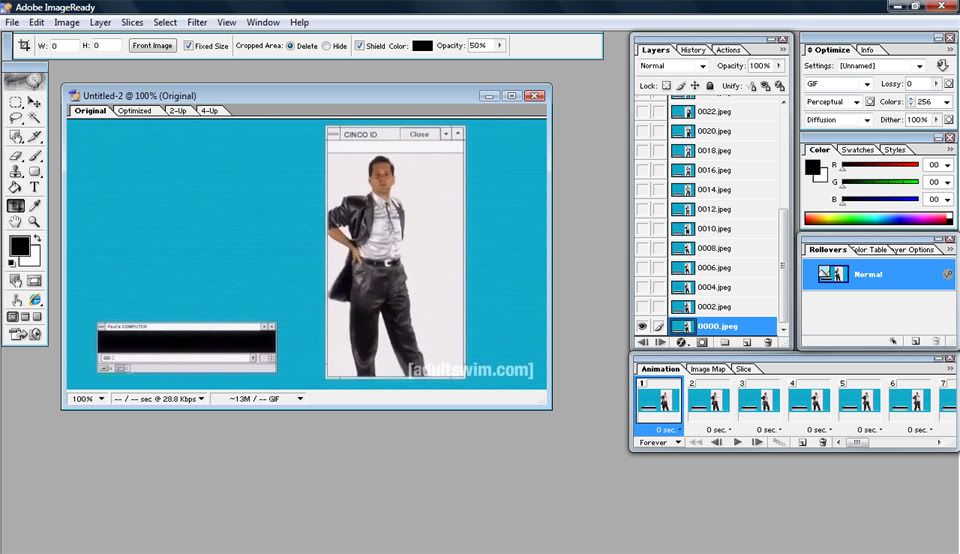
After the above, a little window will pop up, just find and choose the folder where you saved your caps. They will open and your screen should look something like this (click to enlarge):
Now, with the particular images I'm using, I don't want a gif of the whole screen, just the little part with Paul Rudd, so we've gotta crop it down. Now, just in case you don't know how this works:

Select the crop tool, choose the area you want to crop,
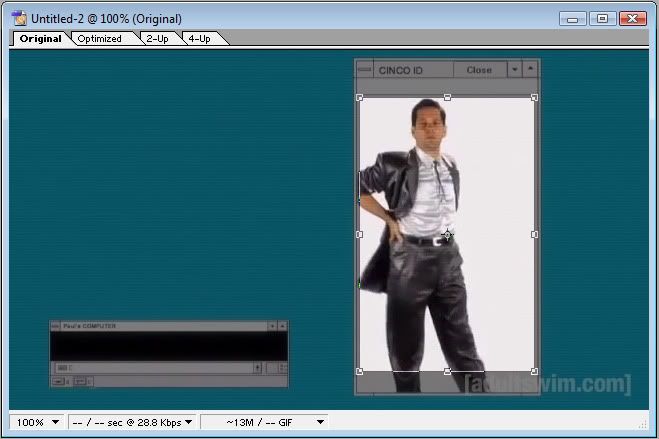
And hit enter.
Once your image is cropped, you can hit the play button down here to see what the gif would look like (note: make sure the little box in the bottom left says "Forever," otherwise your gif will only play once or twice and then freeze). Just be sure to hit stop before moving on, once you're happy with the way the image moves.

Now, here's the really important part. Hit the "2-Up" tab above the image. It'll show your original image on the left, and the optimized image on the right.
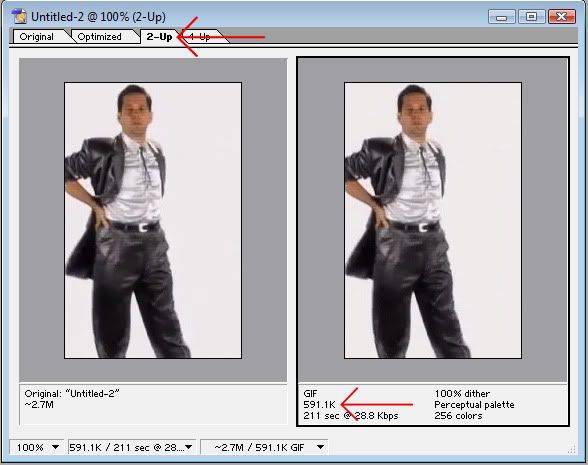
This will also show you how large your final image file will be. Mine is 591.1K without any tweaking. I don't really worry about file size, but if the hosting website you'll be uploading your final image to has a cap on file size, you'll want to pay attention.
If you go to the optimization window, there are tons of little options to tweak your file size, but just know, that TOO MUCH tweaking will cause your image to look terrible. For example, if I change the number of colors:

See what I mean? With only 16 colors, the file size is dramatically reduced, but the image looks awful.
Either way, the optimization window doesn't change the file size a whole lot, so if your file size is just WAY to large, you'll want to go back and either delete some frames (you'll need to close the image out of ImageReady, either delete some caps from your folder of caps or go back to VirtualDub and decimate by a larger number, and then re-open your folder as frames) or cap a smaller area.
So, now that your animation is done, you just need to save it. BUT, the usual "Save" option doesn't work here. You need to

Once the save window opens up, name and save your file and violà! You have a fancy new gif.
I generally just make gifs out of either DVDs or YouTube videos, but there's a high chance anyone that reads this won't have the same DVD Decrypter software that I have or wants to use the same converter site, so this tutorial doesn't include parts about that. If you have a DVD decrypter software, all you have to do is decrypt a dvd and make sure it saves into a file type that's recognized by VirtualDub (the program I use to cap, which I downloaded from here originally, in case you want to do that).
If you ARE interested, I like to use Convert.Files, to download YouTube videos.
I also use Adobe ImageReady 7.0, but I assume the same process would work with other versions of ImageReady, but I've never used those versions so I don't know if things look/are the same.
Anyway,
VirtualDub: Capping the Video
Open up VirtualDub, and then open your video file.
Once the file is open, you can use the play and stop buttons to watch the video
If it's a really long video, you can just grab the slider and move to the place you want, either way, stop the video and then use the left and right arrows on the keyboard to move back and forth one frame at a time. Once you find the frame you want to start at, hit the "home" button on the keyboard, or press this button:
Then, press play or use the right arrow until you get to the last frame you want. Hit the "end" button on the keyboard, or press this button to end the selection of frames:
Now we have to set the frame rate.
Here's the section you need to concern yourself with:
I usually process all frames and then delete individual frames by hand, but that's just me. It's a good idea to decimate by 2 or 3.
Basically what this means is that VirtualDub will save only every 2nd or 3rd frame, which will drop the file size and will make sure the gif moves fast enough.
Once that's done, you need to save the caps.
The following window will pop up with your save options:
I don't add a prefix or anything, but you can if you want. The really important parts here are the save location and the file type. I like to just name a file "caps" (nice and simple), but name and location is up to you. The important thing is that there's NOTHING ELSE in the folder besides the caps that you save. Then make sure they save as JPEGs.
Ta-da! Done capping!
ImageReady: Make That Shit Move
We need to open up the caps.
After the above, a little window will pop up, just find and choose the folder where you saved your caps. They will open and your screen should look something like this (click to enlarge):
Now, with the particular images I'm using, I don't want a gif of the whole screen, just the little part with Paul Rudd, so we've gotta crop it down. Now, just in case you don't know how this works:
Select the crop tool, choose the area you want to crop,
And hit enter.
Once your image is cropped, you can hit the play button down here to see what the gif would look like (note: make sure the little box in the bottom left says "Forever," otherwise your gif will only play once or twice and then freeze). Just be sure to hit stop before moving on, once you're happy with the way the image moves.
Now, here's the really important part. Hit the "2-Up" tab above the image. It'll show your original image on the left, and the optimized image on the right.
This will also show you how large your final image file will be. Mine is 591.1K without any tweaking. I don't really worry about file size, but if the hosting website you'll be uploading your final image to has a cap on file size, you'll want to pay attention.
If you go to the optimization window, there are tons of little options to tweak your file size, but just know, that TOO MUCH tweaking will cause your image to look terrible. For example, if I change the number of colors:
See what I mean? With only 16 colors, the file size is dramatically reduced, but the image looks awful.
Either way, the optimization window doesn't change the file size a whole lot, so if your file size is just WAY to large, you'll want to go back and either delete some frames (you'll need to close the image out of ImageReady, either delete some caps from your folder of caps or go back to VirtualDub and decimate by a larger number, and then re-open your folder as frames) or cap a smaller area.
So, now that your animation is done, you just need to save it. BUT, the usual "Save" option doesn't work here. You need to
Once the save window opens up, name and save your file and violà! You have a fancy new gif.