Hermione Tutorial
Well let´s star with this tutorial, I made this in PS CS2 transbalable 100% of the tutorial I think so
Go from this: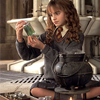
to this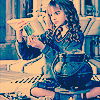
In really easy steps ^^
1-.First start croping your image to 100 x 100 as always, now sharpen it once, the duplicate your base and sei in Screen 100%
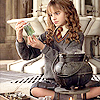
2-.Add a new layer fill it with # 012043, set in Exclusion opacity 40%
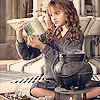
3-.Add a new layer fill it with #a9fceb, set in Soft Light opacity 100%
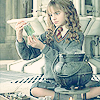
4-.Add a new layer fill it with #a9fcfb, sei in Color Burn opacity 100%
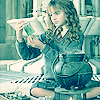
5-.Add a new layer fill it with #fca9f1, set in Overlay opacity 40%
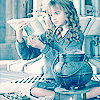
6-. Add a new adjusment layer that is Hue/Saturation with this settings:
Masters
Hue: +5
Saturation: +39
Brightness: -7
Reds
Hue: +10
Saturation: +23
Brightness: +9
Greens
Hue:+8
Saturation:+10
Brightness: +4
Cyans
Hue: +6
Saturation: +9
Brightness: 0
as finally Click OK and set in Color Burn 100%
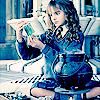
7-.Add a new layer fill it with #022a44, set in Exclusion 100%
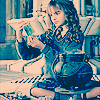
8-.Add a new layer fill it with #fff693, set in Darken 100%
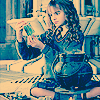
9-.Add a new layer and fill it with #c1cbfd, set in Soft Light opacity 40%
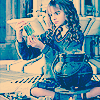
10-.Now add a new adujesment layer as final step that is Color Balance with this settings
+56, -17, -17
In midtones click OK leave in Normal 100% and this is your final product ^^

Other icons made with this tutorial:


and that´s all as always I like to see the results that you obtain ^^
Go from this:
to this
In really easy steps ^^
1-.First start croping your image to 100 x 100 as always, now sharpen it once, the duplicate your base and sei in Screen 100%
2-.Add a new layer fill it with # 012043, set in Exclusion opacity 40%
3-.Add a new layer fill it with #a9fceb, set in Soft Light opacity 100%
4-.Add a new layer fill it with #a9fcfb, sei in Color Burn opacity 100%
5-.Add a new layer fill it with #fca9f1, set in Overlay opacity 40%
6-. Add a new adjusment layer that is Hue/Saturation with this settings:
Masters
Hue: +5
Saturation: +39
Brightness: -7
Reds
Hue: +10
Saturation: +23
Brightness: +9
Greens
Hue:+8
Saturation:+10
Brightness: +4
Cyans
Hue: +6
Saturation: +9
Brightness: 0
as finally Click OK and set in Color Burn 100%
7-.Add a new layer fill it with #022a44, set in Exclusion 100%
8-.Add a new layer fill it with #fff693, set in Darken 100%
9-.Add a new layer and fill it with #c1cbfd, set in Soft Light opacity 40%
10-.Now add a new adujesment layer as final step that is Color Balance with this settings
+56, -17, -17
In midtones click OK leave in Normal 100% and this is your final product ^^
Other icons made with this tutorial:
and that´s all as always I like to see the results that you obtain ^^