Zoey tutorial
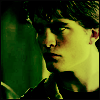
Go from this

to this
Well this is my second tutorial well we are going to begin
-First Start cropping your image in 100px x 100 px
-Then duplicate you image twice or wht ever you image need and the both set in Screen
-Fill a new layer with fc2e33 and set in Soft Light
-Fill another new layer with 00425e and set in Exclusion
-Fill a new layer with a57903 and set in Multiply
-Fill a new layer with fd04dd and set in Saturation
-Now duplicate your base image bring it to the top and set in Soft Light
-Then Duplicate de Soft Light image but desaturate it
-Fill another layer with 84ebfe and set in Color Burn
-Fill another layer with fcda92 and set in Soft Light
-Now go to layer >> New adjusment layer >> Brightness/ Contrast and put in this way:
Brightness- +44
Contrast- +54
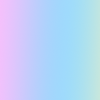
-Now add this gradient:
and set in
Saturation in 50 % of opacity
-Fill another new layer with 06cdff and set in Color Burn in a 10% of opacity
-And now you can add more color layer,borders,brush text and wht ever you want
Other icons made with this tut:


NOTE:The tutorial depend the result of the coloring because of the image that you use it coul be darken like the other icons or a less darken like Zoey Icon n_n
I like to see the results of my tut i hope that you like the tutorial

to this

Well this is my second tutorial well we are going to begin
-First Start cropping your image in 100px x 100 px
-Then duplicate you image twice or wht ever you image need and the both set in Screen
-Fill a new layer with fc2e33 and set in Soft Light
-Fill another new layer with 00425e and set in Exclusion
-Fill a new layer with a57903 and set in Multiply
-Fill a new layer with fd04dd and set in Saturation
-Now duplicate your base image bring it to the top and set in Soft Light
-Then Duplicate de Soft Light image but desaturate it
-Fill another layer with 84ebfe and set in Color Burn
-Fill another layer with fcda92 and set in Soft Light
-Now go to layer >> New adjusment layer >> Brightness/ Contrast and put in this way:
Brightness- +44
Contrast- +54
-Now add this gradient:

and set in
Saturation in 50 % of opacity
-Fill another new layer with 06cdff and set in Color Burn in a 10% of opacity
-And now you can add more color layer,borders,brush text and wht ever you want
Other icons made with this tut:
NOTE:The tutorial depend the result of the coloring because of the image that you use it coul be darken like the other icons or a less darken like Zoey Icon n_n
I like to see the results of my tut i hope that you like the tutorial