Twilight tutorial
I has a new layout, you like? xD
And here is a tutorial...
Requested by iluvpoto
I changed it a bit, I think it's more beautiful now.
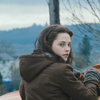
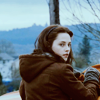
FROM
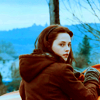
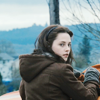
TO
Using: Photoshop CS
Includes: curves, color balance, selective color, H/S/L
In 12 steps
STEP 1
Crop your image, we are using the beautiful Bella cap (Twilight) :D
Sharpen, Blur, etc.
STEP 2
Duplicate it and set it to soft light 68% opacity, to bring out some contrast.
STEP 3
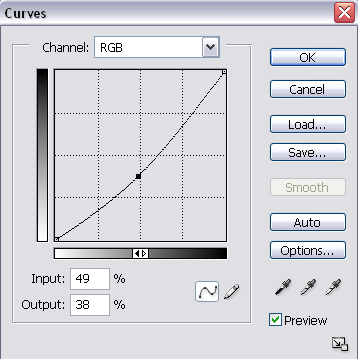
Curves:
RGB:
Input: 49
Output: 38
+ PREVIEW
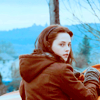
You should get this
STEP 4
Fill it with #180A02 and set it to difference 30% fill; 100% opacity
Another fill layer (#290F04), set it to exclusion 100% opacity.
STEP 5
Color Balance:
Midtones: +47; -19; -17
Shadows: +14; -2; -43
Highlight: -30; +2; +21
Set it to fill 28%; opacity 100%
STEP 6
Selective color:
Neutrals: 0; 0; 0; +15
Black: 0; 0; 0; +15
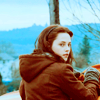
we have this so far:
STEP 7
Fill it with white (#FFFFFF) and set it to soft light 70% fill.

It looks better, but it needs a lot of color.
STEP 8
Another Selective color layer:
Reds: 0; +34; 0; 0
Yellow: 0; 0; -18; 0
Green: 100; 0; -95; +100
Cyan: +100; +6; +20; -26
Blue: +100; -48; +21; +100
Neutrals: +7; +18; +20; -25
STEP 9
Hue/Saturation/Lightness
Master: 0; +29; 0
Yellows: +1; +2; 0
Cyan: +4; +39; 0
Yes I am obsessed with blue xD
STEP 10
Make another curves layer:
RGB:
1st point:
I: 29
O: 28
2nd point:
I: 94
O: 100
+ PREVIEW
GREEN:
I: 100
O: 100
+PREVIEW
BLUE:
1st point:
I: 40
O: 55
2nd point:
I: 64
O: 81
+PREVIEW
You should get this:
OK, fill 47%, opacity 100%
STEP 11
Add this; set to soft light 100% opacity

STEP 12
Now a white bloop (clicky); set to soft light 36% fill, opacity 100%
Other images with similar/the same coloring:


AND WE ARE DONE, I HOPE IT'S USEFUL :D
I'd like to see your results.
If you'll have trouble with curves tell me so I can help you the best way I can!
comment if you want the PSD, I'll give you the link to the PSD in a screened comment.
MY LAYER PALETTE