Bruised Tutorial
Here's the bruised tutorial. Hope you guys find it useful. Let me know if you have any questions, comments, or suggestions.
*This is my first tutorial so sorry if it's lacking in anything.
So this tutorial is going to show you how to go from this:

to this:
.
This was all done in PS 7 with default brushes, so no need to download anything. So just save the first pic to your computer and then open it up.
Step 1:
Zoom in to 200% and focus on his eye.
Create a new layer and select the following brush in the default brushes:
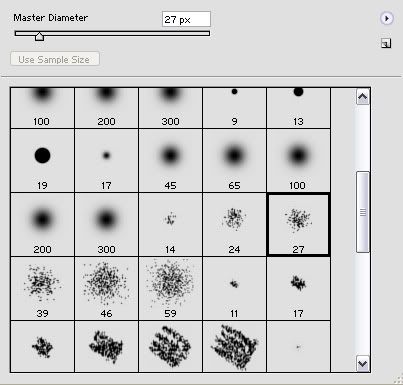
Reduce the opacity to 40%, and load the palette with a nice dark red color (I used #982722).
Run it under his eye in one sweep.
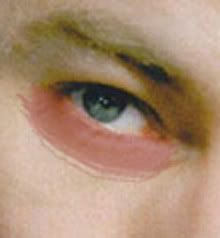
Select the smudge tool, lower the strength to about 15 and smudge under his eye, working down and across. Feel free to use the eraser if it spreads out too far but make sure you use a feathered eraser brush.
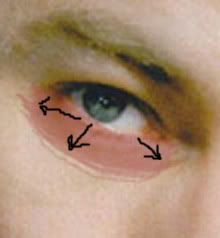
Once you're done smudging it should look somewhere along the lines of this:

Step 2:
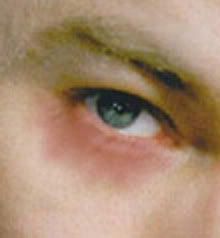
Duplicate the red layer. Go into image adjustments and click on hue/saturation. Play with the hue slide bar until you get a color inbetween purple and red (I used -55 on the hue). Don't mess with the saturation or lightness.
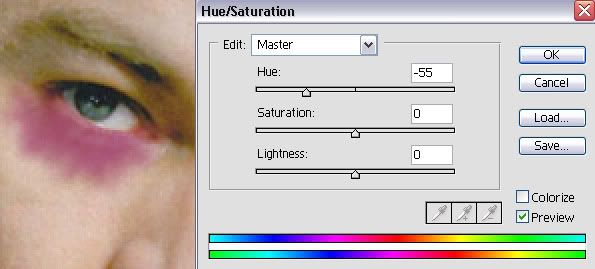
Set this layer to saturation and lower the ocpacity to 25%. This will give us a undertone of purple. It doesn't look like much but it will help later. It should look like this:
Step 3:
Duplicate the red layer again and drag it to the top. Go back into image adjustments and click hue/saturation. Again, play with the hue slide bar until you get a yellowish green color ( I used +75). Again, don't mess with the saturation of lightness.
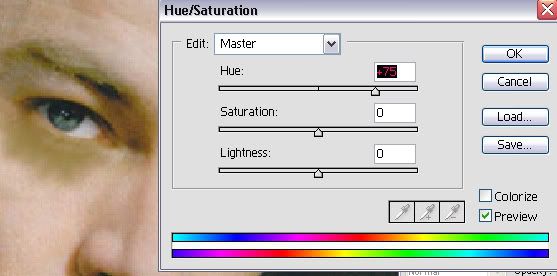
Set this layer to color burn and lower the opacity to 50%.
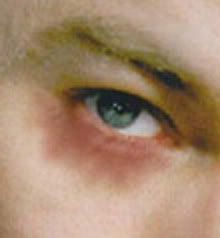
Step 4:
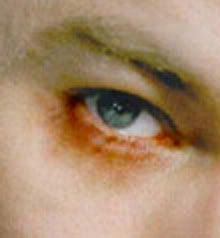
Now, create a set (if you don't know how to, it's the little folder image on the bottom of the palette) and drag all the layer into the set. Make sure they're still in the same order. Change the set blending to color burn.

It should look like this now:
Step 5:
Duplicate the set and rotated it 180. Move it above his eye. Rescale the layer until it looks right, and doesn't cover up his eyebrow.
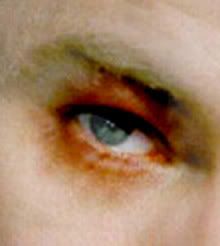
Step 6:
On your layer palette, slect the JM pic. Using the selection tool, draw a square around his eye, this is the area we want to use.
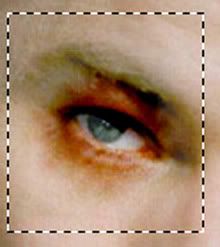
On filters click liquify. Lower the brush size to 20 and change the style to expanding.
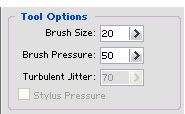

.
Using your own judgement, enlarge around his eye till it looks swollen.
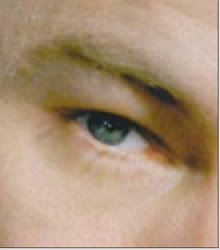
Click ok when you like your results. Remember, you can always click cancel and start over again if you don't like the way it is. Once you click ok, it should something look like this:
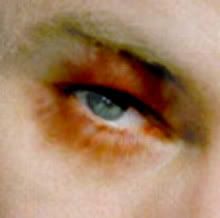
Zoom back out. His eyes look a bit too stark so we're going to fix that.
Step 7:
Create a new layer outside of both sets. Using a small feathered brush, lower the opacity to 15% and chose a bright red. Use the brush just over the white of his eyes. You should go from the top image to the results in the bottom image.
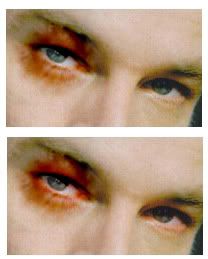
And now you're done!
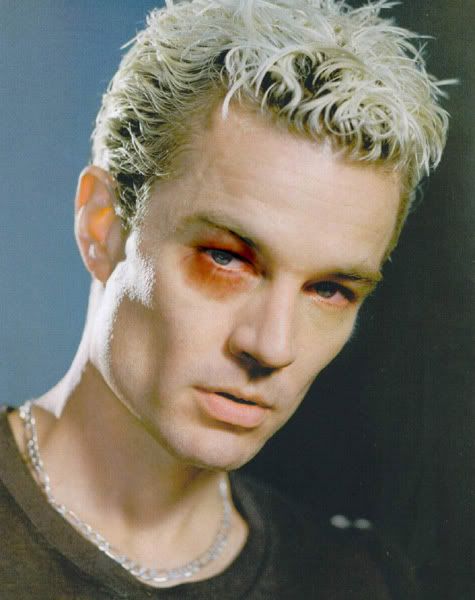
You can go back and erase areas where the color is too dark, or fiddle with the liquify some more, or smudge some if the colors end too abruptly. You may need to adjust colors or blending depending on your picture's brightness, skin tone, etc.
*If you want to add the hit mark next to his mouth, just repeat steps 1-4.
*This is my first tutorial so sorry if it's lacking in anything.
So this tutorial is going to show you how to go from this:

to this:

.
This was all done in PS 7 with default brushes, so no need to download anything. So just save the first pic to your computer and then open it up.
Step 1:
Zoom in to 200% and focus on his eye.
Create a new layer and select the following brush in the default brushes:

Reduce the opacity to 40%, and load the palette with a nice dark red color (I used #982722).
Run it under his eye in one sweep.

Select the smudge tool, lower the strength to about 15 and smudge under his eye, working down and across. Feel free to use the eraser if it spreads out too far but make sure you use a feathered eraser brush.

Once you're done smudging it should look somewhere along the lines of this:

Step 2:
Duplicate the red layer. Go into image adjustments and click on hue/saturation. Play with the hue slide bar until you get a color inbetween purple and red (I used -55 on the hue). Don't mess with the saturation or lightness.

Set this layer to saturation and lower the ocpacity to 25%. This will give us a undertone of purple. It doesn't look like much but it will help later. It should look like this:

Step 3:
Duplicate the red layer again and drag it to the top. Go back into image adjustments and click hue/saturation. Again, play with the hue slide bar until you get a yellowish green color ( I used +75). Again, don't mess with the saturation of lightness.

Set this layer to color burn and lower the opacity to 50%.

Step 4:
Now, create a set (if you don't know how to, it's the little folder image on the bottom of the palette) and drag all the layer into the set. Make sure they're still in the same order. Change the set blending to color burn.

It should look like this now:

Step 5:
Duplicate the set and rotated it 180. Move it above his eye. Rescale the layer until it looks right, and doesn't cover up his eyebrow.

Step 6:
On your layer palette, slect the JM pic. Using the selection tool, draw a square around his eye, this is the area we want to use.

On filters click liquify. Lower the brush size to 20 and change the style to expanding.


.
Using your own judgement, enlarge around his eye till it looks swollen.

Click ok when you like your results. Remember, you can always click cancel and start over again if you don't like the way it is. Once you click ok, it should something look like this:

Zoom back out. His eyes look a bit too stark so we're going to fix that.
Step 7:
Create a new layer outside of both sets. Using a small feathered brush, lower the opacity to 15% and chose a bright red. Use the brush just over the white of his eyes. You should go from the top image to the results in the bottom image.

And now you're done!

You can go back and erase areas where the color is too dark, or fiddle with the liquify some more, or smudge some if the colors end too abruptly. You may need to adjust colors or blending depending on your picture's brightness, skin tone, etc.
*If you want to add the hit mark next to his mouth, just repeat steps 1-4.