Oreo and Red Velvet Kisses
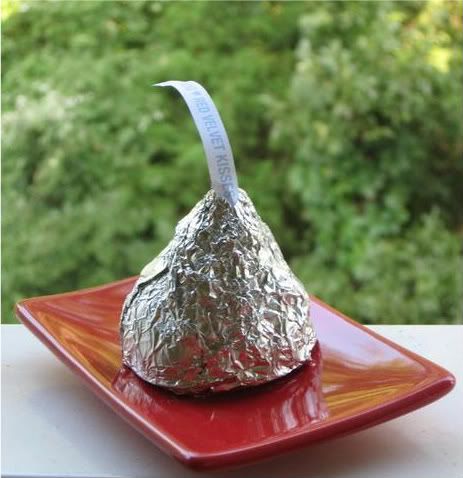
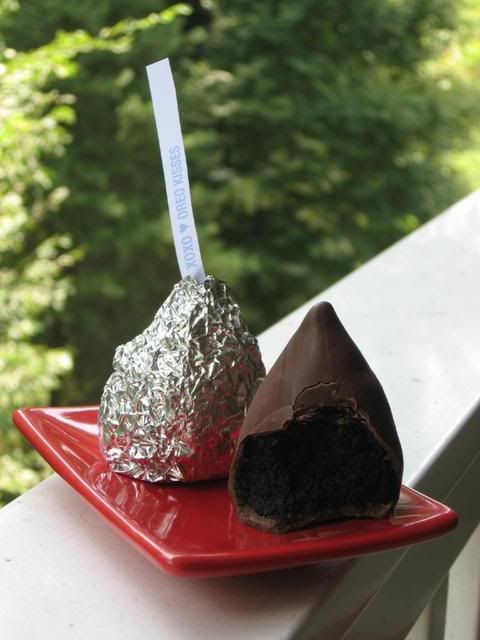
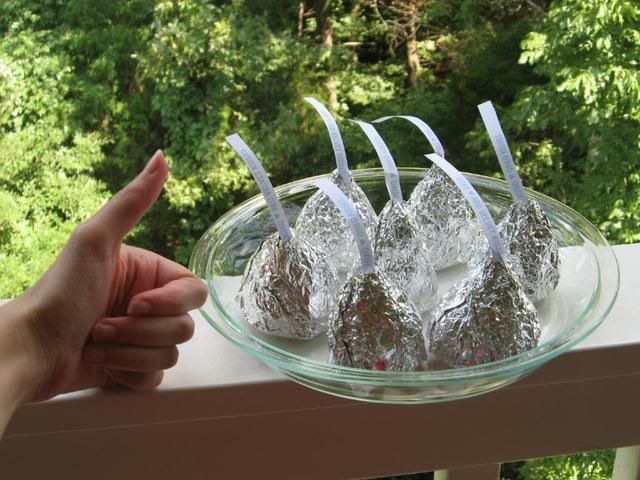
Following Bakerella's lead again :) I made GIIIIANT Oreo and Red Velvet Kisses. They're delicious.


Oreo Kisses

Red Velvet Kisses
Red Velvet Cake Kisses
Kisses By: Bakerella (http://bakerella.blogspot.com)
Cake Recipe By: Mom
Frosting Recipe By: Paula Deen
Yields: about 28 2-inch kisses.
Ingredients:
For the Cake:
1/2 cup Crisco
2 eggs
2 tablespoons cocoa
1/2 teaspoon salt
1 1/2 cups sugar
1 teaspoon vanilla
1 cup buttermilk
2 1/2 cups flour
1 teaspoon soda
1 tablespoon white vinegar
2 ounces red food coloring
chocolate bark (or dipping chocolate; for kisses)
For the Frosting:
8 ounces cream cheese, softened
1 stick butter, softened
1/2 teaspoon vanilla extract
2 cups sifted confectioners' sugar
Directions:
For the cake:
Preheat oven to 350 degrees. Cream Crisco, sugar, and eggs. Make a paste of the cocoa and coloring and add to the Crisco mixture. Add salt and vanilla. Add buttermilk alternately with the flour, beginning and ending with flour. Mix vinegar and soda right before using and add to mixture by folding in. Pour batter into a 9 x 13 in. pan and bake at 350 degrees for 25-30 minutes. Cool completely.
For the frosting:
In a large mixing bowl, beat the cream cheese, butter and vanilla together until smooth. Add the sugar and on low speed, beat until incorporated. Increase the speed to high and mix until very light and fluffy.
Assembling the kisses:
1. After cake is cooked and cooled completely, crumble into large bowl.
2. Mix thoroughly with about 2 cups cream cheese frosting. (It may be easier to use fingers to mix together, but be warned it will get messy.)
3. Roll mixture into 1-2" size balls and lay on cookie sheet.
4. Then, begin to form the shape of a kiss. Flattening the bottom and forming a point at the top. Note: mine ended up about 2 inches tall and 1.5 inches wide.
5. It helps to put the uncoated balls in the freezer for a few minutes to keep the mixture from starting to fall apart when you drop into the melted chocolate. Note: I refrigerated mine overnight and then froze for a couple of minutes before dipping.
6. Melt chocolate as directed on package and then dip "kisses" one at a time into chocolate, tap off extra and slide them off spoon onto wax paper covered cookie sheet to dry. Note: Dipping is often the most difficult part. These are Bakerella's instructions, but find what works for you. Let your kitchen be your playground. Look through your utensils for useful tools, and be creative. I used a grill fork to hold my kisses while spooning chocolate over them, and then redipped the bottoms separately.
To decorate:
1. Handwrite your messages or create them on the computer. Cut out the strips (about 1/4" tall and however wide you need).
2. Cut up some square sheets of aluminum foil (about 6" square)
3. Place dry kiss in center and start wrapping the foil around the base. Insert message near top and secure it by pressing the foil together at top. Note: It really helps to use cheap foil here! The thinner and more malleable the better. Crush it a little first to make it more flexible.
4. Refrigerate in an airtight container.
Oreo Kisses
Recipe By: Bakerella (http://bakerella.blogspot.com)
Yields: about 11 2-inch truffles.
Ingredients:
1 package oreo cookies (divided… use cookie including the cream center)
1 8oz. package cream cheese (softened)
chocolate bark or dipping chocolate
Directions:
1. Finely crush all but seven cookies in a food processor or place them in a ziploc bag and crush into a fine consistency. Note: As for the extra 7 cookies, just eat them. Or, if you have extra dipping chocolate, make some chocolate covered oreos.
2. Stir in softened cream cheese. Use the back of a large spoon to help mash the two together.
3. Roll the mixture into 1-2" balls and place on wax paper covered cookie sheet.
4. Then, begin to form the shape of a kiss. Flattening the bottom and forming a point at the top. Note: mine ended up about 2 inches tall and 1.5 inches wide.
5. It helps to put the uncoated balls in the freezer for a few minutes to keep the mixture from starting to fall apart when you drop into the melted chocolate. Note: I refrigerated mine overnight and then froze for a couple of minutes before dipping.
6. Melt chocolate as directed on package and then dip "kisses" one at a time into chocolate, tap off extra and slide them off spoon onto wax paper covered cookie sheet to dry. Note: Dipping is often the most difficult part. These are Bakerella's instructions, but find what works for you. Let your kitchen be your playground. Look through your utensils for useful tools, and be creative. I used a grill fork to hold my kisses while spooning chocolate over them, and then redipped the bottoms separately.
To decorate:
1. Handwrite your messages or create them on the computer. Cut out the strips (about 1/4" tall and however wide you need).
2. Cut up some square sheets of aluminum foil (about 6" square)
3. Place dry kiss in center and start wrapping the foil around the base. Insert message near top and secure it by pressing the foil together at top. Note: It really helps to use cheap foil here! The thinner and more malleable the better. Crush it a little first to make it more flexible.
4. Refrigerate in an airtight container.

Did I mention that they were giant?
For more info and lots more pictures, go see my baking blog, Willow Bird Baking! Bakerella just commented on it, and I'm a little star-struck :)
x posted to food_porn and cooking


Oreo Kisses

Red Velvet Kisses
Red Velvet Cake Kisses
Kisses By: Bakerella (http://bakerella.blogspot.com)
Cake Recipe By: Mom
Frosting Recipe By: Paula Deen
Yields: about 28 2-inch kisses.
Ingredients:
For the Cake:
1/2 cup Crisco
2 eggs
2 tablespoons cocoa
1/2 teaspoon salt
1 1/2 cups sugar
1 teaspoon vanilla
1 cup buttermilk
2 1/2 cups flour
1 teaspoon soda
1 tablespoon white vinegar
2 ounces red food coloring
chocolate bark (or dipping chocolate; for kisses)
For the Frosting:
8 ounces cream cheese, softened
1 stick butter, softened
1/2 teaspoon vanilla extract
2 cups sifted confectioners' sugar
Directions:
For the cake:
Preheat oven to 350 degrees. Cream Crisco, sugar, and eggs. Make a paste of the cocoa and coloring and add to the Crisco mixture. Add salt and vanilla. Add buttermilk alternately with the flour, beginning and ending with flour. Mix vinegar and soda right before using and add to mixture by folding in. Pour batter into a 9 x 13 in. pan and bake at 350 degrees for 25-30 minutes. Cool completely.
For the frosting:
In a large mixing bowl, beat the cream cheese, butter and vanilla together until smooth. Add the sugar and on low speed, beat until incorporated. Increase the speed to high and mix until very light and fluffy.
Assembling the kisses:
1. After cake is cooked and cooled completely, crumble into large bowl.
2. Mix thoroughly with about 2 cups cream cheese frosting. (It may be easier to use fingers to mix together, but be warned it will get messy.)
3. Roll mixture into 1-2" size balls and lay on cookie sheet.
4. Then, begin to form the shape of a kiss. Flattening the bottom and forming a point at the top. Note: mine ended up about 2 inches tall and 1.5 inches wide.
5. It helps to put the uncoated balls in the freezer for a few minutes to keep the mixture from starting to fall apart when you drop into the melted chocolate. Note: I refrigerated mine overnight and then froze for a couple of minutes before dipping.
6. Melt chocolate as directed on package and then dip "kisses" one at a time into chocolate, tap off extra and slide them off spoon onto wax paper covered cookie sheet to dry. Note: Dipping is often the most difficult part. These are Bakerella's instructions, but find what works for you. Let your kitchen be your playground. Look through your utensils for useful tools, and be creative. I used a grill fork to hold my kisses while spooning chocolate over them, and then redipped the bottoms separately.
To decorate:
1. Handwrite your messages or create them on the computer. Cut out the strips (about 1/4" tall and however wide you need).
2. Cut up some square sheets of aluminum foil (about 6" square)
3. Place dry kiss in center and start wrapping the foil around the base. Insert message near top and secure it by pressing the foil together at top. Note: It really helps to use cheap foil here! The thinner and more malleable the better. Crush it a little first to make it more flexible.
4. Refrigerate in an airtight container.
Oreo Kisses
Recipe By: Bakerella (http://bakerella.blogspot.com)
Yields: about 11 2-inch truffles.
Ingredients:
1 package oreo cookies (divided… use cookie including the cream center)
1 8oz. package cream cheese (softened)
chocolate bark or dipping chocolate
Directions:
1. Finely crush all but seven cookies in a food processor or place them in a ziploc bag and crush into a fine consistency. Note: As for the extra 7 cookies, just eat them. Or, if you have extra dipping chocolate, make some chocolate covered oreos.
2. Stir in softened cream cheese. Use the back of a large spoon to help mash the two together.
3. Roll the mixture into 1-2" balls and place on wax paper covered cookie sheet.
4. Then, begin to form the shape of a kiss. Flattening the bottom and forming a point at the top. Note: mine ended up about 2 inches tall and 1.5 inches wide.
5. It helps to put the uncoated balls in the freezer for a few minutes to keep the mixture from starting to fall apart when you drop into the melted chocolate. Note: I refrigerated mine overnight and then froze for a couple of minutes before dipping.
6. Melt chocolate as directed on package and then dip "kisses" one at a time into chocolate, tap off extra and slide them off spoon onto wax paper covered cookie sheet to dry. Note: Dipping is often the most difficult part. These are Bakerella's instructions, but find what works for you. Let your kitchen be your playground. Look through your utensils for useful tools, and be creative. I used a grill fork to hold my kisses while spooning chocolate over them, and then redipped the bottoms separately.
To decorate:
1. Handwrite your messages or create them on the computer. Cut out the strips (about 1/4" tall and however wide you need).
2. Cut up some square sheets of aluminum foil (about 6" square)
3. Place dry kiss in center and start wrapping the foil around the base. Insert message near top and secure it by pressing the foil together at top. Note: It really helps to use cheap foil here! The thinner and more malleable the better. Crush it a little first to make it more flexible.
4. Refrigerate in an airtight container.

Did I mention that they were giant?
For more info and lots more pictures, go see my baking blog, Willow Bird Baking! Bakerella just commented on it, and I'm a little star-struck :)
x posted to food_porn and cooking