Tutorials #001 to #005
Done on Photoshop CS4. If you snag the graphics/textures, don't forget to credit ;). If you have any questions, Im here! Don't ask for a .PSD, you won't have one. Remember, those settings work on that picture, it doesn't mean they will work on yours.
Tutorial #001
from this :
to this :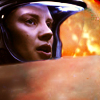
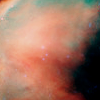
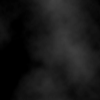
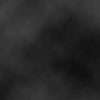
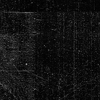
Texture
by mata090680
1. Play with color balance. In the midtones, increase red a lot (64), green a little (10) and blue a bit (29). In highlights, increase a bit red (20) and green (22). Reduce blue a lil (-4). In the shadows, increase a lil red (12) and green (2) but decrease a bit blue (-33).
2. Duplicate the layer
3. Use my bestfriend, the eraser tool in the first layer and erase everywhere but not the space we can see in the background.
4. In the copy of the layer, erase the part on Kara's face.
5. Do another color balance layer. In midtones, increase red a lot (75), a lil green (14) and blue (10). In highlight, increase red a lot (56), green a bit (22) and reduce blue a lil (-18). In shadows, set red at 13, green at 18 and blue at -33. Keep only the part over Kara's face.
6. Use this texture made by mata090680 Rotate it in order to have the black corner on the left corner.
7. Duplicate it
8. Set the 1st one to screen and erase the part over Kara's face
9. Set the 2nd to colorburn and keep only the space part
10. Duplicate the base, put it at the top of the layyer and set it to soft light.
Tutorial #002
From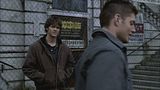
to
Textures:
by rhcp_csi
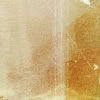
by palebird
by reyesphile
1. Resize (image -> image size) and rotate the pic ( select your pic and click on "move tool" (the forst tool, with the black arrow, on the left side on the PS window) and then click on "show transform controls" (on the navigation bar)
2. Do this curves layer (layer -> adjustement layer)
3. Do a selective color layer. In reds : cyan -68, magenta +26, yellow +76, black -12. In yellows, cyan +100%, magenta +17, yellow -51, black -20. In whites : cyan +100, yellow -23, black -10. In neutrals, cyan +9, magenta _10, yellow -6, black +6
4. Do another selective color layer In whites : cyan -70, yellow +6
5. Add a color balance layer. Midtones :cyan +22, magenta -6, yellow -19. Shadows : cyan -11, yellow +13. Highlights : cyan -1, yellow -22
6. Go to Layer -> New adjustement Layer and add a brightness / contrast layer. Brightness +9, Contrast : -39.
Part 2 : Textures and specific coloring
7. Duplicate your base and set it to soft light opacity at 55%
8. Use this color layer and set it to multiply opacity at 53%
9. Add a brightness/contrast layer with brightness at +108 and contrast at -28
10. Use this texture made by rhcp_csi. Set it to hard light, opacity 82%. Erase the part that is over Dean.
11. Duplicate the previous texture (step 10) and move it so that the white lines that we see on the texture are on the right (over Dean's face). Then erase everything that is not over Dean.
12. Duplicate your base (the 1st step) and set it to soft light opacity 100%
13. Duplicate the base (12 step) let it to soft light, opacity 100%
14. Do a color balance layer. In midtones : red +41, Green -23 and blue +24
15. Do a brightness/contrast layer. Increase the brightness to 33. Erase the part over Dean and the background BUT NOT the part over Sammy and the sign that is on his back.
16. Do a color balance layer. In midtones, put cyan to minus 61. Erase the part over the Dean's face (not his coat), all over Sammy and over the sign.
17. Add this texture made by palebird . Set it to screen opacity 100%
18. Duplicate you base (same than step 12 and 13)
19. Duplicate the texture by palebird let the opacity to 100%
20. Use this texture made by reyesphile. Set it to color burn, opacity 32%
21. Add a brightness/ contrast layer. Increase the brightness to 11.
22. Add a layer. (layer -> new ->layer) Then use a brush (size between 3 and 8) with the white color. Paint over Dean's shoulders, Sammy's waist, the sign and the window on the layer. Then go to filter -> blur -> gaussian blur and set the ratio to 13.
23. Use again the texture by rhcp_csi (a non altered version) and set it to screen, opacity 44%
24. Duplicate your base and set it to soft light (like step 12 and 13)
25. Add a color balance layer and put red (in midtones) -43.
26. Add another color balance. In midtones : Red +26, Green -2, Blue +32. Erase the part that is over the boys and the sign.
27. Add a color balance layer. In midtones : Red+20, Green +12, Blue +39
28. Add this texture made by rhcp_csi set it to soft light, opacity 38%
29. Add a color fill layer with this color : #030303, set it to soft light, opacity 39%
30. Add a brightness/contrast layer. Brightness -6, contrasts +43.
Tutorial #003
From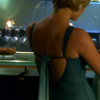
to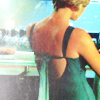
Textures
by bea_lost

1. Duplicate your base and set it to screen, around 66%
2. Do this curves layer
3. Put a selective color layer. In reds, decrease the cyan (here 20% less), increase yellows (+2) and lower black (-1). In yellows, decrease yellow (-3) and increase black (+3). In whites, increase cyan (+11) and yellow (+9) and black (+24). In neutral, increase magenta (+2) and yellow (+8). In blacks, increase black 100%
4. Do another selective color layer. In reds : cyan -68, magenta +26, yellow +76, black -12. In yellows, cyan +100%, magenta +17, yellow -51, black -20. In whites : cyan +100, yellow -23, black -10. In neutrals, cyan +9, magenta _10, yellow -6, black +6
5. Do another selective color layer. In whites : cyan -70, yellow +6
6. Still following? Good ! Do a channel mixer layer. Red channel : red +112, green -12, blue -12. Green channel : green +100. Blue channel : green -12, blue +124
7. Add a color balance layer. Midtones :cyan +22, magenta -6, yellow -19. Shadows : cyan -11, yellow +13. Highlights : cyan -1, yellow -22
8. Add a brightness / contrast layer and play with the settings. I added here +9 at brightness and minus contrast around 39.
9. Open this texture by bea_lost rotate it so that the white light is on the left. Set it to screen.
10. Use this texture by bea_lost . Desaturate it, set it to screen 57%
11. Duplicate your base. Put the copy on the top of the layers and set it to soft light
12. Duplicate the previous layer (step 11) and set it to soft light 30%
13. Do a brightness/contrast layer and play with it. I incresaed brightness to 11 and low contrast to 4.
And you're done !
Tutorial #004
From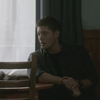
to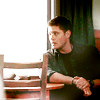
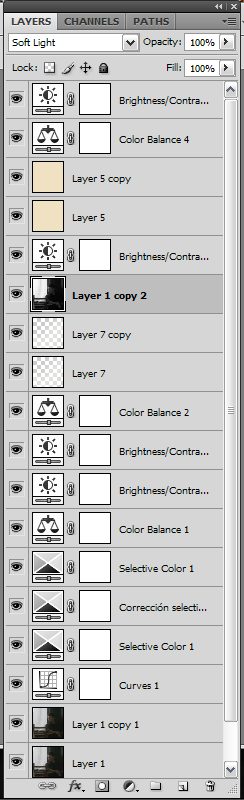
Entire layer list here
Texture :
by mata090680

(It's not a texture, it's a colorlayer but I've snagged it on one of her tutorials and don't remember the color :p )
I will use a lighting technique that I found at all_at_once 's community, danceof_flame
1. Duplicate your base. Set it to screen, opacity at 47%
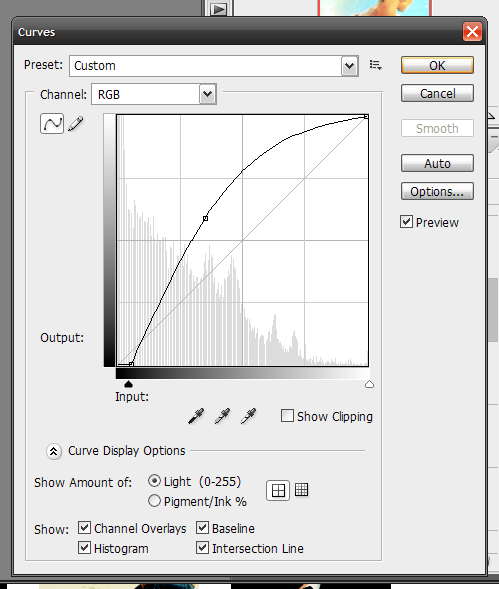
2. Do a curve layer
Output : 150
Input : 89
3. Do a selective color layer
Reds : -23%, 0%, +8%, -11%
Whites : 0%,0%, +15%, +11%
Neutrals : 0%, +3%, 0%, -4%
4. Do another selective color layer
Reds : -68%, +26%, +76%, -12%
Yellows : +100%, +17%, -51%, -20%
Whites : +100%, 0%, -23%, -10%
Neutrals : +9%, -10%, -6%, +6%
5. Do a selective color layer (yes I know again :p )
Whites : -70%, 0%, +6%, 0%
6. Do a color balance layer
Shadows : -11, 0, +13
Midtones : +22, -6, -19
Highlights : -1, 0, -22
7. Do a brightness/contrast layer
Brightness : 9
Contrast : -39
8. Do another brightness/contrast layer
Brightness : 79
Contrast : -13
9. Do a color balance layer
Midtones : +24, -42, -3
10. Open a new layer. With a white brush, paint a little bit over Dean's chest, the table and the part of the wall on the top of his shoulder. Then, use the gaussian blur til the light you'll produce will satisfy you. My layer looks like this (apart that your layer got a transparent background, not a black one)
11. Duplicate this layer and set the opacity to 21%
12. Duplicate you base. Put it above the last layer and set it to soft light.
13. Do a brightness/contrast layer
Brightness : 52
Contrast : -50
14. Use this layer Set it to colorburn.
15. Duplicate this layer.
16. Do a color balance layer
Midtones : +12, +14, +66
17. Do a brightness/contrast layer
Brightness : 32
And you're done!!
As I said, questions are welcome!
Tutorial #005
From
to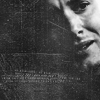
Textures
by violateraindrop
by rhcp_csi
Part 1 : Preparing the base
1. Resize (image -> image size) and rotate the pic ( select your pic and click on "move tool" (the forst tool, with the black arrow, on the left side on the PS window) and then click on "show transform controls" (on the navigation bar)
2. Do this curves layer (layer -> adjustement layer)
3. Add a selective color layer (layer -> new adjustement"). In reds, decrease the cyan (here 20% less), increase yellows (+2) and lower black (-1). In yellows, decrease yellow (-3) and increase black (+3). In whites, increase cyan (+11) and yellow (+9) and black (+24). In neutral, increase magenta (+2) and yellow (+8). In blacks, increase black 100%
4. Do another selective color layer. In reds : cyan -68, magenta +26, yellow +76, black -12. In yellows, cyan +100%, magenta +17, yellow -51, black -20. In whites : cyan +100, yellow -23, black -10. In neutrals, cyan +9, magenta _10, yellow -6, black +6
5. Do another selective color layer In whites : cyan -70, yellow +6
6. Do a channel mixer layer (layer -> new adjustement layer). Red channel : red +112, green -12, blue -12. Green channel : green +100. Blue channel : green -12, blue +124
7. Add a color balance layer. Midtones :cyan +22, magenta -6, yellow -19. Shadows : cyan -11, yellow +13. Highlights : cyan -1, yellow -22
8. Go to Layer -> New adjustement Layer and add a brightness / contrast layer. Brightness +9, Contrast : -39.
Part 2 : Black and White
9. Duplicate your base and set it to soft light 100%
10. Go to Layer -> New Adjustement Layer -> Gradient Map and choose the black and white one
11. Add this texture made by violateraindrop and set it to screen (opacity 63%)
12. Add this texture made by violateraindrop and set it to screen
13. Do another brightness/contrast layer. Increase the brightness up to 36.
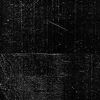
14. Add this texture made by rhcp_csi Set it to overlay (opacity 56%)
15. Add this texture made by rhcp_csi Erase the part that is covering Dean's face. Set it to screen (opacity 73%)
16. Add a layer. Use the brush and choose a grey color. I use here a tiny text brush made by sanami276 @ ownthesunshine
And you're done!!
Tutorial #001
from this :
to this :
Texture
by mata090680
1. Play with color balance. In the midtones, increase red a lot (64), green a little (10) and blue a bit (29). In highlights, increase a bit red (20) and green (22). Reduce blue a lil (-4). In the shadows, increase a lil red (12) and green (2) but decrease a bit blue (-33).
2. Duplicate the layer
3. Use my bestfriend, the eraser tool in the first layer and erase everywhere but not the space we can see in the background.
4. In the copy of the layer, erase the part on Kara's face.
5. Do another color balance layer. In midtones, increase red a lot (75), a lil green (14) and blue (10). In highlight, increase red a lot (56), green a bit (22) and reduce blue a lil (-18). In shadows, set red at 13, green at 18 and blue at -33. Keep only the part over Kara's face.
6. Use this texture made by mata090680 Rotate it in order to have the black corner on the left corner.
7. Duplicate it
8. Set the 1st one to screen and erase the part over Kara's face
9. Set the 2nd to colorburn and keep only the space part
10. Duplicate the base, put it at the top of the layyer and set it to soft light.
Tutorial #002
From

to
Textures:
by rhcp_csi
by palebird
by reyesphile
1. Resize (image -> image size) and rotate the pic ( select your pic and click on "move tool" (the forst tool, with the black arrow, on the left side on the PS window) and then click on "show transform controls" (on the navigation bar)
2. Do this curves layer (layer -> adjustement layer)
3. Do a selective color layer. In reds : cyan -68, magenta +26, yellow +76, black -12. In yellows, cyan +100%, magenta +17, yellow -51, black -20. In whites : cyan +100, yellow -23, black -10. In neutrals, cyan +9, magenta _10, yellow -6, black +6
4. Do another selective color layer In whites : cyan -70, yellow +6
5. Add a color balance layer. Midtones :cyan +22, magenta -6, yellow -19. Shadows : cyan -11, yellow +13. Highlights : cyan -1, yellow -22
6. Go to Layer -> New adjustement Layer and add a brightness / contrast layer. Brightness +9, Contrast : -39.
Part 2 : Textures and specific coloring
7. Duplicate your base and set it to soft light opacity at 55%
8. Use this color layer and set it to multiply opacity at 53%
9. Add a brightness/contrast layer with brightness at +108 and contrast at -28
10. Use this texture made by rhcp_csi. Set it to hard light, opacity 82%. Erase the part that is over Dean.
11. Duplicate the previous texture (step 10) and move it so that the white lines that we see on the texture are on the right (over Dean's face). Then erase everything that is not over Dean.
12. Duplicate your base (the 1st step) and set it to soft light opacity 100%
13. Duplicate the base (12 step) let it to soft light, opacity 100%
14. Do a color balance layer. In midtones : red +41, Green -23 and blue +24
15. Do a brightness/contrast layer. Increase the brightness to 33. Erase the part over Dean and the background BUT NOT the part over Sammy and the sign that is on his back.
16. Do a color balance layer. In midtones, put cyan to minus 61. Erase the part over the Dean's face (not his coat), all over Sammy and over the sign.
17. Add this texture made by palebird . Set it to screen opacity 100%
18. Duplicate you base (same than step 12 and 13)
19. Duplicate the texture by palebird let the opacity to 100%
20. Use this texture made by reyesphile. Set it to color burn, opacity 32%
21. Add a brightness/ contrast layer. Increase the brightness to 11.
22. Add a layer. (layer -> new ->layer) Then use a brush (size between 3 and 8) with the white color. Paint over Dean's shoulders, Sammy's waist, the sign and the window on the layer. Then go to filter -> blur -> gaussian blur and set the ratio to 13.
23. Use again the texture by rhcp_csi (a non altered version) and set it to screen, opacity 44%
24. Duplicate your base and set it to soft light (like step 12 and 13)
25. Add a color balance layer and put red (in midtones) -43.
26. Add another color balance. In midtones : Red +26, Green -2, Blue +32. Erase the part that is over the boys and the sign.
27. Add a color balance layer. In midtones : Red+20, Green +12, Blue +39
28. Add this texture made by rhcp_csi set it to soft light, opacity 38%
29. Add a color fill layer with this color : #030303, set it to soft light, opacity 39%
30. Add a brightness/contrast layer. Brightness -6, contrasts +43.
Tutorial #003
From
to
Textures
by bea_lost
1. Duplicate your base and set it to screen, around 66%
2. Do this curves layer
3. Put a selective color layer. In reds, decrease the cyan (here 20% less), increase yellows (+2) and lower black (-1). In yellows, decrease yellow (-3) and increase black (+3). In whites, increase cyan (+11) and yellow (+9) and black (+24). In neutral, increase magenta (+2) and yellow (+8). In blacks, increase black 100%
4. Do another selective color layer. In reds : cyan -68, magenta +26, yellow +76, black -12. In yellows, cyan +100%, magenta +17, yellow -51, black -20. In whites : cyan +100, yellow -23, black -10. In neutrals, cyan +9, magenta _10, yellow -6, black +6
5. Do another selective color layer. In whites : cyan -70, yellow +6
6. Still following? Good ! Do a channel mixer layer. Red channel : red +112, green -12, blue -12. Green channel : green +100. Blue channel : green -12, blue +124
7. Add a color balance layer. Midtones :cyan +22, magenta -6, yellow -19. Shadows : cyan -11, yellow +13. Highlights : cyan -1, yellow -22
8. Add a brightness / contrast layer and play with the settings. I added here +9 at brightness and minus contrast around 39.
9. Open this texture by bea_lost rotate it so that the white light is on the left. Set it to screen.
10. Use this texture by bea_lost . Desaturate it, set it to screen 57%
11. Duplicate your base. Put the copy on the top of the layers and set it to soft light
12. Duplicate the previous layer (step 11) and set it to soft light 30%
13. Do a brightness/contrast layer and play with it. I incresaed brightness to 11 and low contrast to 4.
And you're done !
Tutorial #004
From
to
Entire layer list here
Texture :
by mata090680

(It's not a texture, it's a colorlayer but I've snagged it on one of her tutorials and don't remember the color :p )
I will use a lighting technique that I found at all_at_once 's community, danceof_flame
1. Duplicate your base. Set it to screen, opacity at 47%
2. Do a curve layer
Output : 150
Input : 89
3. Do a selective color layer
Reds : -23%, 0%, +8%, -11%
Whites : 0%,0%, +15%, +11%
Neutrals : 0%, +3%, 0%, -4%
4. Do another selective color layer
Reds : -68%, +26%, +76%, -12%
Yellows : +100%, +17%, -51%, -20%
Whites : +100%, 0%, -23%, -10%
Neutrals : +9%, -10%, -6%, +6%
5. Do a selective color layer (yes I know again :p )
Whites : -70%, 0%, +6%, 0%
6. Do a color balance layer
Shadows : -11, 0, +13
Midtones : +22, -6, -19
Highlights : -1, 0, -22
7. Do a brightness/contrast layer
Brightness : 9
Contrast : -39
8. Do another brightness/contrast layer
Brightness : 79
Contrast : -13
9. Do a color balance layer
Midtones : +24, -42, -3
10. Open a new layer. With a white brush, paint a little bit over Dean's chest, the table and the part of the wall on the top of his shoulder. Then, use the gaussian blur til the light you'll produce will satisfy you. My layer looks like this (apart that your layer got a transparent background, not a black one)
11. Duplicate this layer and set the opacity to 21%
12. Duplicate you base. Put it above the last layer and set it to soft light.
13. Do a brightness/contrast layer
Brightness : 52
Contrast : -50
14. Use this layer Set it to colorburn.
15. Duplicate this layer.
16. Do a color balance layer
Midtones : +12, +14, +66
17. Do a brightness/contrast layer
Brightness : 32
And you're done!!
As I said, questions are welcome!
Tutorial #005
From

to
Textures
by violateraindrop
by rhcp_csi
Part 1 : Preparing the base
1. Resize (image -> image size) and rotate the pic ( select your pic and click on "move tool" (the forst tool, with the black arrow, on the left side on the PS window) and then click on "show transform controls" (on the navigation bar)
2. Do this curves layer (layer -> adjustement layer)
3. Add a selective color layer (layer -> new adjustement"). In reds, decrease the cyan (here 20% less), increase yellows (+2) and lower black (-1). In yellows, decrease yellow (-3) and increase black (+3). In whites, increase cyan (+11) and yellow (+9) and black (+24). In neutral, increase magenta (+2) and yellow (+8). In blacks, increase black 100%
4. Do another selective color layer. In reds : cyan -68, magenta +26, yellow +76, black -12. In yellows, cyan +100%, magenta +17, yellow -51, black -20. In whites : cyan +100, yellow -23, black -10. In neutrals, cyan +9, magenta _10, yellow -6, black +6
5. Do another selective color layer In whites : cyan -70, yellow +6
6. Do a channel mixer layer (layer -> new adjustement layer). Red channel : red +112, green -12, blue -12. Green channel : green +100. Blue channel : green -12, blue +124
7. Add a color balance layer. Midtones :cyan +22, magenta -6, yellow -19. Shadows : cyan -11, yellow +13. Highlights : cyan -1, yellow -22
8. Go to Layer -> New adjustement Layer and add a brightness / contrast layer. Brightness +9, Contrast : -39.
Part 2 : Black and White
9. Duplicate your base and set it to soft light 100%
10. Go to Layer -> New Adjustement Layer -> Gradient Map and choose the black and white one
11. Add this texture made by violateraindrop and set it to screen (opacity 63%)
12. Add this texture made by violateraindrop and set it to screen
13. Do another brightness/contrast layer. Increase the brightness up to 36.
14. Add this texture made by rhcp_csi Set it to overlay (opacity 56%)
15. Add this texture made by rhcp_csi Erase the part that is covering Dean's face. Set it to screen (opacity 73%)
16. Add a layer. Use the brush and choose a grey color. I use here a tiny text brush made by sanami276 @ ownthesunshine
And you're done!!