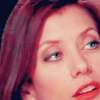
again, a MILD COLOURING.
- WORKS WELL ON: Screencaps. Photographs.
- Made in PS7, not translatable.
- Involves a bunch of fill layers and selective colouring.
- Difficulty: VERY easy. :)
- Downloadable PSD.
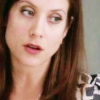
1, Crop your base.
Before we start colouring anything, we should have our image lightened and a bit sharpened.
2, First, if you find it necessary, sharpen the facial features a bit with the appropriate tool, at a smaller strength value (50% or below.)
3, Then duplicate the base layer twice, set both of them to Screen, 100%, and merge them down (Ctrl+E) Just the two screen layers!. Much better now?
Finally, duplicate the merged layer, but instead of screen, switch it to Soft Light, because the screening made our icon a bit livid.
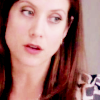
Now we're adding 3 Fill Layers, this will be the essence of the colouring.
4, First: #DADBEC, Colour Burn, 100%. That gives a stronger shade.
5, Second: #B8C7D1, Soft Light, 100%. The latter one made some features look a bit too dark and burnt, so this enlightens it all. :)
6, Third: #A98383, Overlay, 100%. This redness is important for the skin. In my opinion, will look nicer with this extra.
7, Selective colouring! (Via an adjustment layer. It's important not to alter the selected layer, but the whole image.)
REDS: -38, 0, 0, 0
CYANS: -100, 0, 0, 0
MAGENTAS: -100, -100, 0, +100
NEUTRALS: +58, 0, 0, -12
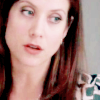
I know the difference between the two steps is hardly can be seen, but when you'll have all the layers done, and hide this one, you'll notice!
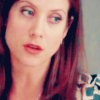
8, New fill layer: #686447, Soft Light, 100%. But you can certainly left this out, if the outcome is too dark for you.
9, Selective colouring, not again!
REDS: -100. 0. 0, +52
YELLOWS: -100, 0, +100, 0
NEUTRALS: +24, 0, -23, 0
10, One final touch!
New fill layer, #080D26, Exclusion, 100%. To get that nice, usual yellowish tone.
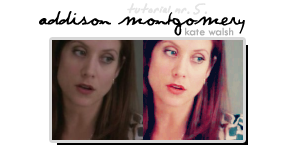
And we're done!
Note: while working with even darker images, you might dpulicate the base layer more then twice and set them to screen. If the picture is lighter, you might not need two of them, just one (and eben at a lower opacity).
I'd be happy to see your results!
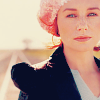
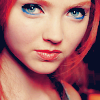
Other examples for this tutorial: