Fred plays Final Fantasy VII Part V
This is the last segment because I finished the game! This makes Final Fantasy VII the first Final Fantasy game I have actually finished. (I've made it to endgame for another three. What can I say? I love playing the games and don't typically feel compelled to put and end to that.) Screenshots from Caves of Narshe, as always.
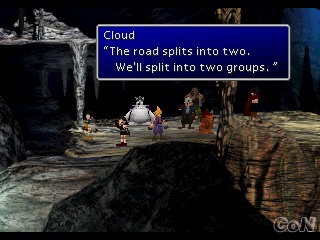
I do not have much to say about Disc Three because it consists of side quests and the final dungeon. A nasty glitch locked me inside the Northern Crater, though, so I didn't get to tackle Emerald Weapon or Ruby Weapon, despite all of my preparation.
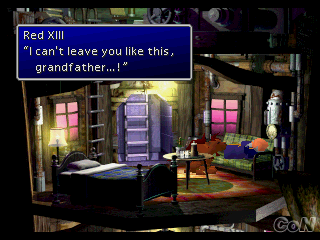
Getting final weapons and final limit breaks in this game is mainly a matter of finding the right treasure chests or talking to the right people. I obtained all of the final limit breaks, but Cloud was the only one to actually learn his since none of the other characters had learned both of their Level Three limit breaks. Cloud's is also the trickiest to get.
For the sake of getting Omnislash, as well as the W-Summon and Final Attack Materia, I spent a lot of Disc Three in the Battle Arena of the Gold Saucer. I only used Cloud or Tifa because their Limit Breaks are my favorites, but that is sort of moot because I rarely take enough damage to read my Limit, even if my bar is more than half full.
The key to excelling in the Battle Arena is half preparation and half screaming about adapting to handicaps. Here are my basic preparations for the Battle Arena:
When actually in the arena, I've found these tactics useful:

I do not have much to say about Disc Three because it consists of side quests and the final dungeon. A nasty glitch locked me inside the Northern Crater, though, so I didn't get to tackle Emerald Weapon or Ruby Weapon, despite all of my preparation.

Getting final weapons and final limit breaks in this game is mainly a matter of finding the right treasure chests or talking to the right people. I obtained all of the final limit breaks, but Cloud was the only one to actually learn his since none of the other characters had learned both of their Level Three limit breaks. Cloud's is also the trickiest to get.
For the sake of getting Omnislash, as well as the W-Summon and Final Attack Materia, I spent a lot of Disc Three in the Battle Arena of the Gold Saucer. I only used Cloud or Tifa because their Limit Breaks are my favorites, but that is sort of moot because I rarely take enough damage to read my Limit, even if my bar is more than half full.
The key to excelling in the Battle Arena is half preparation and half screaming about adapting to handicaps. Here are my basic preparations for the Battle Arena:
- Equip the character's strongest weapon. No AP is delivered in the Battle Arena, so ultimate weapons are okay. All ultimate weapons come with conditions on their strength, though. The strength Cloud's Ultimate Weapon, for example, is determined by the proportion of his current HP to his max HP. It seems to adapt to cuts made by the handicaps, and with those handicaps, you'll want to keep your HP close to full anyway, so that weapon is a good bet. Tifa's Premium Heart, on the other hand, is not so good for the Battle Arena because it is dependent on how full her limit gauge is. Unless you go in with her limit gauge close to full and never use the limit, it's probably better to use something like God's Hand.
- Equip a Mystile. The armor Mystile doesn't have the highest defense or magic defense, but it has defensive and magic defensive evasion of 50%. Makes it bloody hard to get a Limit Break, though.
- Equip a Ribbon. The Ribbon accessory prevents most status effects, including the Toad and Mini handicaps. It does not prevent Slow, but Slow can be undone with Haste.
- Find those crucial Enemy Skills. Big Guard is useful because it casts Haste on the character. White Wind is a good healing spell as long as you keep an eye on your HP; it heals the amount of the caster's current HP, so in a pinch, it's not going to do any good. But if you cast it when your HP is around half of the max, then it'll fill you up just fine and also erase any negative status effects. Magic Hammer absorbs 100 MP from the target, provided they have the MP to spare. Good offensive Enemy Skills include Aqualung, Magic Breath, and Beta.
- Find and equip useful Command Materia. Slash-All is good for getting through early battles quickly. Double-Cut is good for later battles. These are mutually exclusive, however, so unless I'm doing the Special battles, I equip Slash-All. W-Item is good for when you're short on MP. By Disc Three, you should have a healthy supply of X-Potions and Turbo Ethers to use with it. Don't forget the Enemy Skill Materia.
- Level up and equip useful Spell Materia. Cure2 (Restore), which costs fewer MP than White Wind. (If your HP gets cut a lot, you can probably get by with Cure.) Berserk (Mystify) linked to an Added Effect on the character's armor, just in case that Ribbon gets broken; Berserk may not seem like the status effect to be worried about, but it can be fatal because you lose control of your character and the effects of Command Materia and Counterattack are disabled. If I have room, Freeze (Contain) to deal lots of spell damage and possibly Stop your enemy; Haste (Time), which costs fewer MP than Big Guard; and Esuna (Heal), which costs fewer MP than White Wind.
- Equip useful Independent Materia. Counterattack is the main one. HP Plus, MP Plus, and Speed Plus are useful, especially since those stats can be cut by handicaps.
When actually in the arena, I've found these tactics useful:
- Cast Haste or Big Guard early. You never know when your Materia will get broken or your Max MP will get halved, so the earlier the better. The Haste will last through the rounds until an enemy casts Slow on you. The caterpillar-like enemies that may appear in the first few rounds cast Slow, so if I meet them in the first round, I kill them first and cast Haste in the second round. Otherwise, I cast in the first.
- If you have MP, use it! This mostly applies to the sixth and seventh battles. If you still have either Magic Hammer or Items, you can't lose both with your next handicap, so it is advisable to use Contain spells and Enemy Skills to make your sixth and seventh battles will go much more quickly. Plus, you might get your MP halved or drained, so it's just a waste not to use it.
- Know your arsenal. These battles are not like other battles. You're not usually going to need spells and Enemy Skills and items that do the same thing. In the Battle Arena, it is so important that you not only adequately prepare yourself but that you know what your options are in the event that something on which you have been relying gets broken. (White Wind heals status effects! Magic Hammer drains MP!)
- Don't get cocky. Proud Clod? Pah! That was the easiest boss in the game! Yes, but now you're alone and handicapped. That 700 HP hit could be like half your HP. Proud Clod may also hit twice in a row. So this tactic is more like "keep an eye on your HP and don't let it fall below ~1200."
- Know which enemies to kill quickly. I mentioned the Ghost Ship before. The Behemoth in the Special battles casts ????, which deals damage equal to however much damage the Behemoth has taken.
- If all your Materia and your Weapon are broken, it's time to cut and run. Even if you're not taking a lot of damage. The reason for this is that the ghost ship that may appear in the final round can eject you from the battle, so if you can't kill it fast, it's best to take what Battle Points you have.
- If you have under 2000 Max HP, seriously consider quitting. Because, you know, it's possible that the enemy can kill you in one hit, and your armor could get broken in the next round.
You have to win the Battle Arena three or four times to afford Omnislash, which costs 32,000 BP, and six or seven times to afford W-Summon, which costs 64,000 BP. Winning the Special battles gets you the Final Attack Materia.
When I wasn't in the Battle Arena, I was raising Chocobos. Colored Chocobos are needed to access the game's best Materia. I imagine Mime and Quadra Magic would be useful for fighting against the Weapons, and I think Quadra Magic could have been a boon against Bizarro Sephiroth, too, but the only one of these Materia I found really critical was Knights of the Round, which dealt something in the range of 40,000 to 50,000 damage to Bizarro Sephiroth, which only has 40,000 HP. Nothing else I was doing was making any progress against its frequent healing spells.
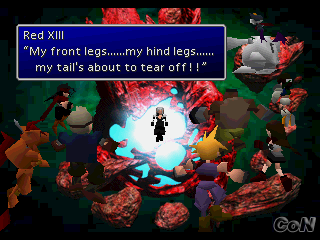
Speaking of the final battles, they were a bit disappointing. I'm used to final battles not being difficult, but not once was I ever in danger of losing. Even when Safer Sephiroth used math to destroy our solar system-yes, this was a real attack-my party was merely reduced to 200+ HP each. Even if Tifa hadn't had a Level 2 Final Attack linked to a Level 2 Phoenix summon, which would have twice revived the entire party in the event that Tifa died, Cloud had FullCure and both Tifa and Cait Sith had Cure3 linked to All. I didn't even get to use Omnislash.
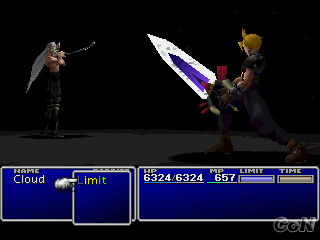
Of course, then followed a battle in which Cloud could only use Omnislash (or Limit Breaks in general? I'm not sure).
I don't know what to say about the ending. It was pretty amazing seeing the Lifestream spill out over the planet, but otherwise, it ended sort of awkwardly, and after all that the FF7 team had done to integrate Yuffie and Vincent into the team, I was sad not to see them in the final cutscenes.
I leave you with a picture of Zack and a quote from Yuffie.

Yuffie: [upon reluctantly handing over the Megalixer she found] But I'm the one who found it, so you better give it back to me when you're done with it!
Forever Yuffie, up till the last battle. ♥