Ani's Tutorial 1: Old Movie "Still Image" Animation
Well I tried my best to write this tutorial since I had issues with the my internet i've been messing around in photoshop alot more. Hope it makes sense. I've never been good at teaching ^_^.
Old Movie "Still Image" Animation Tutorial
Using Photoshop 7+ (I used CS2)
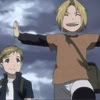
Start Image:
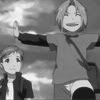
1. Take your icon and go to (Image -> Adjustments -> Desaturate)
You can use the image at [this link] for help with steps 2-5.
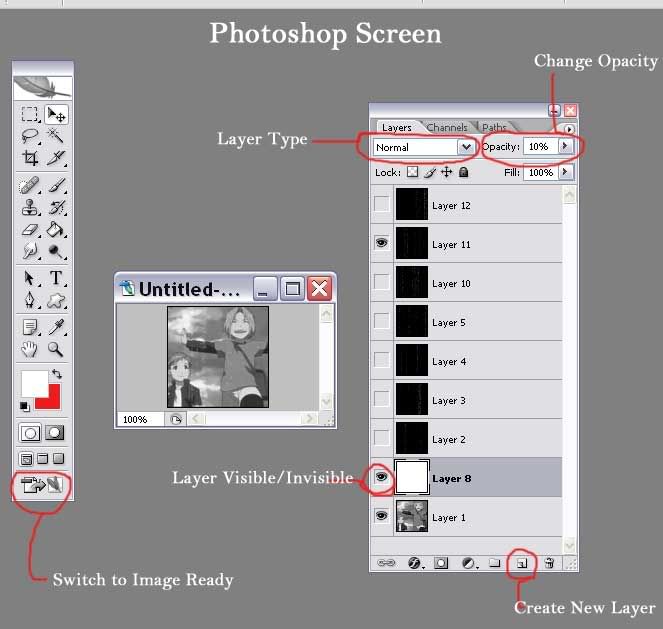
2. Add a layer ontop of your image. Fill it with white. Change the opacity to 7%. Then hide this Layer by clicking on the eye.
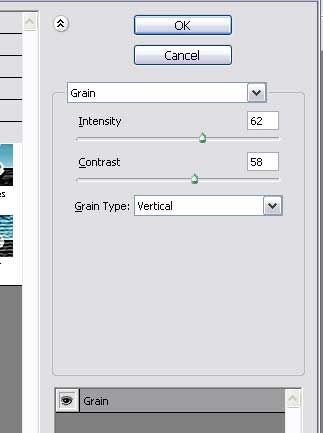
3. Make a new layer ontop of the white layer. Fill it with Black. Then go to (Filter -> Texture -> Grain). I used these settings [pic here]. Make sure use make the grain go vertical. Then change this Layer type to "Screen".
4. Repeat step 3 about 6 more times. If you do it exactly the same way Photoshop will automatically randomize the grain. You won't have to mess with or change your settings.
*Extra Step* If you want to have your icons have the slightly brownish look to it as I have done then above all your layers make a new layer filled with brown. Make this layer "Color" and reduce it's opacity. I used an opacity of 50%. I also added the text at this time. I've also made icons that were just black and white, like what you will come up with if you don't add the brown. Or if you know how to mess with the Satuartion you can make your icon just look dull in color.
5. Click on your toolbar to open ImageReady. If you do not see your animation window then go to (Window -> Animation). If you've never done an animation before and even if you have i'm going to explain it a little here.
Now if you thought that was hard the next part is going to be even harder.
You can use the image at [this link] for help with steps 6-9.
6. Make sure that in your layers the main icon is visable as well as the first grain layer (and extras if you are using it) and nothing else. Underneath the frame you will see an arrow pointing down. Click on it and change your time to 0.1 seconds.
7. Click on the "Duplicate Frame" button. This is on your animation window and is on the left of a little trash can icon. Make the grain layer invisible and click on the next grain above it and make it visable.
8. Repeat step 7 until you have a sepearte grain layer showing on each frame.
*Step nine doesn't have to be done but it will give you a much more interesting icon.
9. Now for the most tricky part. If you have 7 frames like me then this will look good. If you end up with less than 5 this part won't work so don't do it, or add more "grain" frames. Click on the 5th frame. Then click on the "white" fill layer and make it visable. Now go to your 6th frame, click on the white fill layer and make it visable and change the opacity to 10% on this layer only. Next click on the 7th frame, click on the white fill layer, make it visabe, and change the opacity to 5%.
10. If you have the icon set to "loop forever" and use the play button on your animation menu you will see it animated. To save this you will want to click on your "optimize" window and make sure the format is set to gif. I also had to change the colors to 64 to have this icon fit LJ standards. When you are ready to save go to (File -> Save Optimized As).
My Final Image (this includes a few extras i added in):
Comments are My Crack. Feed my Addiction.
But also if you make icons with this and post in your journal i'd be so thrilled to have a mention in your post ^_^
**If you can master this I will be making an advanced tutorial called Old Movie "Animated" Animation Tutorial very soon where you can have an animated icon instead of a still image.
Old Movie "Still Image" Animation Tutorial
Using Photoshop 7+ (I used CS2)
Start Image:
1. Take your icon and go to (Image -> Adjustments -> Desaturate)
You can use the image at [this link] for help with steps 2-5.
2. Add a layer ontop of your image. Fill it with white. Change the opacity to 7%. Then hide this Layer by clicking on the eye.
3. Make a new layer ontop of the white layer. Fill it with Black. Then go to (Filter -> Texture -> Grain). I used these settings [pic here]. Make sure use make the grain go vertical. Then change this Layer type to "Screen".
4. Repeat step 3 about 6 more times. If you do it exactly the same way Photoshop will automatically randomize the grain. You won't have to mess with or change your settings.
*Extra Step* If you want to have your icons have the slightly brownish look to it as I have done then above all your layers make a new layer filled with brown. Make this layer "Color" and reduce it's opacity. I used an opacity of 50%. I also added the text at this time. I've also made icons that were just black and white, like what you will come up with if you don't add the brown. Or if you know how to mess with the Satuartion you can make your icon just look dull in color.
5. Click on your toolbar to open ImageReady. If you do not see your animation window then go to (Window -> Animation). If you've never done an animation before and even if you have i'm going to explain it a little here.
Now if you thought that was hard the next part is going to be even harder.
You can use the image at [this link] for help with steps 6-9.
6. Make sure that in your layers the main icon is visable as well as the first grain layer (and extras if you are using it) and nothing else. Underneath the frame you will see an arrow pointing down. Click on it and change your time to 0.1 seconds.
7. Click on the "Duplicate Frame" button. This is on your animation window and is on the left of a little trash can icon. Make the grain layer invisible and click on the next grain above it and make it visable.
8. Repeat step 7 until you have a sepearte grain layer showing on each frame.
*Step nine doesn't have to be done but it will give you a much more interesting icon.
9. Now for the most tricky part. If you have 7 frames like me then this will look good. If you end up with less than 5 this part won't work so don't do it, or add more "grain" frames. Click on the 5th frame. Then click on the "white" fill layer and make it visable. Now go to your 6th frame, click on the white fill layer and make it visable and change the opacity to 10% on this layer only. Next click on the 7th frame, click on the white fill layer, make it visabe, and change the opacity to 5%.
10. If you have the icon set to "loop forever" and use the play button on your animation menu you will see it animated. To save this you will want to click on your "optimize" window and make sure the format is set to gif. I also had to change the colors to 64 to have this icon fit LJ standards. When you are ready to save go to (File -> Save Optimized As).
My Final Image (this includes a few extras i added in):
Comments are My Crack. Feed my Addiction.
But also if you make icons with this and post in your journal i'd be so thrilled to have a mention in your post ^_^
**If you can master this I will be making an advanced tutorial called Old Movie "Animated" Animation Tutorial very soon where you can have an animated icon instead of a still image.