TUTORIAL: AAR
As requested by _filthysparkle, here is a tutorial for my The All-American Rejects icon post. Because I used the same technique for almost all of the icons, I will only show you guys one.
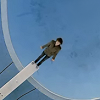
to
Tutorial: Lose Yourself Completely
(Best for PSP7 but can be translated for other programs very easily)
1.
Crop a picture of your liking and resize it to 100x100 and go to Effects>Sharpen>Sharpen. I capped the Move Along video and cropped the above picture to use. This tutorial works best for darker pictures like the one seen here.
2.
Next, duplicate the base and set the layer to screen. Then, change the opacity to around 60% so that it brightens the image a bit.
3.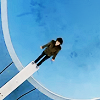
Duplicate the base again twice and set both layers to soft light. Make sure that both layers are above the Screened layer.
4.
The last step is to put some text on your icon, if you wish to. I wrote "LOSE YOURSELF" in Georgia 5pt. and "completely" in Beautiful ES 10 pt. Set the layer to Overlay and you're done!
As you can see, this tutorial was easy peasy, but can do wonders in making icons look strong and vibrant.
Hope this helped!
Enjoy!
♥ Karrie
Like my tutorials? Friend me!

to

Tutorial: Lose Yourself Completely
(Best for PSP7 but can be translated for other programs very easily)
1.

Crop a picture of your liking and resize it to 100x100 and go to Effects>Sharpen>Sharpen. I capped the Move Along video and cropped the above picture to use. This tutorial works best for darker pictures like the one seen here.
2.

Next, duplicate the base and set the layer to screen. Then, change the opacity to around 60% so that it brightens the image a bit.
3.

Duplicate the base again twice and set both layers to soft light. Make sure that both layers are above the Screened layer.
4.

The last step is to put some text on your icon, if you wish to. I wrote "LOSE YOURSELF" in Georgia 5pt. and "completely" in Beautiful ES 10 pt. Set the layer to Overlay and you're done!
As you can see, this tutorial was easy peasy, but can do wonders in making icons look strong and vibrant.
Hope this helped!
Enjoy!
♥ Karrie
Like my tutorials? Friend me!