(no subject)
Tutorial #4: Color Blanace and Hue/Saturation
go from
to
to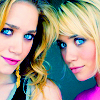
using PSPX
Translates easily to Photoshop!
Tutorial
go from
to
to
using PSPX
Translates easily to Photoshop!
1. Crop your base. Resize to 100 by 100 pixels. Sharpen as needed.
2. Duplicate your base. Set the new layer to screen, at 100% opacity.
3. Create a new layer. Fill it with #d4e1f6. Set it to burn, at 100% opacity.

4. Create a new layer. Fill it with #f8ede6. Set it to multiply, at 100% opacity.

5. Create a new color balance adjustment layer. The color levels for Midtones should be: -80, 23, 80. Preserved luminance should be checked.
6. Create a new hue/saturation adjustment layer. Set the saturation to 49 or 50.
7. Create another new hue/saturation adjustment layer. Set the saturation to 40 or 41. Set the opacity of this layer to 73%. Of this layer is too vibrant for you, lower the opacity or get rid of the layer.
NOTE: If it comes out too faded, duplicate the base and set it to soft light. Place the layer beneath the screened layer. You might also try lowering the opacity of the screened layer. ALSO, If you want to add a more vibrant color to the eyes, create a new layer, set it to softlight, zoom in, and use a small, round brush in the color of your choice to color the eyes. I did not apply this technique in the tutorial above.
Other icons made with this tutorial, or variations of it:


PIMPING modelicons100 modelicons100 modelicons100 modelicons100 modelicons100 modelicons100 modelicons100 modelicons100 modelicons100 modelicons100.
go from
to
to
using PSPX
Translates easily to Photoshop!
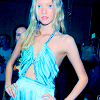
Tutorial
go from
to
to
using PSPX
Translates easily to Photoshop!
1. Crop your base. Resize to 100 by 100 pixels. Sharpen as needed.
2. Duplicate your base. Set the new layer to screen, at 100% opacity.
3. Create a new layer. Fill it with #d4e1f6. Set it to burn, at 100% opacity.
4. Create a new layer. Fill it with #f8ede6. Set it to multiply, at 100% opacity.
5. Create a new color balance adjustment layer. The color levels for Midtones should be: -80, 23, 80. Preserved luminance should be checked.
6. Create a new hue/saturation adjustment layer. Set the saturation to 49 or 50.
7. Create another new hue/saturation adjustment layer. Set the saturation to 40 or 41. Set the opacity of this layer to 73%. Of this layer is too vibrant for you, lower the opacity or get rid of the layer.
NOTE: If it comes out too faded, duplicate the base and set it to soft light. Place the layer beneath the screened layer. You might also try lowering the opacity of the screened layer. ALSO, If you want to add a more vibrant color to the eyes, create a new layer, set it to softlight, zoom in, and use a small, round brush in the color of your choice to color the eyes. I did not apply this technique in the tutorial above.
Other icons made with this tutorial, or variations of it:
PIMPING modelicons100 modelicons100 modelicons100 modelicons100 modelicons100 modelicons100 modelicons100 modelicons100 modelicons100 modelicons100.