Tips & Tricks for Resin cast alternatives.

Hey guys its been awhile!!! I got a few request regarding how I made my Princess Peach & Daisy Broochs with out the use of Resin casting gems. I would love to resin cast, but at the time I did'nt have the money to do it. I was still determine to make my favorite pricesses of the Nintendo world because they were on my dream cosplay list!!! This tutorail will shift from Daisy's brooch to Peach's so that way you can see how both were created.So lets get started shall we.
Supplies:
1. Plastic christmas Ornaments
http://shop.hobbylobby.com/products/plastic-ball-ornament/
2. Stain glass window paint in the color of your choice ( I like Plaid's)
http://www.plaidonline.com/gallery-glass-window-color-2-oz/84/product.htm
3. Small bowl or Tuperware container
4. Circular wood piece the size of your ornament ( wood box lids, cottage cheese/yogurt lids, Paper mache boxes or anything that has a round concave shape to it will work.)


5. Glue: Hot glue or E6000 ( Which ever type you prefer)
6. Velcro or snaps
7. Rub &Buff, Acrylic, or Spray Paint

In the photo we have the stainglass paint in a lighter color ( the lighter the color the darker it dries so take note when you purchase Plaid paint!!) and one half of the plastic ornament. ( This was Peaches brooch)
O.k first paint your circular piece ( I used a wooded box top I got at Michales in the woodsection aisle) in the color you want. I usesd gold acrylic for peach's)
Next snip off the tip of the ornament piece using either scciors or wire cutters ( be gentle or you will crack or scratch the surface. Sand that area with a really light grit sandpaper if you want.
a href="http://pics.livejournal.com/aleathiaburns/pic/0011b83p/">

Next place your plastic piece in the bowl.

Ok here is the other type of window glass paint I used for Daisy's ( Michales did'nt have the plaid brand so I was a bit miffed about that..oh well you make due with what you have). Also this type you don"t have to worry about using a lighter shade since it dries exactly like the color
Ok pour a small amount into the piece.

Next roll the paint around until you have coated the entire piece.

Ok important note!!! You may see some tiny airbubbles. If you do squeeze some paint directly onto it and roll the paint around again. This will eliminate the problem since airbubbles are a nuisance and will show up once the pain dries. This crap happens in resin casting gems too!!! So add the paint a litle at a time and add more if you have to and keep on rolling it around. O.k once you are done pour off the excess into the bottle slowly. Try and get alot off of the piece. Here is an example of Peaches's.

Place you piece down so that it can dry do not lay it flat because the paint will collect into the bottom and will look funky. Trust me. Every 30 minutes check on it to make sure that the paint is not slightly coming out onto the containter. If you don't the paint and pieces will stick to the container and it will peel off. So use a damp cloth to wipe off the bottom of the container and the edge of the piece. Kinda even it out. Here is a tip: once the pain dries it will look like a plastic film.If you messed up you can just peel it off and start over again which is kinda cool if you are not happy with the color and want to use another.


Here is Peach's Brooch ( got the image off my cell phone camera cuz my regualr camera died once I was done with the piece).
For Daisy's I cut hers flower shape out of styrofaom, sealed it with 6 layers of Modgepodge, Gessed it, painted it, and applied a flat wood piece for backing. I then slipped the plastic piece into it. And viola you have Daiy's. Also you can use craftfoam, styrene, or vinly place mat for the flower part.


ok apart from my badge showing from Dragon con you can see how the brooch came out. I like 3D effects on props.

This one was made using styerne and a placemat glued together. This one I used as a topper for her parosol,but can also work if you are not in the mood do any carving and sealing foam.

This technique can work for all shapes of ornaments for example the heart shapes for Pretty cure or Sailormoon brooches. Im gonna use Cure Black as an example because I pareviouly worked on this costume.

Here are the heart shapes and I am using Plaid"s paint in Red ( notice how it looks pink)

once I let them dry I have my heart shapes.
So there you have it resin casting alternative. I hope this works for you as it worked for me.and it can save you tons of money.
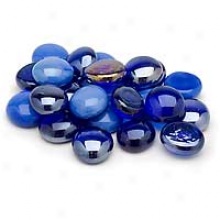
Bonus tips: If you still want smaller gems( for Daisy's and Preaches crown) and you can't afford to resin cast just hit the flora section of Michales, Joanns, Hobby lobby, or the pet shop's aquaruim supplies and get plastic gems. some are clear & dark and can work wonders plus they are cheap. I even found some the same size for Clamp Cosplay!!! Some sizes are shaped smaller than the others so you will be sorting through them to get the same size.


In this photo I used 2 green gems for her flowers Also to be real thifty the orange ones on the left were from a pair of earrings i bought at theBeauty Supply store so you can find gems anywhere just as long as you are able to find the right shape.Well that's the tutorial I hope it helps you as it helped me...plus saves you money!!!!