Hermione Granger icon - Tutorial #21
requested by dreaminoflorien & happeh_hobbit.
*made using PSP8*
going from this to
or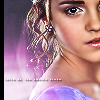
.
PLEASE DON'T COPY THIS ICON, USE THE STEPS TO CREATE SOMETHING THAT IS YOUR OWN; THAT'S MAKES IT MORE FUN, ANYWAY :)
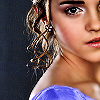
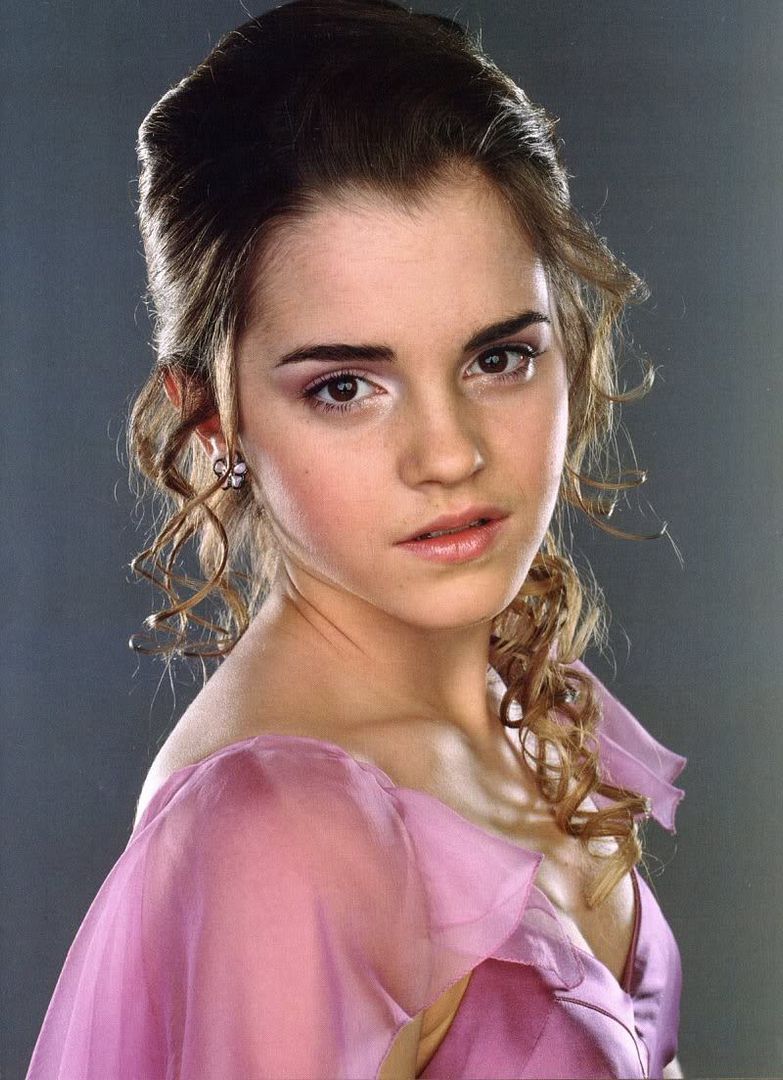
1. First I took this picture that I got from MuggleNet and resized and cropped it down to a 100x100 base.

Then I sparpened it TWICE and took the soften brush (my settings) and went over her skin.
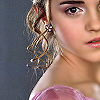
2. I recolored her dress next. I personally prefer Hermione in the blue/periwinkle Yule Ball garb, so I selected a light bluish color (#8080FF), took a regular round brush, created a new layer, and went over the part of the pink dress that was showing. After I was finshed I set that layer to color (L) 100.

>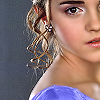
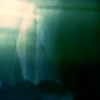
3. Next I merged those two layers, duplicated it and set it to multiply 100. Then I duplicated the layer twice more, set the middle one (the one closest to the multiply layer) to screen 50 and desaturated (Shift+H) it. For the top layer, I set it to soft light 100.
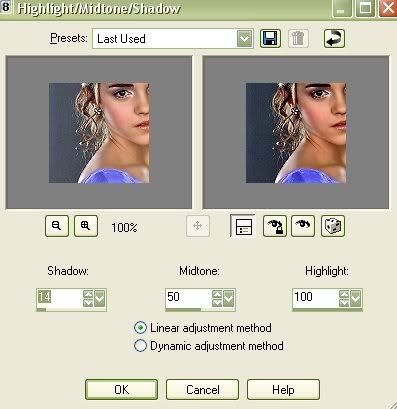
I wanted it a bit darker so I selected the top, soft light layer and went to Adjust > Brightness and Contrast > Highlight/Midtone/Shadow (or just Shift+M) and used these settings.
4. For the tiny text, I used a brush by tina_sparkle in white (#FFFFFF).

>
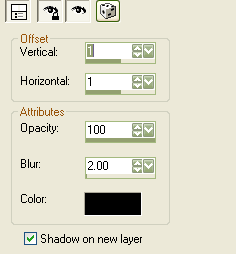
Set the layer with the brush to screen 100. To add the shadow, go to (in PSP8 anyway) Effects > 3D Effects > Drop Shadow (my settings); set that layer to multiply 100.
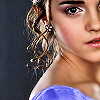
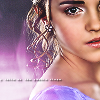
So that's the first icon :) If you like it the way it is, you can stop.
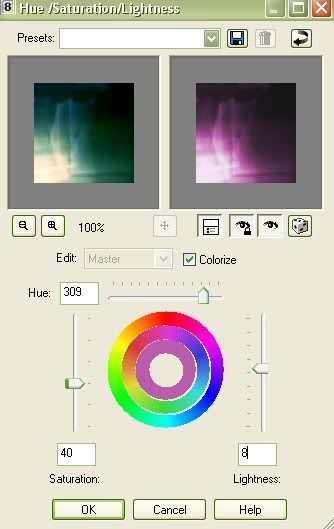
5. For the light texture, I used one by hisatomi, inverted it (Ctrl+I) and changed the color of it to purple (Shift+H).
>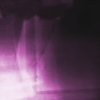
Now, select the layer BELOW the multiply shadow layer (on mine, it's the third layer from the top) and apply the texture; set it to screen 100.
6. For the final step, create a new layer at the top of all the other ones. Take the selection tool (the marquee box thing) and select a small portion of the left side. Then take the flood fill tool, select the color black (#000000) and click inside that rectangle selection you just made.

>
MERGE LAYERS.
*If you want to, now would be a good time to take the Sharpen Brush and sharpen her eye and bottom lip :)*
**Opacities for layers may vary depending upon your image; don't be afraid to experiment!**
And that's it :)
FRIEND ME | RESOURCES | OTHER TUTORIALS
*made using PSP8*
going from this to
or
.
PLEASE DON'T COPY THIS ICON, USE THE STEPS TO CREATE SOMETHING THAT IS YOUR OWN; THAT'S MAKES IT MORE FUN, ANYWAY :)
1. First I took this picture that I got from MuggleNet and resized and cropped it down to a 100x100 base.
Then I sparpened it TWICE and took the soften brush (my settings) and went over her skin.
2. I recolored her dress next. I personally prefer Hermione in the blue/periwinkle Yule Ball garb, so I selected a light bluish color (#8080FF), took a regular round brush, created a new layer, and went over the part of the pink dress that was showing. After I was finshed I set that layer to color (L) 100.
>
3. Next I merged those two layers, duplicated it and set it to multiply 100. Then I duplicated the layer twice more, set the middle one (the one closest to the multiply layer) to screen 50 and desaturated (Shift+H) it. For the top layer, I set it to soft light 100.
I wanted it a bit darker so I selected the top, soft light layer and went to Adjust > Brightness and Contrast > Highlight/Midtone/Shadow (or just Shift+M) and used these settings.
4. For the tiny text, I used a brush by tina_sparkle in white (#FFFFFF).
>
Set the layer with the brush to screen 100. To add the shadow, go to (in PSP8 anyway) Effects > 3D Effects > Drop Shadow (my settings); set that layer to multiply 100.
So that's the first icon :) If you like it the way it is, you can stop.
5. For the light texture, I used one by hisatomi, inverted it (Ctrl+I) and changed the color of it to purple (Shift+H).
>
Now, select the layer BELOW the multiply shadow layer (on mine, it's the third layer from the top) and apply the texture; set it to screen 100.
6. For the final step, create a new layer at the top of all the other ones. Take the selection tool (the marquee box thing) and select a small portion of the left side. Then take the flood fill tool, select the color black (#000000) and click inside that rectangle selection you just made.
>
MERGE LAYERS.
*If you want to, now would be a good time to take the Sharpen Brush and sharpen her eye and bottom lip :)*
**Opacities for layers may vary depending upon your image; don't be afraid to experiment!**
And that's it :)
FRIEND ME | RESOURCES | OTHER TUTORIALS