Tutorial #7 - Christine icon
requested by artwhisperer.
*made using PSP8*
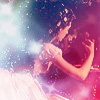
going from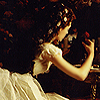
to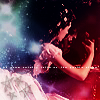
PLEASE DON'T COPY THIS ICON, USE THE STEPS TO CREATE SOMETHING THAT IS YOUR OWN; THAT'S MAKES IT MORE FUN, ANYWAY :)
1. I cropped this picture and made this base:
I sharpened the image one and then went over the skin with the soften tool (my settings)
I then duplicated the background layer once and set it to Multiply Opacity 100. Then I duplicated that Multiply layer, set it to Screen Opacity 50 and desaturated it (shift+h). THEN I duplicated the desa
turated, screen layer and set it to Soft Light Opacity 100.
DO NOT MERGE THE LAYERS
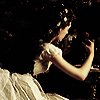
My base now looks like this:
2. Next, I created a new layer, set the blend mode to Exclusion Opacity 100 and filled it with this blue color:

(#000636)
3. Then i took a light texture by ? and set it to Screen Opacity 83. I then copied the light texture layer, desaturated it and changed the opacity to 42.

>
4. Next I took a brush by tinamishi and set it to Soft Light Opacity 100 in black (#000000)
>
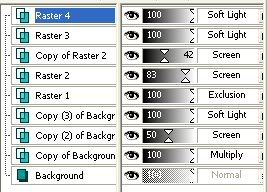
5. Next, I went back down to where the back ground layers were and duplicated the desaturated, soft light layer and moved it to the top. my layers now look like this:
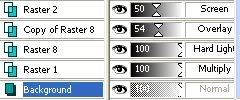
6. To get the pink coloring, I used a gradient by crumblingwalls HOWEVER, I went back down to the back ground layers again and IN BETWEEN the Multiply and the Screen layers, I created a new layer and filled it with this gradient:

I set that layer to Hard Light Opacity 100 and then duplicated it and set THAT layer to Overlay Opacity 54. My layers at the bottom should look like this:
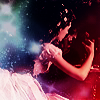
So now my icon looks like this:
Not too pretty, right? xP lol well, we're not done just yet...
7. Now I went back to the top most layer and created another new layer; this time, I filled it with regular ol' black (#000000) and set the layer to Soft Light Opacity 100

>
8. Next I added this text brush by tina_sparkle and set it to Screen Opacity 100.
>
9. Now I added a star brush by ? in black (#000000), reduced the size to about 70 and set the layer to Soft Light. I then duplicated that layer and changed to blend more back to Normal but lowered the opacity to 33 (my layers)

>
**Opacities for layers may vary depending upon your image; don't be afraid to experiment!**
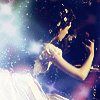
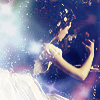
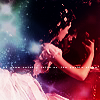
and now i'm done :) not a complete replica of the original icon, but i felt that it was close enough xD lol
please let me know what you all thought of this! i really hope this helps someone out :D
FRIEND ME | RESOURCES | OTHER TUTORIALS
*made using PSP8*
going from
to
PLEASE DON'T COPY THIS ICON, USE THE STEPS TO CREATE SOMETHING THAT IS YOUR OWN; THAT'S MAKES IT MORE FUN, ANYWAY :)
1. I cropped this picture and made this base:
I sharpened the image one and then went over the skin with the soften tool (my settings)
I then duplicated the background layer once and set it to Multiply Opacity 100. Then I duplicated that Multiply layer, set it to Screen Opacity 50 and desaturated it (shift+h). THEN I duplicated the desa
turated, screen layer and set it to Soft Light Opacity 100.
DO NOT MERGE THE LAYERS
My base now looks like this:
2. Next, I created a new layer, set the blend mode to Exclusion Opacity 100 and filled it with this blue color:
(#000636)
3. Then i took a light texture by ? and set it to Screen Opacity 83. I then copied the light texture layer, desaturated it and changed the opacity to 42.
>
4. Next I took a brush by tinamishi and set it to Soft Light Opacity 100 in black (#000000)
>
5. Next, I went back down to where the back ground layers were and duplicated the desaturated, soft light layer and moved it to the top. my layers now look like this:
6. To get the pink coloring, I used a gradient by crumblingwalls HOWEVER, I went back down to the back ground layers again and IN BETWEEN the Multiply and the Screen layers, I created a new layer and filled it with this gradient:
I set that layer to Hard Light Opacity 100 and then duplicated it and set THAT layer to Overlay Opacity 54. My layers at the bottom should look like this:
So now my icon looks like this:
Not too pretty, right? xP lol well, we're not done just yet...
7. Now I went back to the top most layer and created another new layer; this time, I filled it with regular ol' black (#000000) and set the layer to Soft Light Opacity 100
>
8. Next I added this text brush by tina_sparkle and set it to Screen Opacity 100.
>
9. Now I added a star brush by ? in black (#000000), reduced the size to about 70 and set the layer to Soft Light. I then duplicated that layer and changed to blend more back to Normal but lowered the opacity to 33 (my layers)
>
**Opacities for layers may vary depending upon your image; don't be afraid to experiment!**
and now i'm done :) not a complete replica of the original icon, but i felt that it was close enough xD lol
please let me know what you all thought of this! i really hope this helps someone out :D
FRIEND ME | RESOURCES | OTHER TUTORIALS