Archive: Tutorial #01: X/1999 Icon
Tutorial #01: X/1999 Icon
We'll be going from:

to
As per requested by sun_soraya ((Almost done with them requests.))
Level Of Difficulty: You Tell Me.
In this tutorial: Texture-Whoring.
Program:PS 6 ;_____;
Translatable: Yes
Oh sue me it's not like the original, but hey I tried my best to remember how I made the original, so here we go; ah! but before we get started, please try not to copy the tutorial word for word. Why? well b/c I don't think that anyone wants to see the same icon a billion times *cough* be creative ;D*, so yeah. Plus I also fail @ crediting @____@ So help me!
Anywho here we go:
Step 1: Take your base and prepare it, y'know the drill (crop, sharpen, & blah.) then take it and paste it on a 100x100 canvas. (as you probably already know XD) Next create a layer under your base & paste the texture by ewanism down there, or you can use any texture you'd like, provided that it's one of those nifty gray textures.
I'm using this lovely image of Kamui from X as my base :D

+
OR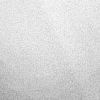
I played with my texture & base a bit, so yeah, maybe you should try it :3
Step 2: Next take the Elliptical Marquee Tool & create a circle around your character base (make sure your on your character base & not your texture base ;D) & right click to Select Inverse to delete all the stuff outside of the circle. Yay! Next paste the texture by tragic_icons // bleedblack_rsc between your texture base & image base (as seen below), repeat what you did to your image again, but this time to your texture (You can use any texture that you want, just make it match your base :)).

>
AH! BUT WAIT! Since I didn't like the way that the texture base looked, I played with it ;D I took the texture & made the Opacity to 40% & left the layer set to Normal, then I duplicated the texture & set that to Soft Light & left the opacity @ 40%. Then I pasted the texture all over again (over the gray texture base and my circle cut texture) desaturated it & set it to Soft Light. Like so:

>
You can play with it until you get the result that you like & looks best on your icon.
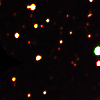
Step 3: Next I locked the layer with image base & duplicated it. On the duplicated layer I used Radial Blur set to about 24 (amount), spin (blur method), & best (quality); I set that layer to Soft Light. Then paste the light texture below by ???????, set it to Screen, rotate the texture to your pleasure & erase any evil distracting lights that interfere w/ your character (ARE YOU SERIOUS THE WHOLE ICONS MADE UP OF DISTRACTING LIGHTS DX), now the light texture whoring begins!!!!!!!! :D

>
+
=

Step 4: Next we'll take the following texture by ???????, set it Screen, rotate it & play around with it, I set it on the side of the circle like the example below shows. Then add another light texture by lostinsidethecrowd, I rotated it & played around with it, I also erased most of the crap that was interfering with my icon character.

+
=

+
=
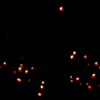
Step 5: Created a new layer, then I took a regular brush, opacity set to about 20% & made a red stroke (#E40409) across the left side of the icon, set that to Screen, then added another light texture by xswaniconsx. set it to screen again, this time change the color of the texture to your liking to make it blend into your icon, I made mine a blue-ish tone (#085DBC), I also rotated it to make it fit more into my icon, then I added a light texture by expose42 & set the layer to Screen.

>
+
=

+
=
Step 6: Next I added two light textures by ??????? & ???????, set them to Screen, I rotated both textures yet again to fit my icon more. Then I added a texture by Shizoo
, set it to Screen, I rotated the texture & put it in the top right corner, I also erased part of the texture b/c it was overwhelming my icon.

+
+
=

+
=
Step 7: Next I added another texture, by lostinsidethecrowd, & I rotated it, erased parts of it, set it to Screen

+
=
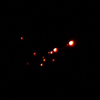
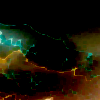
Step 8: Next I added another texture, by ??????? & ???????, set them to Screen, I also rotated both of the textures. The I added another texture, by sanami276, set it to Screen, rotated it, & also erased some of the texture overlapping Kamui.

+
+
=

+
=
Step 9: I then I selected all of the canvas (Ctrl+A) & Copy Merged all the layers, pasted it on top of all the layers, then I used Radial Blur ((set to about 24 (amount), spin (blur method), & best (quality) )), brought down the Saturation of the layer & set it to Soft Light

>
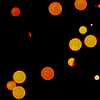
Step 10: Created a new layer, took a small brush, & colored over Kamui's eyes, but you don't have to worry about that. I then added another light texture, by Shizoo
, set it to Screen

+
=
Step 11: Repeat step 9, only this time Desaturate your layer instead. Then create a new layer, then take a regular brush, opacity set to about 20% & made a red stroke (#E40409), yellow stroke (#F7E116), & blue stroke (#3074DB) across the left side of the icon, Radial Blur that bitch, set that to Screen

>
Add text if you want, but I'm not, 'kay? :3
& FINISHED!
AH THANK YOU GAWD I WAS DYING FROM TYPING!!!!!!!111!!!!111!!1!1!!1!11!!!!!!!!1!1!!!11!!!1

Questions, concerns post them here, & there we have it, hope you had fun with it and please show me what you got XD I wanna see.
Jeez I suck @ writing tutorials XD
We'll be going from:

to

As per requested by sun_soraya ((Almost done with them requests.))
Level Of Difficulty: You Tell Me.
In this tutorial: Texture-Whoring.
Program:PS 6 ;_____;
Translatable: Yes
Oh sue me it's not like the original, but hey I tried my best to remember how I made the original, so here we go; ah! but before we get started, please try not to copy the tutorial word for word. Why? well b/c I don't think that anyone wants to see the same icon a billion times *cough* be creative ;D*, so yeah. Plus I also fail @ crediting @____@ So help me!
Anywho here we go:
Step 1: Take your base and prepare it, y'know the drill (crop, sharpen, & blah.) then take it and paste it on a 100x100 canvas. (as you probably already know XD) Next create a layer under your base & paste the texture by ewanism down there, or you can use any texture you'd like, provided that it's one of those nifty gray textures.
I'm using this lovely image of Kamui from X as my base :D

+

OR

I played with my texture & base a bit, so yeah, maybe you should try it :3
Step 2: Next take the Elliptical Marquee Tool & create a circle around your character base (make sure your on your character base & not your texture base ;D) & right click to Select Inverse to delete all the stuff outside of the circle. Yay! Next paste the texture by tragic_icons // bleedblack_rsc between your texture base & image base (as seen below), repeat what you did to your image again, but this time to your texture (You can use any texture that you want, just make it match your base :)).

>

AH! BUT WAIT! Since I didn't like the way that the texture base looked, I played with it ;D I took the texture & made the Opacity to 40% & left the layer set to Normal, then I duplicated the texture & set that to Soft Light & left the opacity @ 40%. Then I pasted the texture all over again (over the gray texture base and my circle cut texture) desaturated it & set it to Soft Light. Like so:

>

You can play with it until you get the result that you like & looks best on your icon.
Step 3: Next I locked the layer with image base & duplicated it. On the duplicated layer I used Radial Blur set to about 24 (amount), spin (blur method), & best (quality); I set that layer to Soft Light. Then paste the light texture below by ???????, set it to Screen, rotate the texture to your pleasure & erase any evil distracting lights that interfere w/ your character (ARE YOU SERIOUS THE WHOLE ICONS MADE UP OF DISTRACTING LIGHTS DX), now the light texture whoring begins!!!!!!!! :D

>

+

=

Step 4: Next we'll take the following texture by ???????, set it Screen, rotate it & play around with it, I set it on the side of the circle like the example below shows. Then add another light texture by lostinsidethecrowd, I rotated it & played around with it, I also erased most of the crap that was interfering with my icon character.

+

=


+

=

Step 5: Created a new layer, then I took a regular brush, opacity set to about 20% & made a red stroke (#E40409) across the left side of the icon, set that to Screen, then added another light texture by xswaniconsx. set it to screen again, this time change the color of the texture to your liking to make it blend into your icon, I made mine a blue-ish tone (#085DBC), I also rotated it to make it fit more into my icon, then I added a light texture by expose42 & set the layer to Screen.

>

+

=

+

=

Step 6: Next I added two light textures by ??????? & ???????, set them to Screen, I rotated both textures yet again to fit my icon more. Then I added a texture by Shizoo
, set it to Screen, I rotated the texture & put it in the top right corner, I also erased part of the texture b/c it was overwhelming my icon.

+

+

=

+

=

Step 7: Next I added another texture, by lostinsidethecrowd, & I rotated it, erased parts of it, set it to Screen

+

=

Step 8: Next I added another texture, by ??????? & ???????, set them to Screen, I also rotated both of the textures. The I added another texture, by sanami276, set it to Screen, rotated it, & also erased some of the texture overlapping Kamui.

+

+

=

+

=

Step 9: I then I selected all of the canvas (Ctrl+A) & Copy Merged all the layers, pasted it on top of all the layers, then I used Radial Blur ((set to about 24 (amount), spin (blur method), & best (quality) )), brought down the Saturation of the layer & set it to Soft Light

>

Step 10: Created a new layer, took a small brush, & colored over Kamui's eyes, but you don't have to worry about that. I then added another light texture, by Shizoo
, set it to Screen

+

=

Step 11: Repeat step 9, only this time Desaturate your layer instead. Then create a new layer, then take a regular brush, opacity set to about 20% & made a red stroke (#E40409), yellow stroke (#F7E116), & blue stroke (#3074DB) across the left side of the icon, Radial Blur that bitch, set that to Screen

>

Add text if you want, but I'm not, 'kay? :3
& FINISHED!
AH THANK YOU GAWD I WAS DYING FROM TYPING!!!!!!!111!!!!111!!1!1!!1!11!!!!!!!!1!1!!!11!!!1

Questions, concerns post them here, & there we have it, hope you had fun with it and please show me what you got XD I wanna see.
Jeez I suck @ writing tutorials XD