(no subject)
Well hello. :) It's been ages since I updated this journal. Life just fucks us all (me, especially) SO to get back on that promised large/wallpaper tutorial, this is it folks. I kinda hope it's up to your standards. ;p
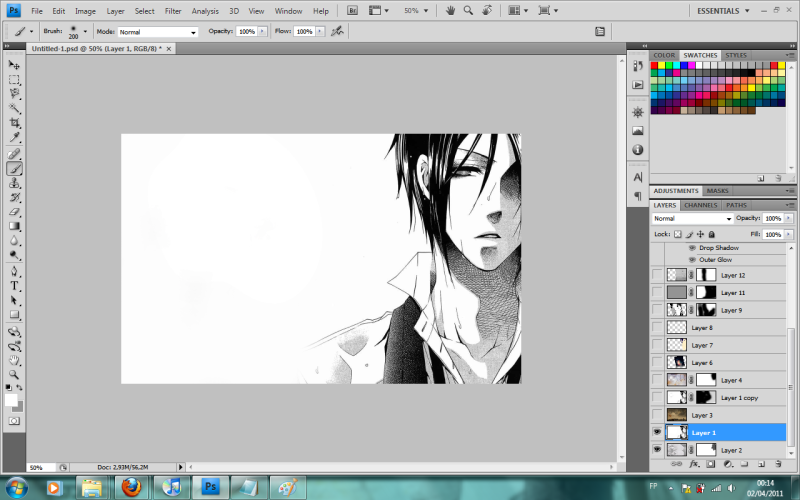
1. First off, taking my preferred image, I put it at the rightmost part.
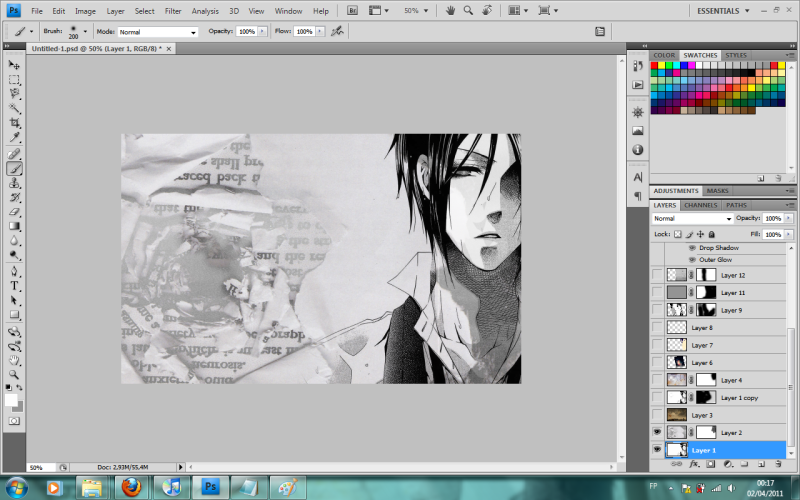
2. I used this texture by 9-liters-of-art@DA as the main background and erased some uneccessary bits at Sebastian's face.
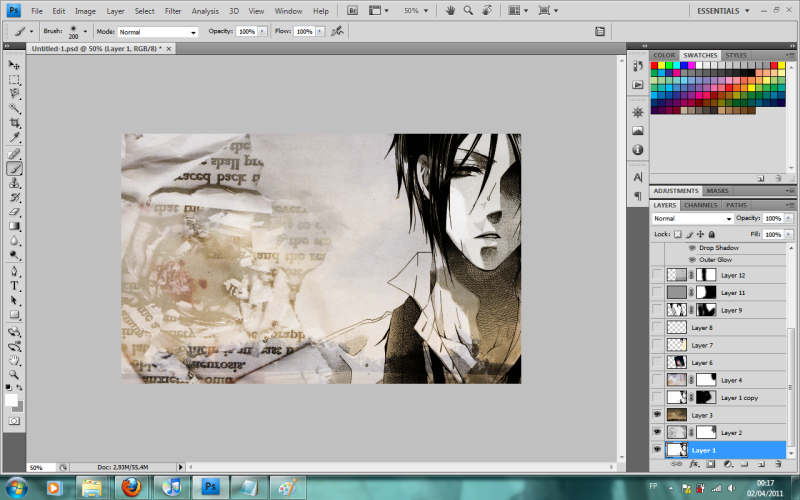
3. Add this texture by vikyvampirs90@DA to put a little vintage-y color.
4. As you can see, Sebastian now looks ugly. So duplicate his layer and put it at the top. I didn't change anything (Opacity:100% Blend:Normal) because it isn't needed. Just add a layer mask and using the default brush (0% Hardness), erase everything except, of course, the character.
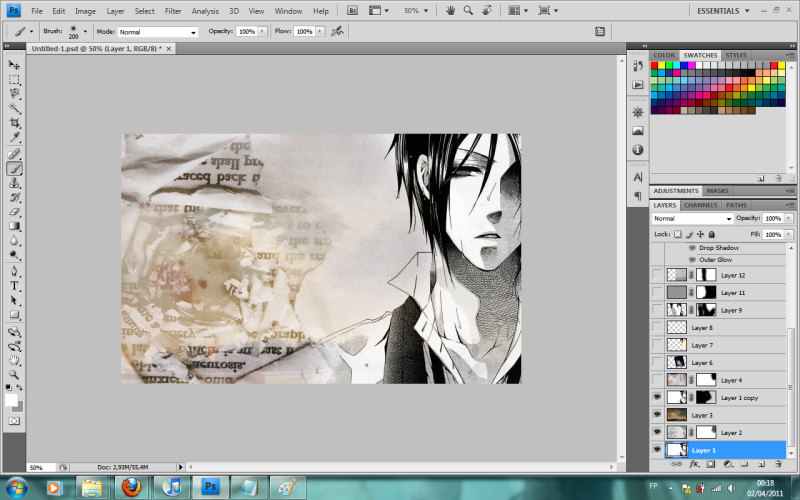
5. To add more color, I used this texture by so-ghislaine@DA and set it to Color Burn while adjusting for the best opacity.
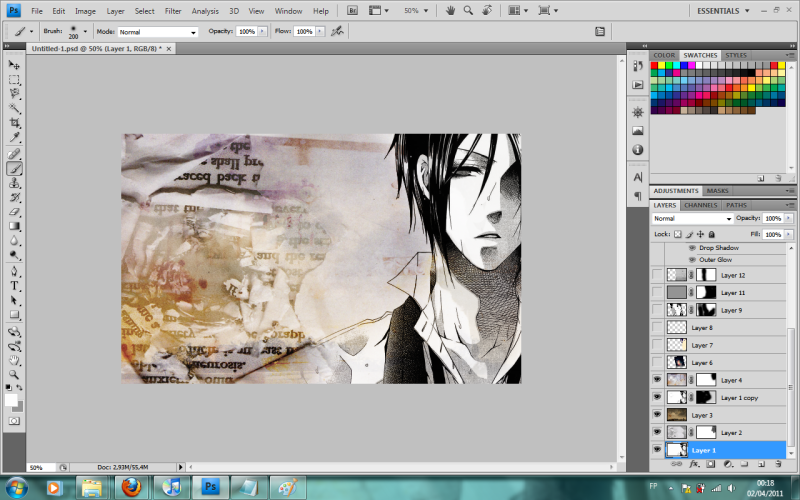
6. Then I put this light texture by bambinainnero and set it to screen with full opacity.
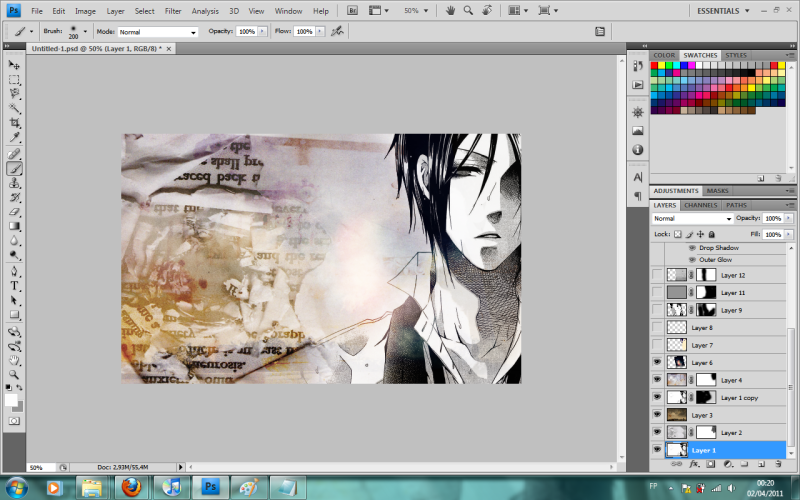
*Then I noticed it lacking. This is probably unrecommended but when inspiration comes, it just hits. What I did was color Main!Sebastian using the usual way and add another b&w image beside him. I also colored the eyes for added effect but otherwise left the second image colorless.
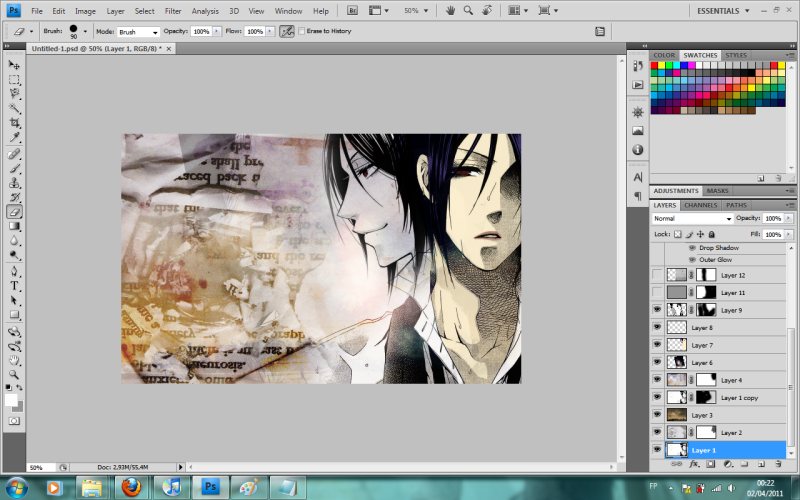
7. I added a layer and filled it with #959595 before setting it to Screen at 40% opacity. This is to dull the background so it isn't that eye-catching and therefore erase it on the part of the images so it would stand out.
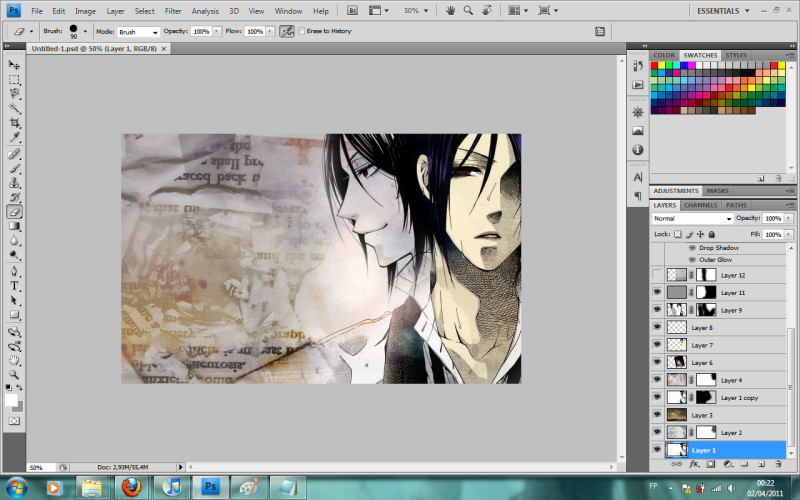
8. To even the color tone, I added this grunge texture from urbanstrokes and placed it at the lightened part. Set to Multiply, adjust the opacity and erase the visible edges.
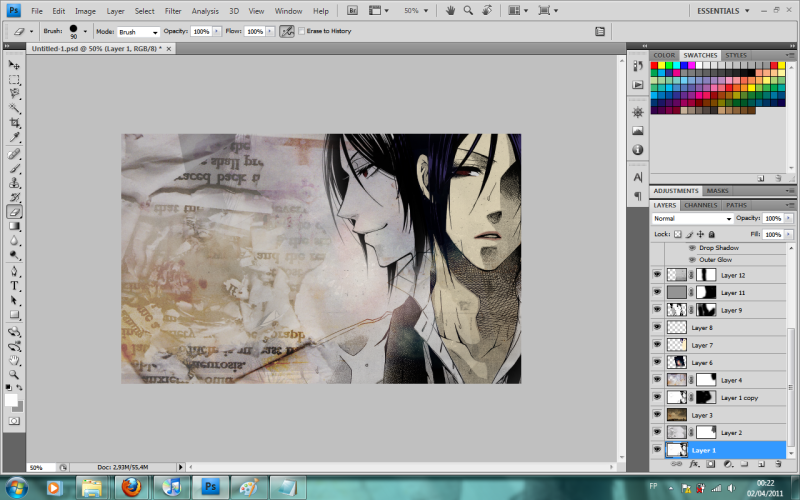
9. I put some text.
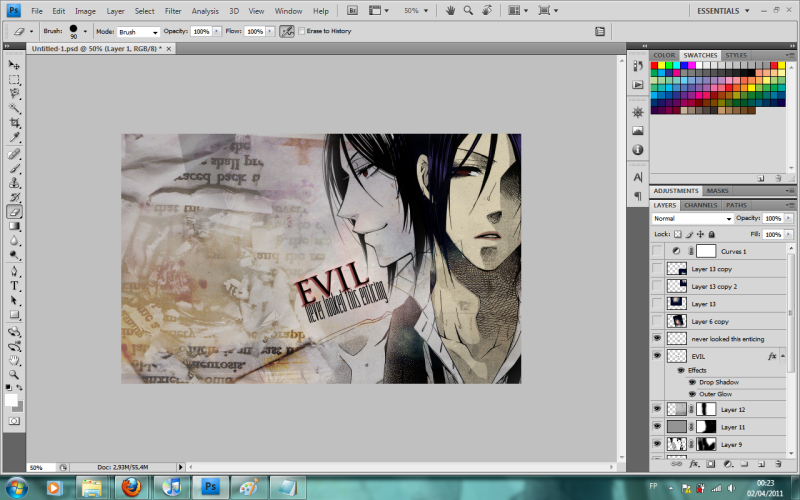
10. I also put some more light textures by bambinainnero to add some more life to it.
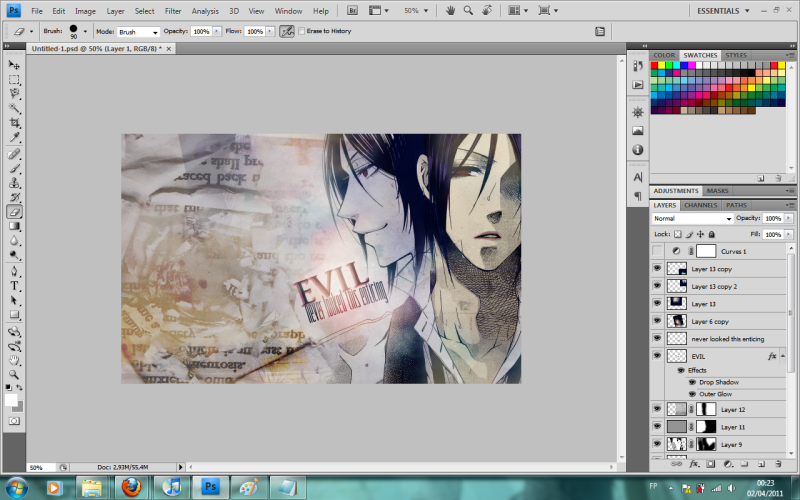
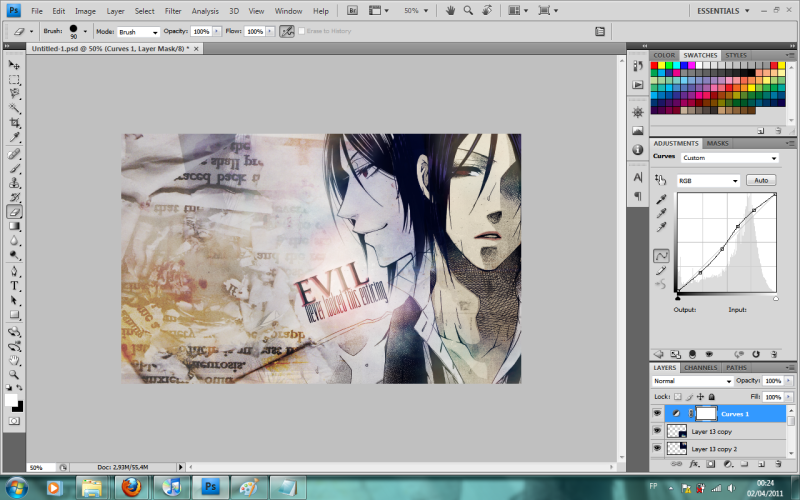
11. To adjust the lighting, I added a lone adjustment layer. Adjust to your heart's content but this is what I did:
Curves: RGB
Output:48 Input:58
Output:110 Input: 115
Output:169 Input:156
Output:212 Input:199
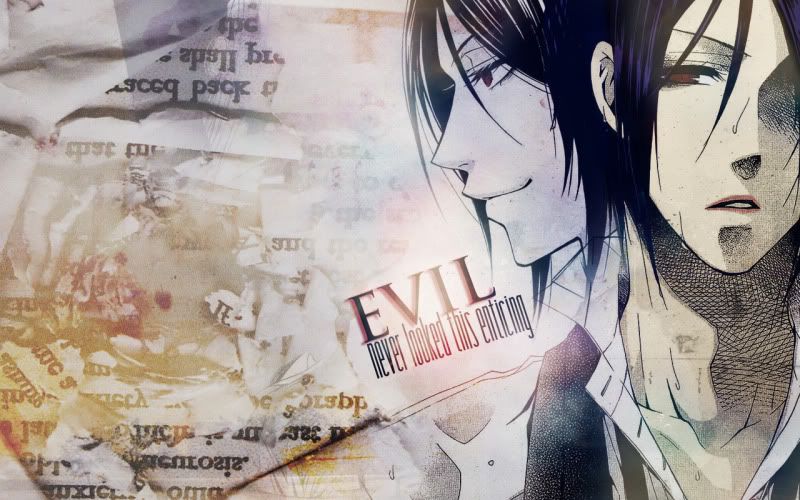
And voila, finished product! :D

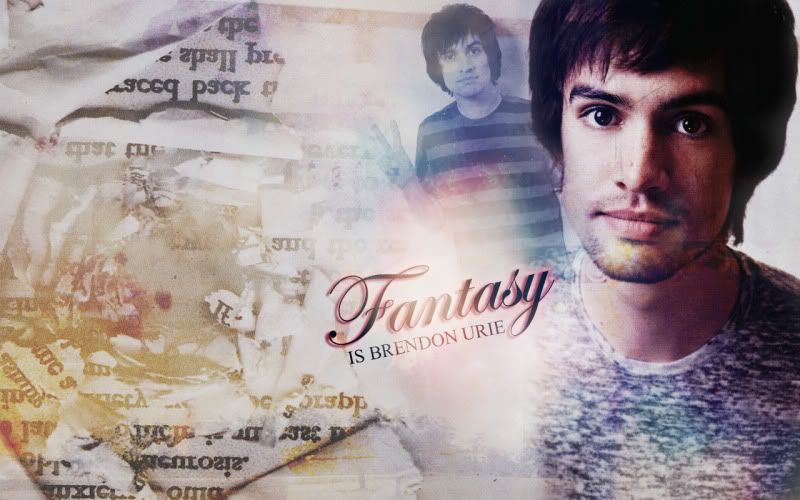
That's it. :> Good night! :)

1. First off, taking my preferred image, I put it at the rightmost part.

2. I used this texture by 9-liters-of-art@DA as the main background and erased some uneccessary bits at Sebastian's face.

3. Add this texture by vikyvampirs90@DA to put a little vintage-y color.

4. As you can see, Sebastian now looks ugly. So duplicate his layer and put it at the top. I didn't change anything (Opacity:100% Blend:Normal) because it isn't needed. Just add a layer mask and using the default brush (0% Hardness), erase everything except, of course, the character.

5. To add more color, I used this texture by so-ghislaine@DA and set it to Color Burn while adjusting for the best opacity.

6. Then I put this light texture by bambinainnero and set it to screen with full opacity.

*Then I noticed it lacking. This is probably unrecommended but when inspiration comes, it just hits. What I did was color Main!Sebastian using the usual way and add another b&w image beside him. I also colored the eyes for added effect but otherwise left the second image colorless.

7. I added a layer and filled it with #959595 before setting it to Screen at 40% opacity. This is to dull the background so it isn't that eye-catching and therefore erase it on the part of the images so it would stand out.

8. To even the color tone, I added this grunge texture from urbanstrokes and placed it at the lightened part. Set to Multiply, adjust the opacity and erase the visible edges.

9. I put some text.

10. I also put some more light textures by bambinainnero to add some more life to it.

11. To adjust the lighting, I added a lone adjustment layer. Adjust to your heart's content but this is what I did:
Curves: RGB
Output:48 Input:58
Output:110 Input: 115
Output:169 Input:156
Output:212 Input:199

And voila, finished product! :D


That's it. :> Good night! :)