Back yard Rehab ... in pictures...
I finally found an iPad App that I could do a rough rendering of my back yard, So I did a before and after picture. The before is more or less where I started this spring. I thought it best for me to have some sort of plan. And that's basically what I'm going to use this for.
Here is the before: AFTER:
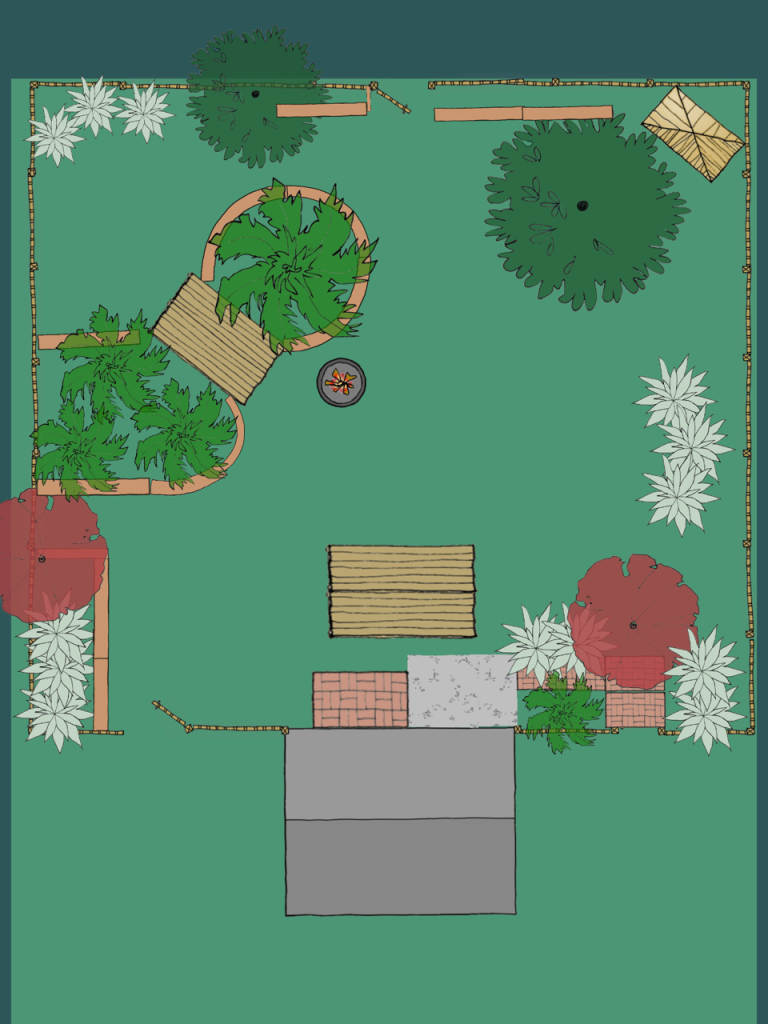
Cool thing is, I have been working on the upper left side of the yard. I have put the the wall infront of the 3 legostrums. I connected the big island's borders to the fence (one of the first things I did). But I accidentally put it in the before picture.
Here is the before: AFTER:
Cool thing is, I have been working on the upper left side of the yard. I have put the the wall infront of the 3 legostrums. I connected the big island's borders to the fence (one of the first things I did). But I accidentally put it in the before picture.
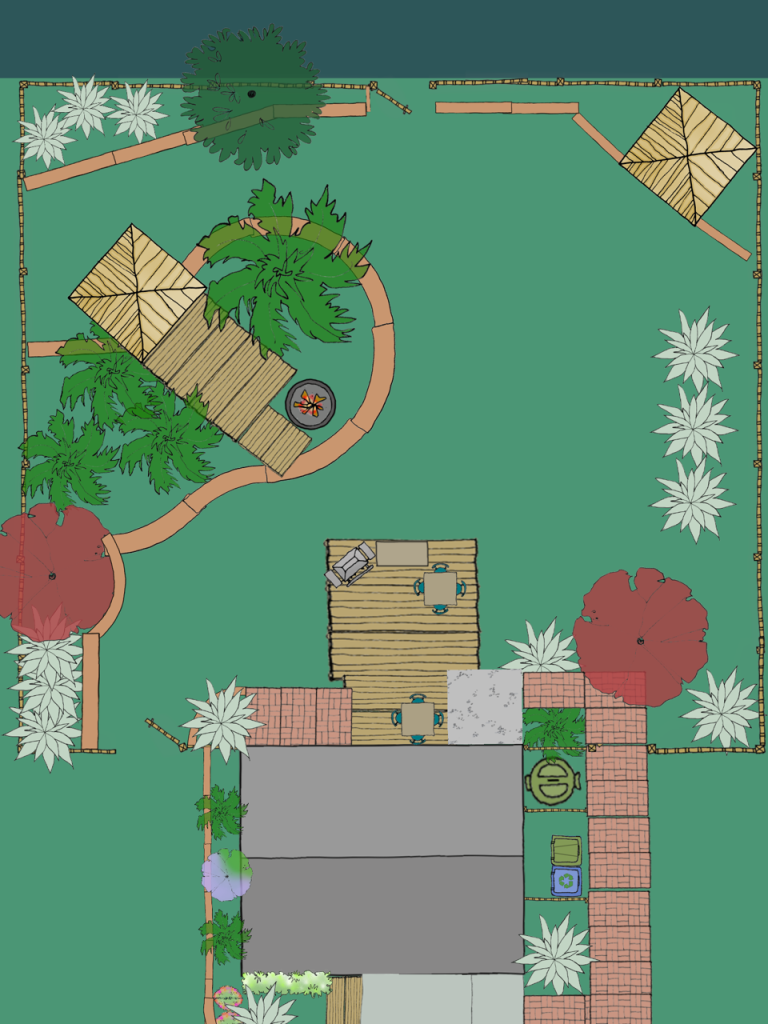
- Starting from the left side - I have 3 crape myrtles and a plum tree. It has a brick border up to the plum tree and then it stops. the 2 fence sections between this area and the big island is used as an oversized gate for the camper to get in and out. since I am moving that gate to above the big island, I plan to connect the 2 areas. Then put a trench with a drain system all down the fence line, then fill with soil and mulch. I hope to connect the drain to the pipe that is already there that goes to the street. This should help with the run off from Lyon's yard.
- Enlarging the big Island to encompass a lot of the dead spots in the yard caused by the tree canopy and dead soil (fire ant mound remnants). I also wanted to make the deck a little closer to the fire pit - which I'm raising up Also it will help with the sweet gum spikey balls that litter my back yard and are a pain when stepped on. The roof above the back of the platform will be a nice addition. I would like to make it big enough to get the camper under it... but that's more of a hope than a going to.
- I am replacing all the yard timbers with bricks. they last longer, look better and attract a lot less destructive bugs - Carpenter Ants, Termites, Carpenter Bees, etc.
- Enlarge the Shed and the driveway area
- Take down the nearly Dead Black walnut tree
- Realign the trees on the right. Install the Spirea from the front. Move the azalea to a better spot.
- remove the walkway of pea gravel and yard timbers on the right side of the yard. it isn't shown, but it's there.
- Down in the right side of the yard is another plum tree. it is sick. it is crowded by 4 crape myrtles and bad drainage. I plan to move 2 of the Crapes - one to the front yard and one to the back left corner of the house. this should allow me to drop a drain pipe in under the little walkway (which needs raising). Then connect that walkway to a new walkway that leads to the front driveway.