Tutorial -6- Ron
How to go from 
to
As always, pick an image, crop it to a square, and then resize it to 100 x 100 pixels. Sharpen the image twice, then using the SMUDGE tool (opacity 40, hardness 42) smooth out the skin. Duplicate the base. Set the topmost layer to SCREEN 100% and desaturate it. Create a new layer with #0A2134 and set it to EXCLUSION 100%.

- >
- >
- >
Take this gradient and set it to OVERLAY 100%.

- >
Take this gradient and set it to SOFT LIGHT 100%.

- >
Take this texture, made by inxsomniax_ and set it to SOFT LIGHT 100%. Using the ERASER tool (opacity 9, hardness 6) erase some of the areas the cover the face.

- >
- >
Take this texture, made by gender and set it to MULTIPLY 100%.
- >
Take this texture, made by pocket_icons and set it to LIGHTEN 100%.

- >
Take this texture, also made by pocket_icons and set it to SOFT LIGHT 100%. Using the ERASER tool, erase the parts that cover the face as well as the clothing and the hair.

- >
Take this texture, (I don’t know who it was made by, so if someone knows, please tell me) and set it to SOFT LIGHT 100%. Using the ERASER tool, erase some of the parts that cover his face as well as the clothing and the hair.
- >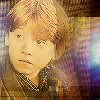
Merge all the layers. Duplicate the base and set the topmost layer to OVERLAY 100%.

Add some text. I took this from iconisms. Create a new layer with #F6E2BC and set it to DARKEN 100%. And voila!

- >
- >
to
As always, pick an image, crop it to a square, and then resize it to 100 x 100 pixels. Sharpen the image twice, then using the SMUDGE tool (opacity 40, hardness 42) smooth out the skin. Duplicate the base. Set the topmost layer to SCREEN 100% and desaturate it. Create a new layer with #0A2134 and set it to EXCLUSION 100%.
- >
- >
- >
Take this gradient and set it to OVERLAY 100%.
- >
Take this gradient and set it to SOFT LIGHT 100%.
- >
Take this texture, made by inxsomniax_ and set it to SOFT LIGHT 100%. Using the ERASER tool (opacity 9, hardness 6) erase some of the areas the cover the face.
- >
- >
Take this texture, made by gender and set it to MULTIPLY 100%.
- >
Take this texture, made by pocket_icons and set it to LIGHTEN 100%.
- >
Take this texture, also made by pocket_icons and set it to SOFT LIGHT 100%. Using the ERASER tool, erase the parts that cover the face as well as the clothing and the hair.
- >
Take this texture, (I don’t know who it was made by, so if someone knows, please tell me) and set it to SOFT LIGHT 100%. Using the ERASER tool, erase some of the parts that cover his face as well as the clothing and the hair.
- >
Merge all the layers. Duplicate the base and set the topmost layer to OVERLAY 100%.
Add some text. I took this from iconisms. Create a new layer with #F6E2BC and set it to DARKEN 100%. And voila!
- >
- >